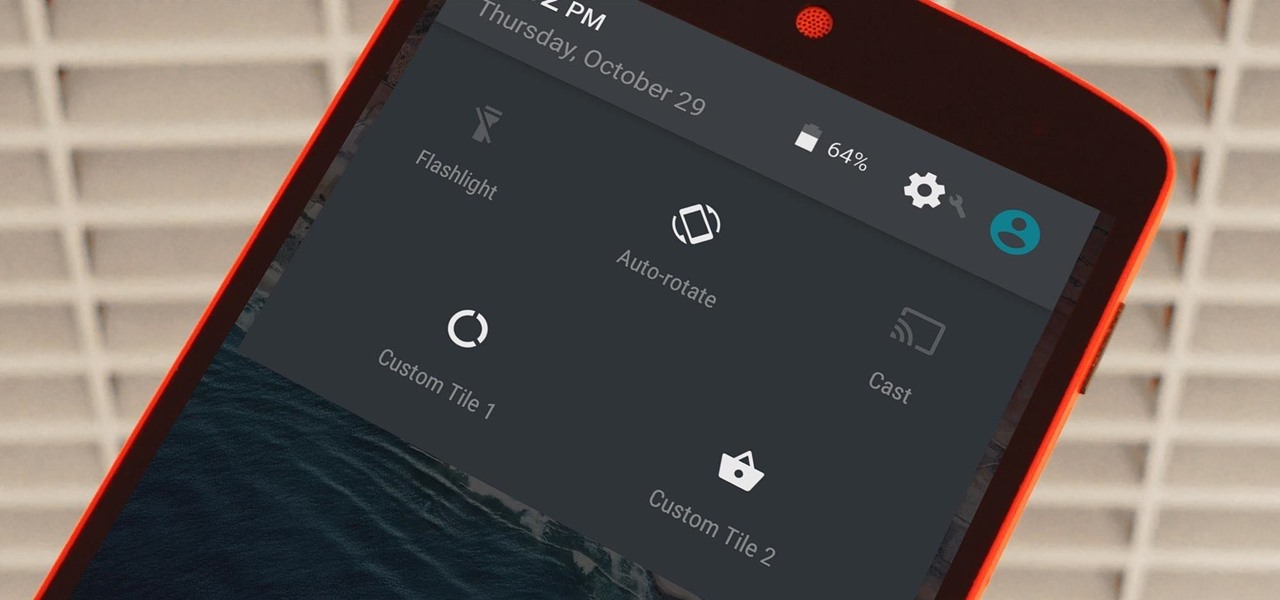

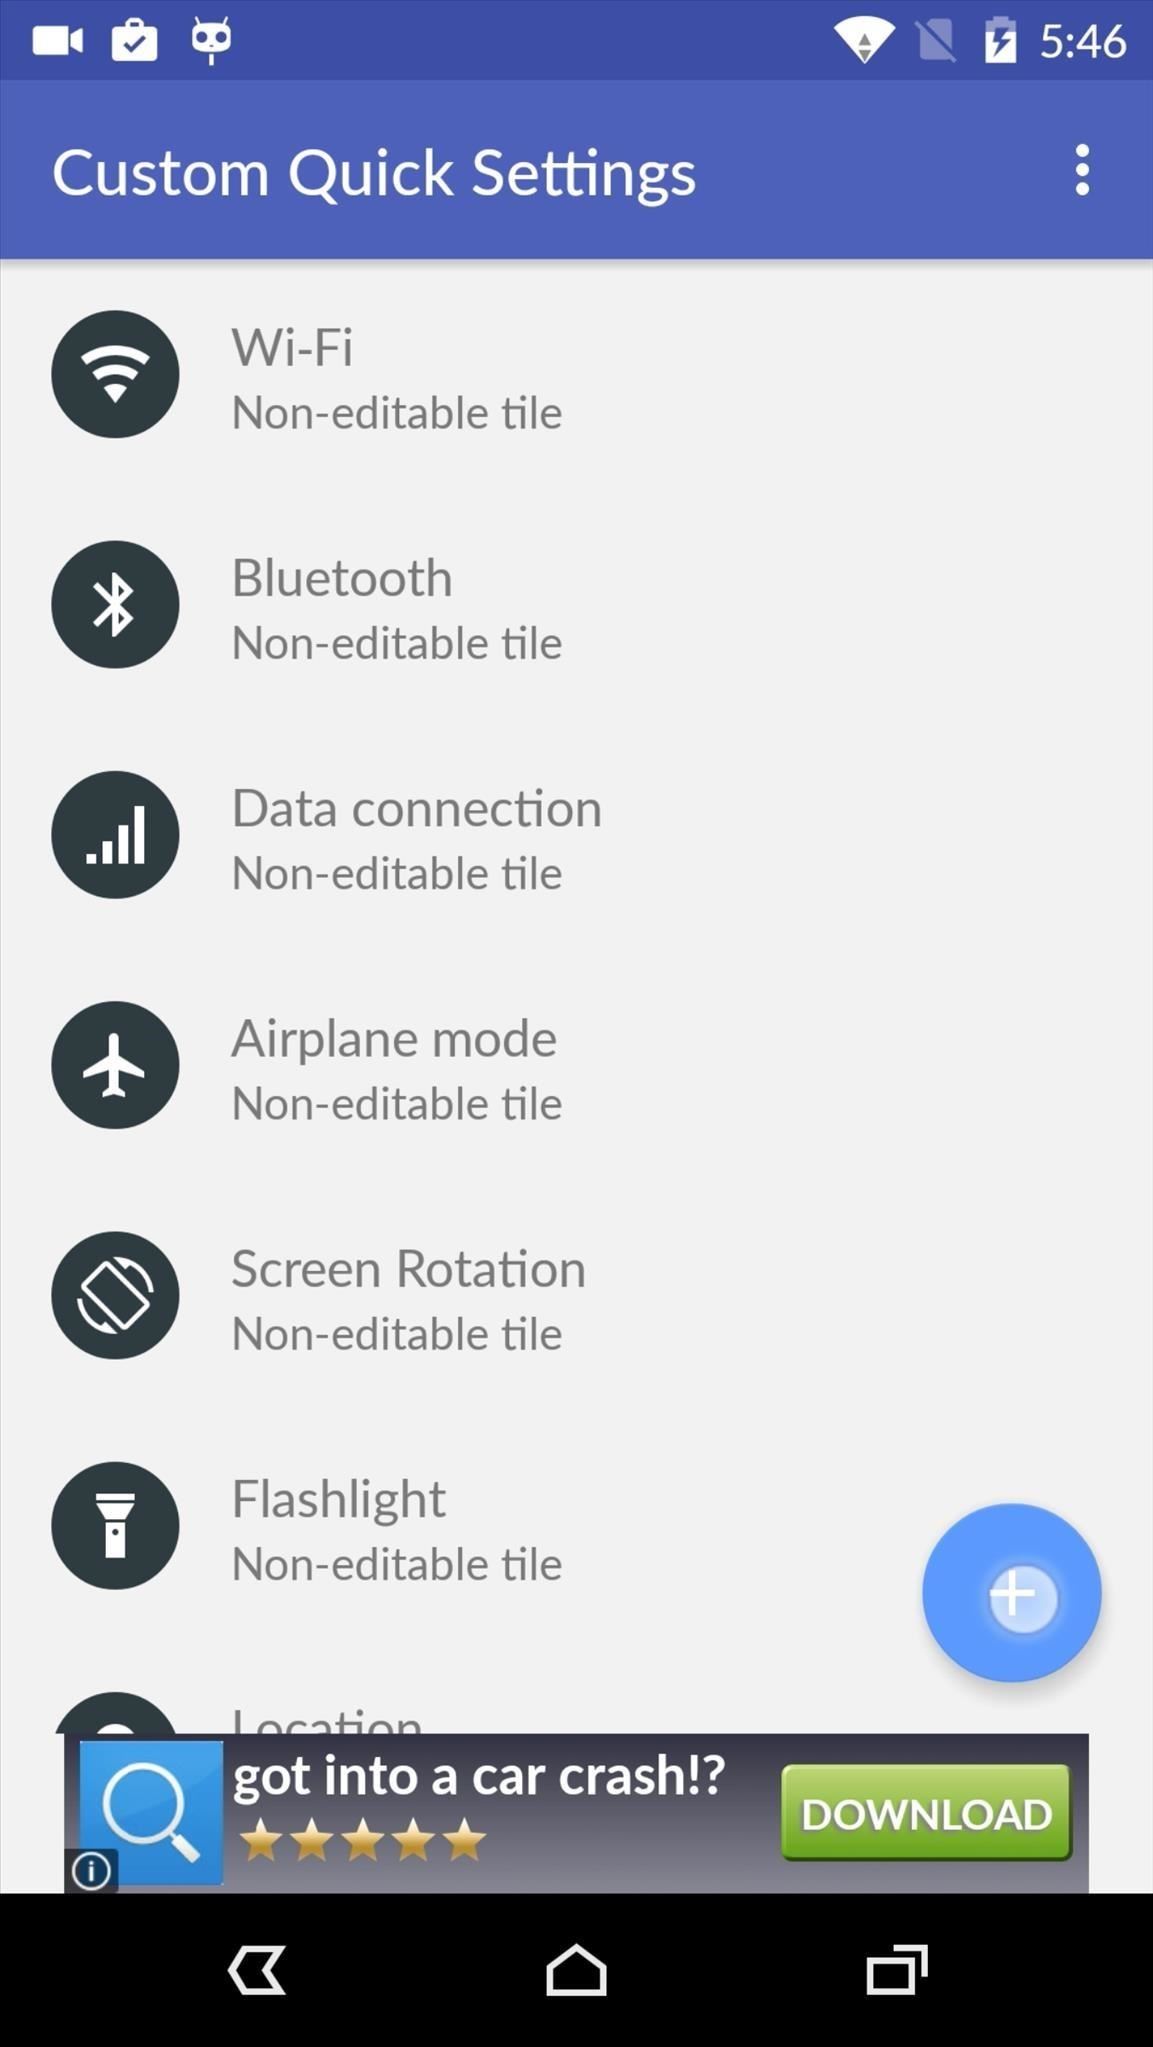
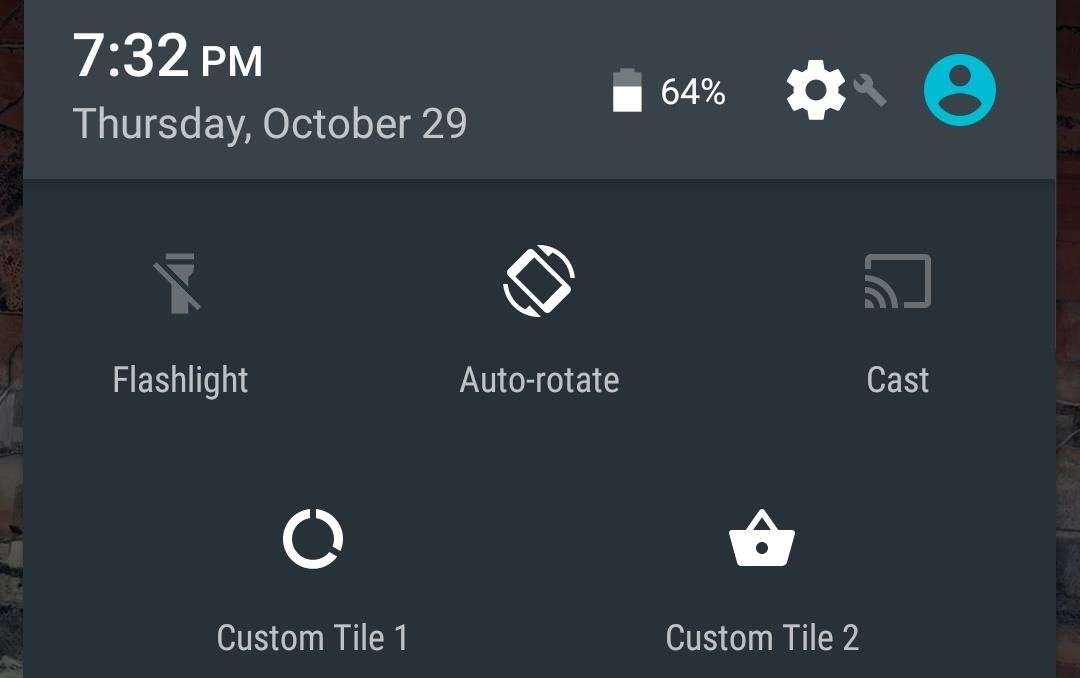
Android's Quick Settings menu is quite handy—just swipe down with two fingers from the top of your screen and you're ready to toggle several different system settings on or off. It got even better with Android 6.0 Marshmallow, since you can even use the hidden System UI Tuner to rearrange and remove your Quick Settings tiles now.
But thanks to a truly innovative app from developer Kieron Quinn, we can now customize Android's Quick Settings menu like never before. With a little bit of initial setup, you can add your own custom Quick Settings tiles that are capable of launching links, opening apps, or toggling settings—and I'll show you how to do it below.
Best of all, this will work without root on Android 6.0 and higher. It will also work on Android Lollipop, however, you will need to be rooted.
Requirements for Unrooted Devices
- Device running Android 6.0 Marshmallow or higher
- System UI Tuner enabled
Requirements for Rooted Devices
- Rooted device running Android 5.0 to 5.1.1 Lollipop
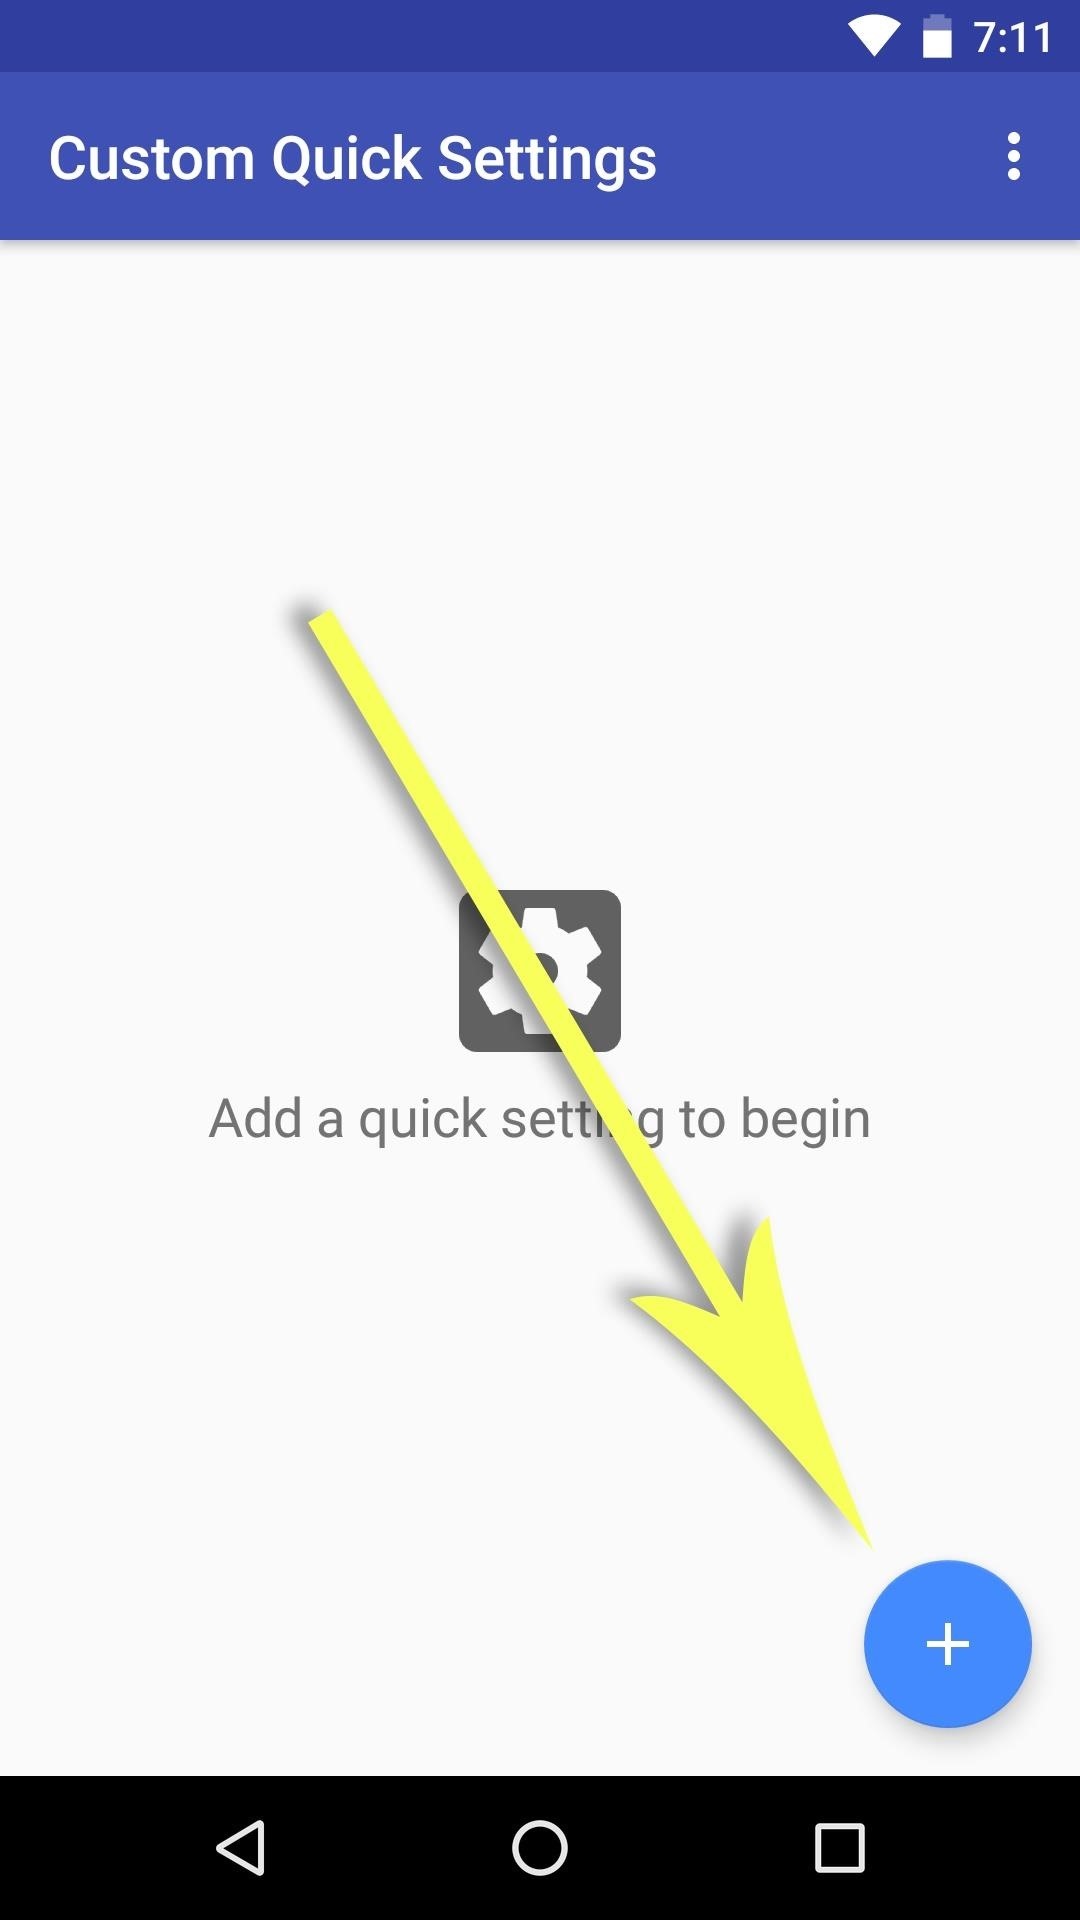
Step 1: Install Custom Quick Settings
Quinn's app is called Custom Quick Settings, and it's available for free on the Google Play Store. To begin, search the app by name and get it installed, or head directly to the install page at the following link.

Step 2: Add a New Quick Settings Tile (Marshmallow Users Only)
Rooted Lollipop users, skip to the next step.
Launch the Custom Quick Settings app and tap the floating action button in the bottom-right corner. From here, select the "System UI Tuner" option, then choose "Quick Settings" from the menu that comes up next.
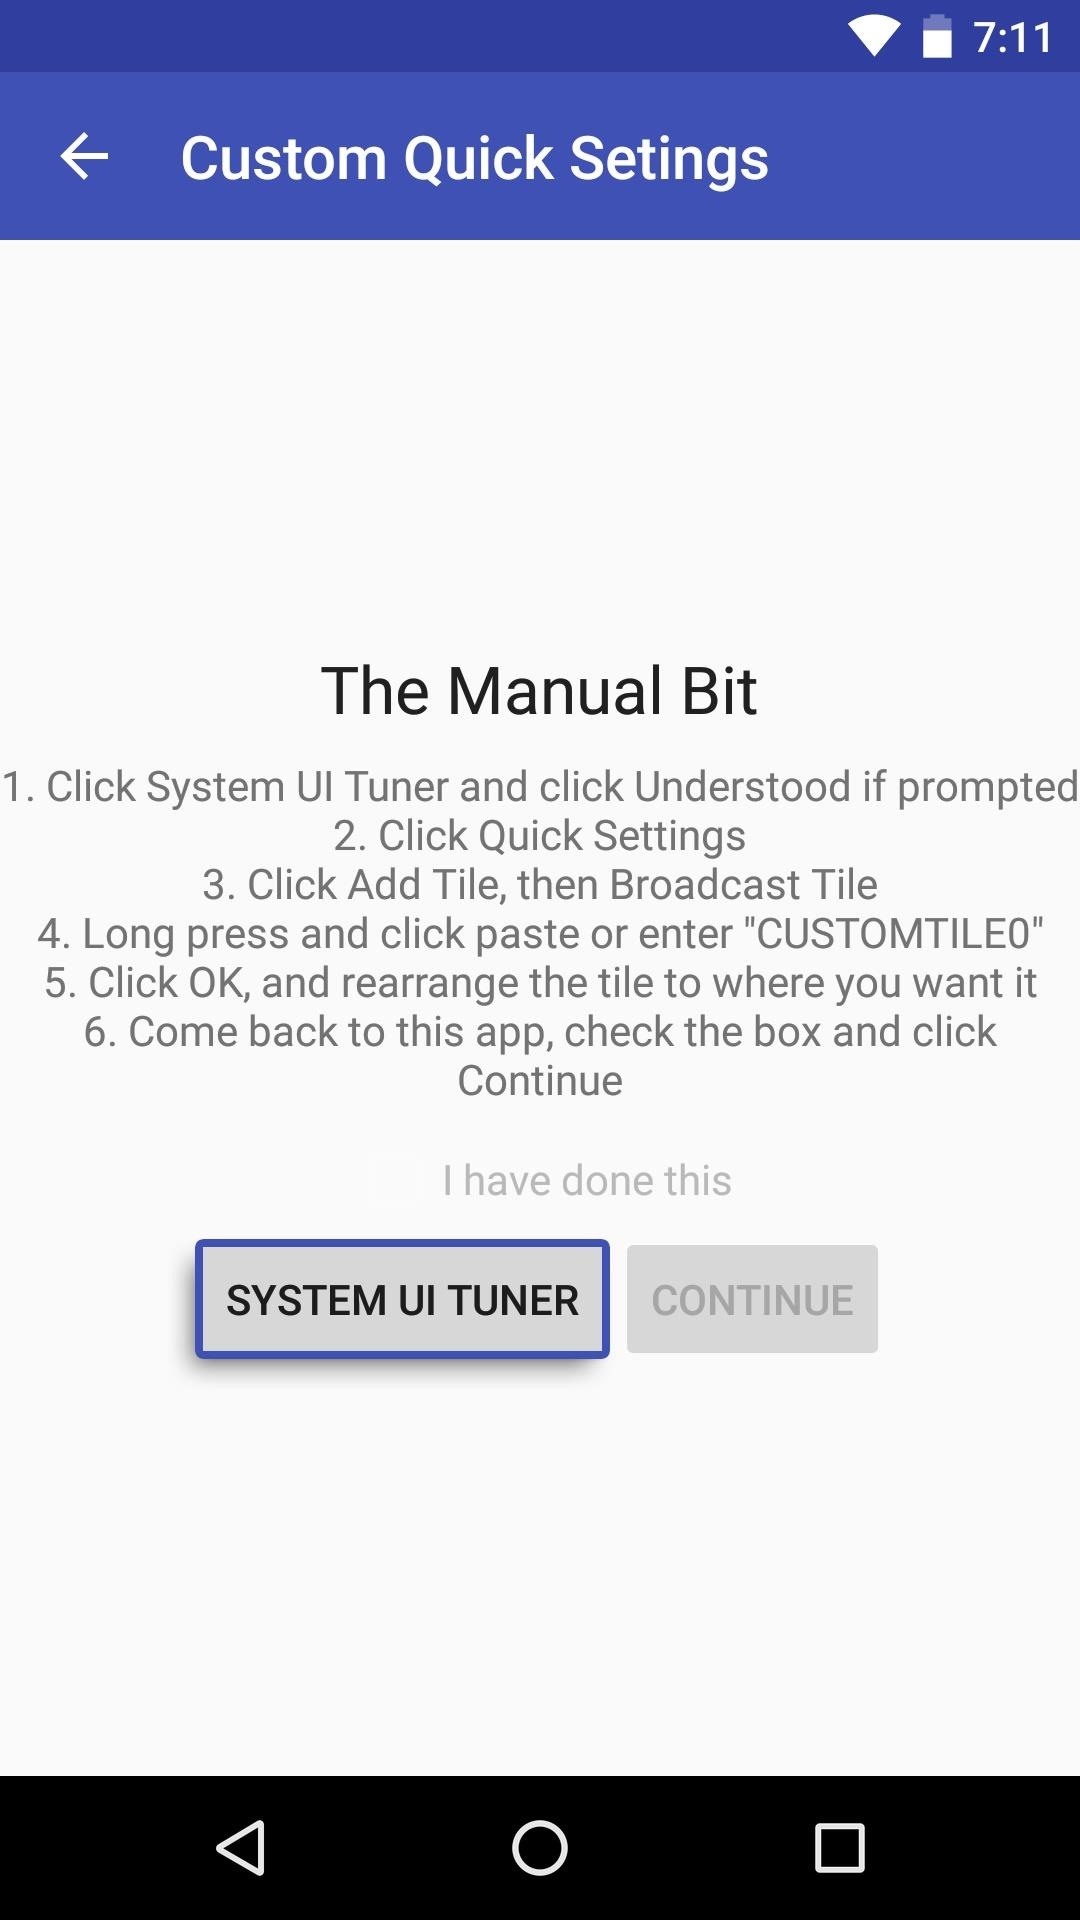
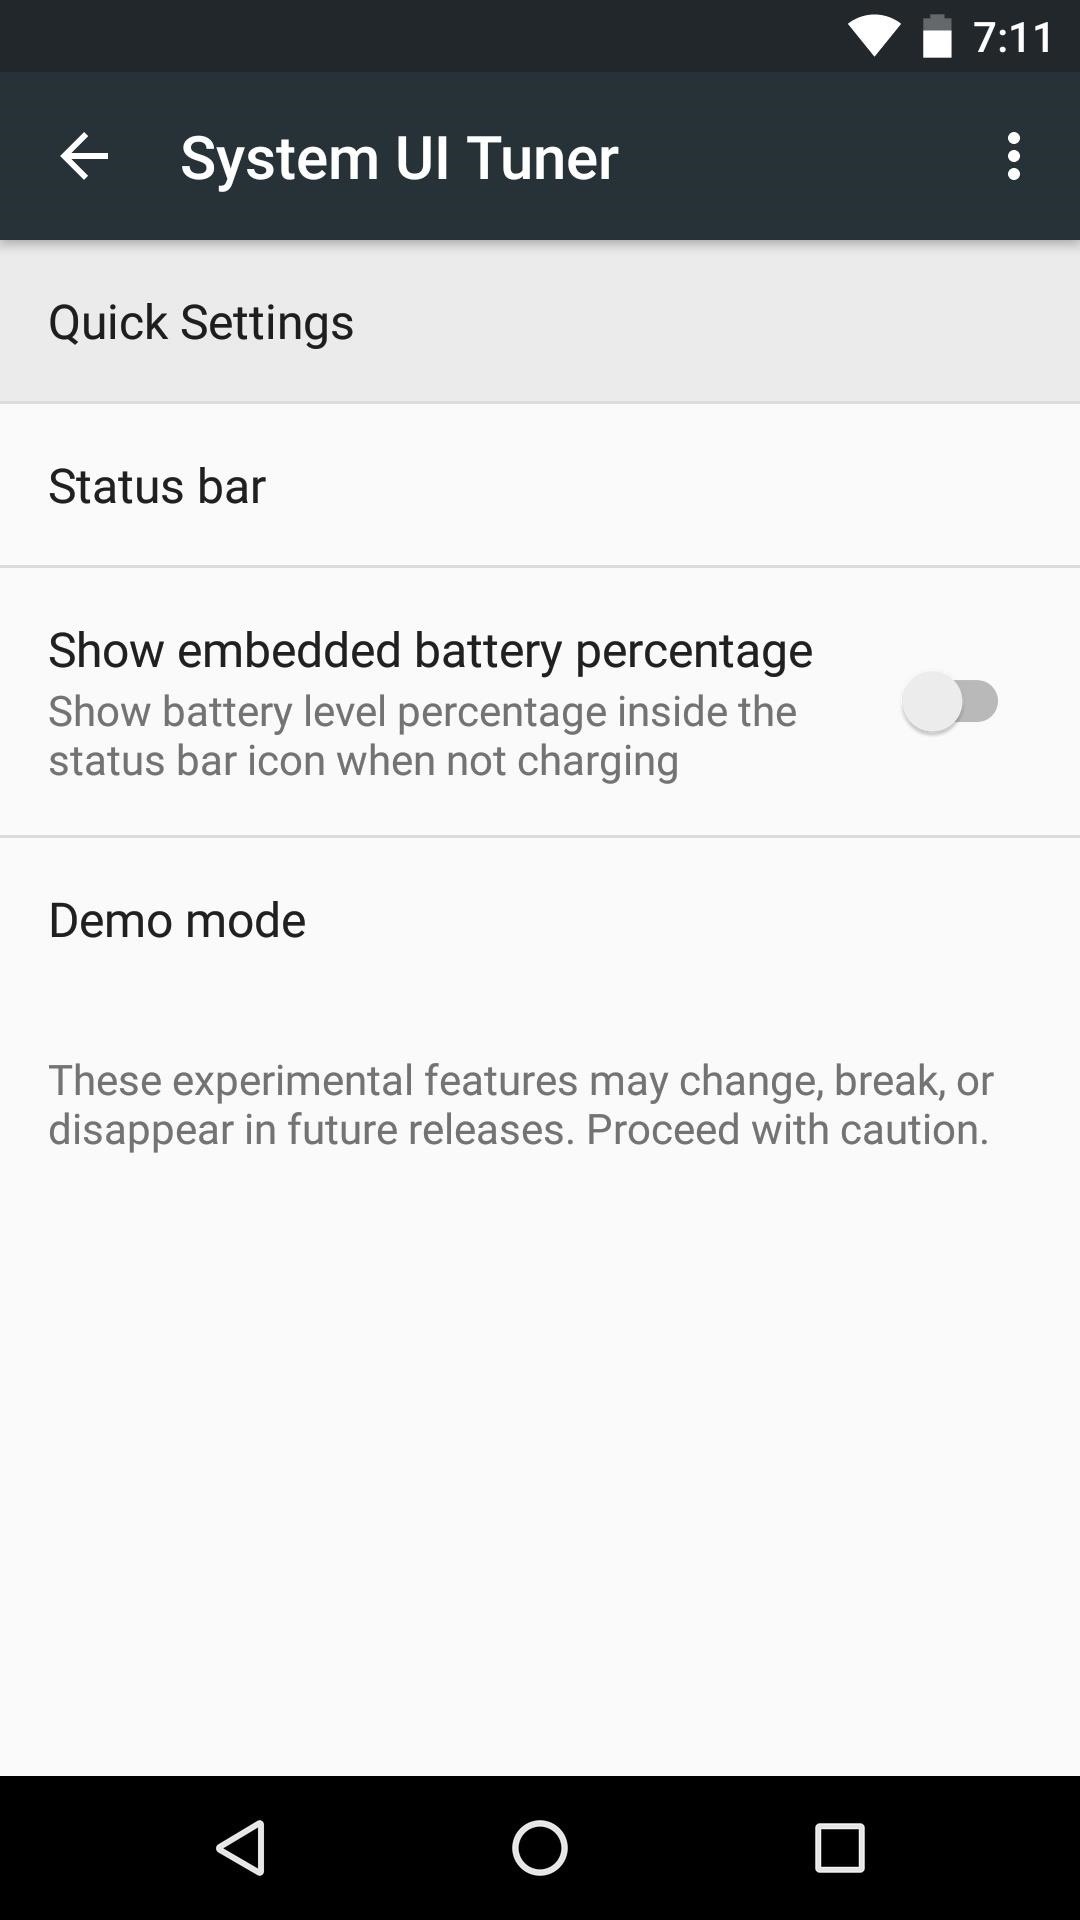
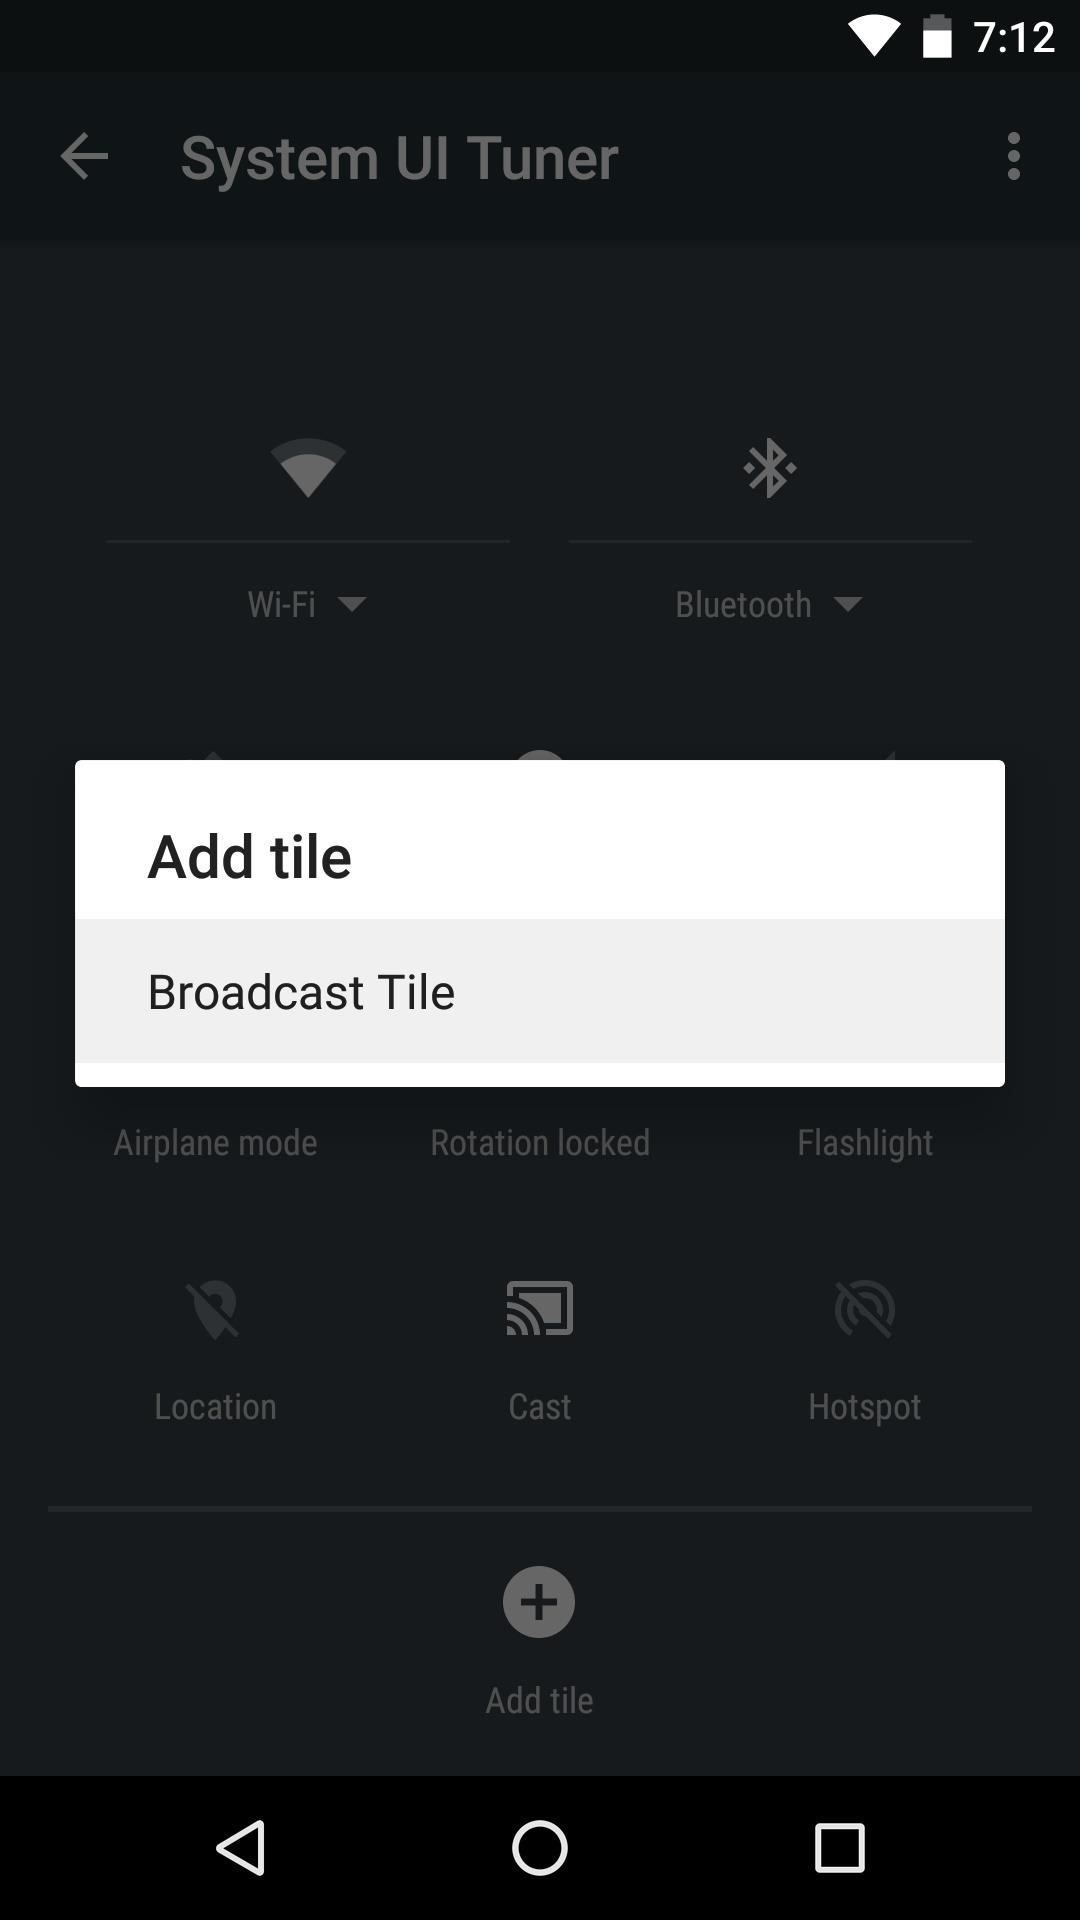
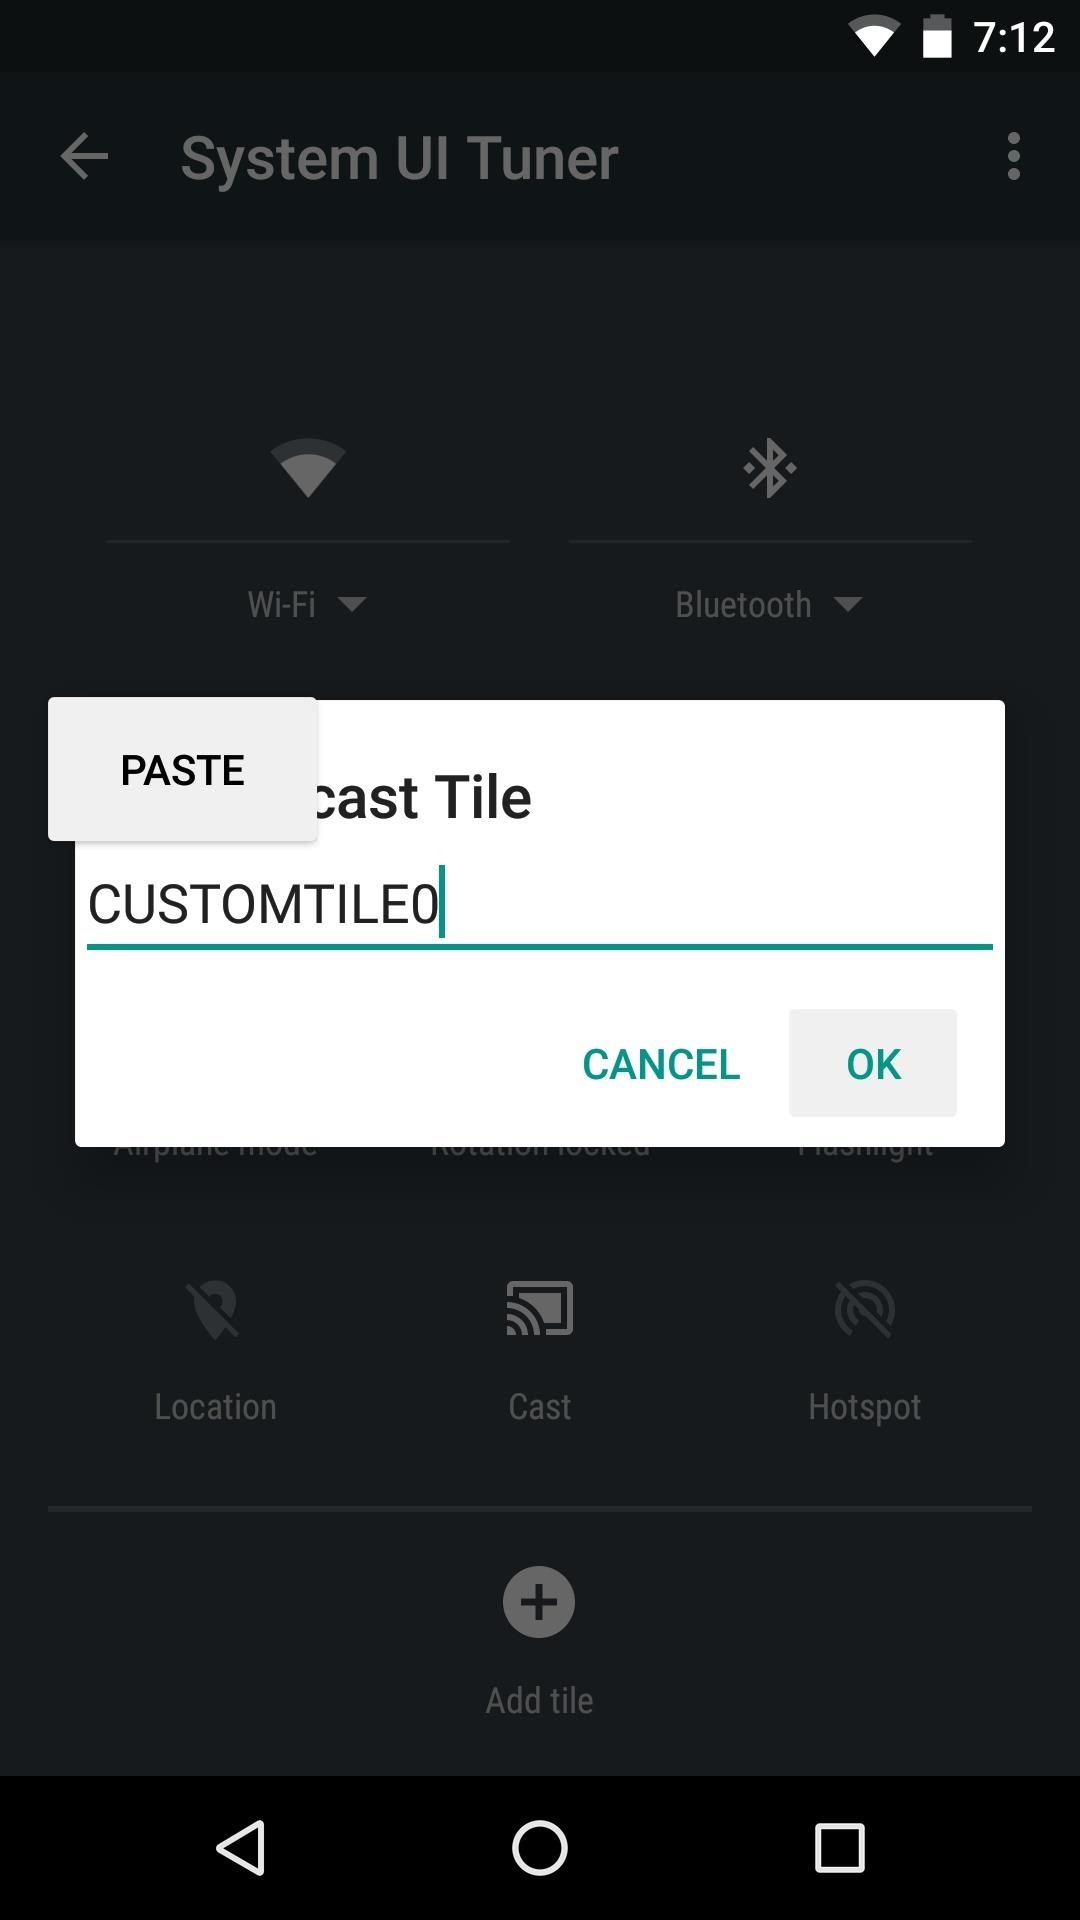
From here, scroll down to the bottom of the Quick Settings customization panel and tap the "Add tile" button. Next, choose "Broadcast Tile," then long-press the text field that pops up, choose "Paste," and tap "OK." If your clipboard isn't already populated with the requisite text for some reason, enter CUSTOMTILE0 into the field manually and press "OK."

At this point, if you'd like your custom Quick Settings tile to be in a specific spot, you can use the same menu to drag and drop the tile into the position you prefer.
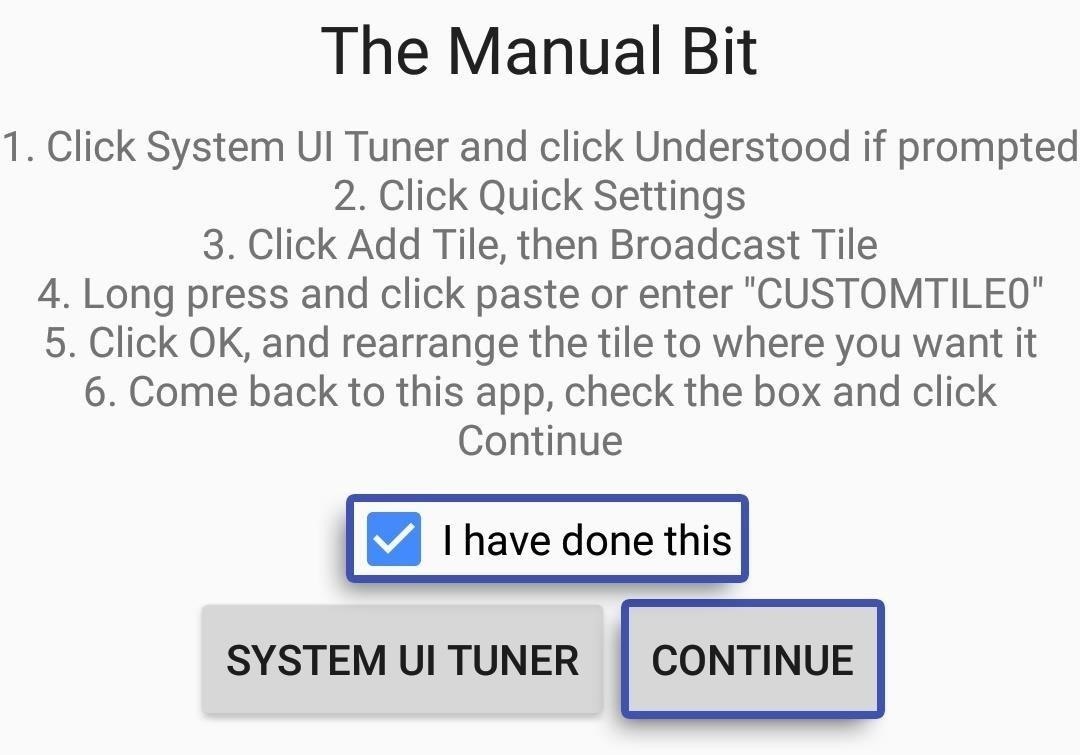
After you're done creating the new tile, tap your device's back button twice to head back out to the Custom Quick Settings app. From here, tick the box next to "I have done this," press "Continue," then skip down to Step 4 to customize your tile.
Step 3: Add a New Quick Settings Tile (Lollipop Users Only)
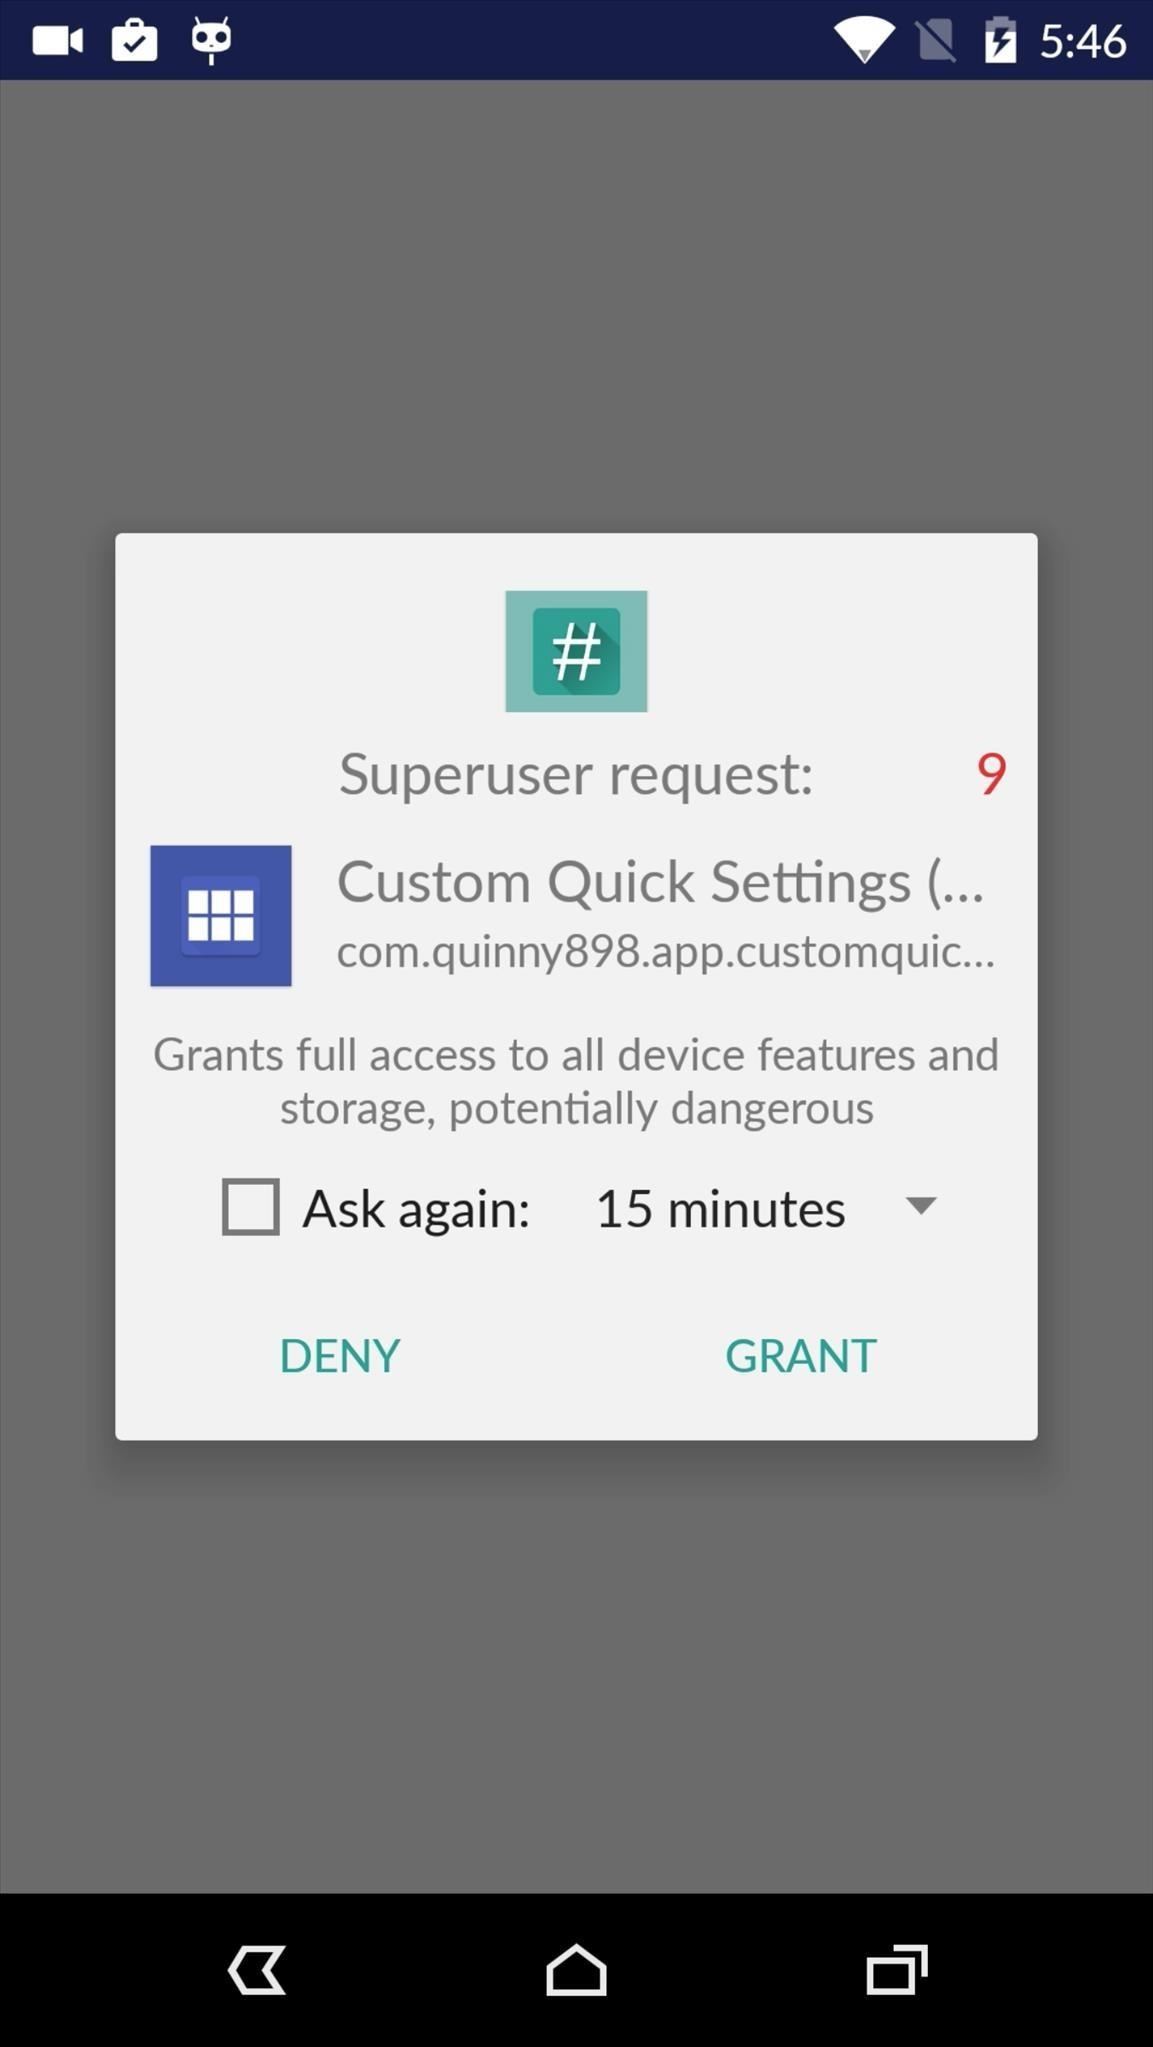
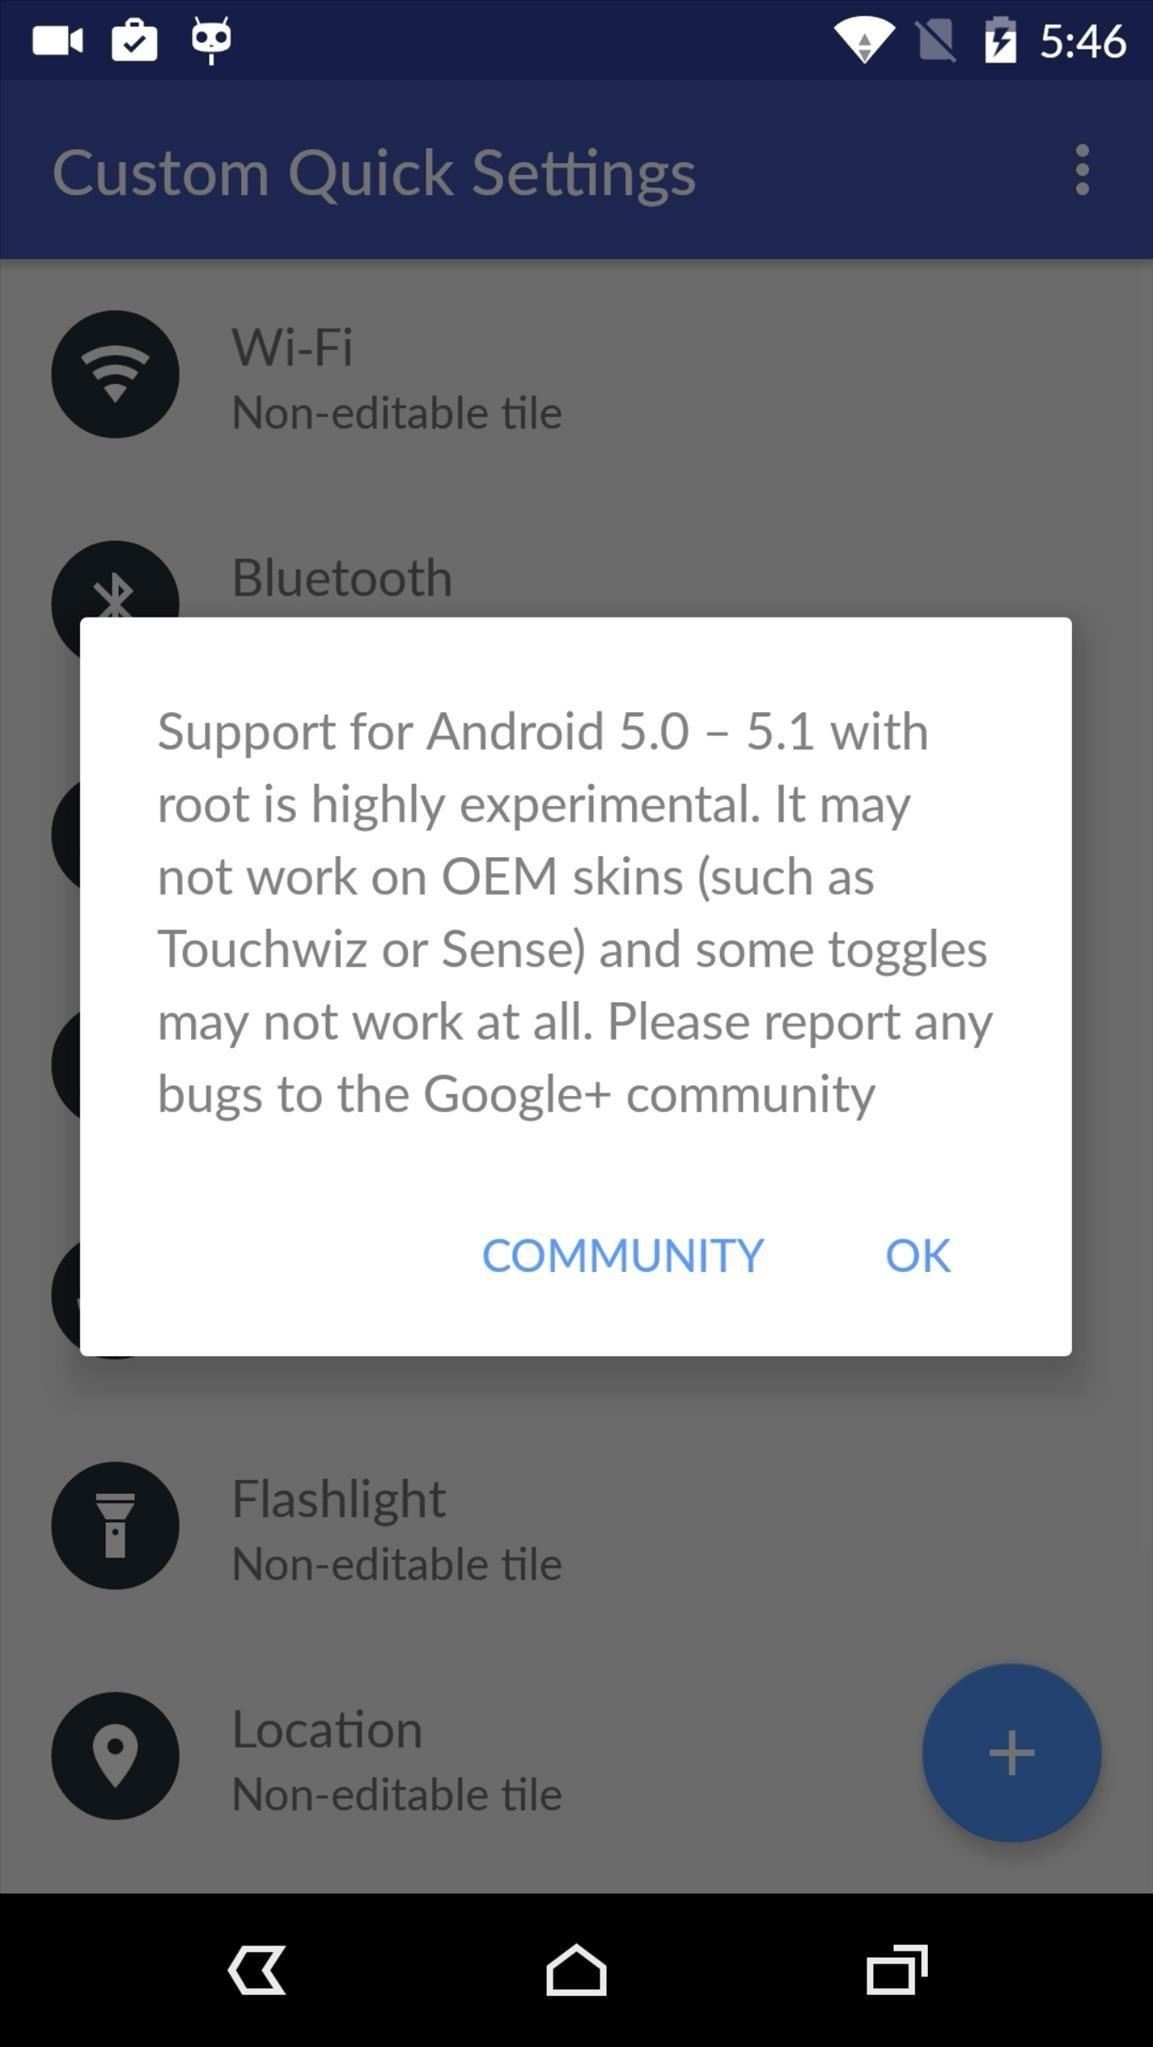
If you're a rooted Lollipop user, open the Custom Quick Settings app up, then grant it Superuser access from the popup. The next screen will tell you that Lollipop support is experimental and may not work on OEM skins. We've tested it on TouchWiz and Sense and confirm that it doesn't work on those, but it worked perfectly on Cyanogen OS.
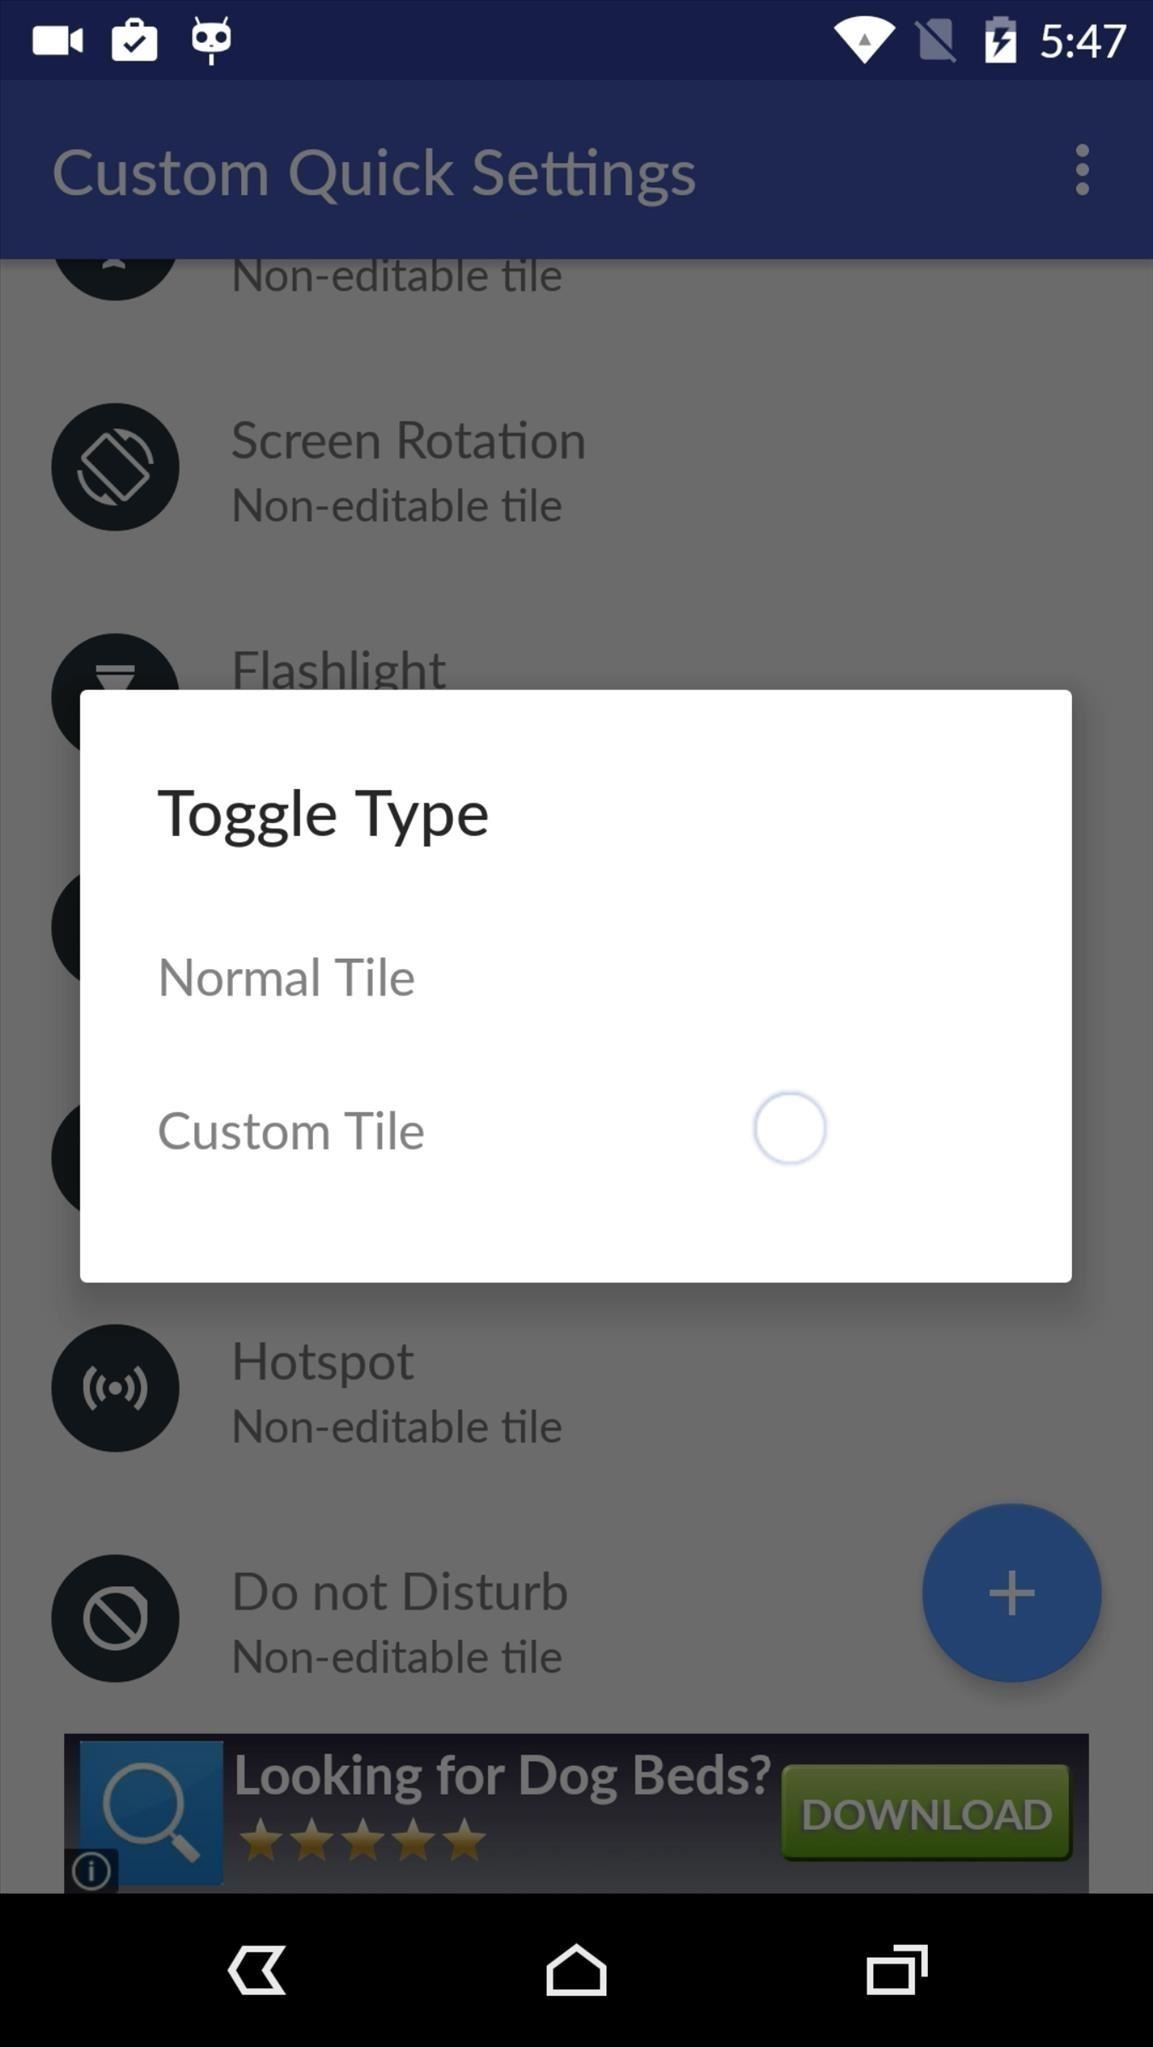
Tap the floating action button in the bottom-right corner, then choose the "Custom Tile" option, then proceed to the next step.
Step 4: Customize Your New Quick Settings Tile
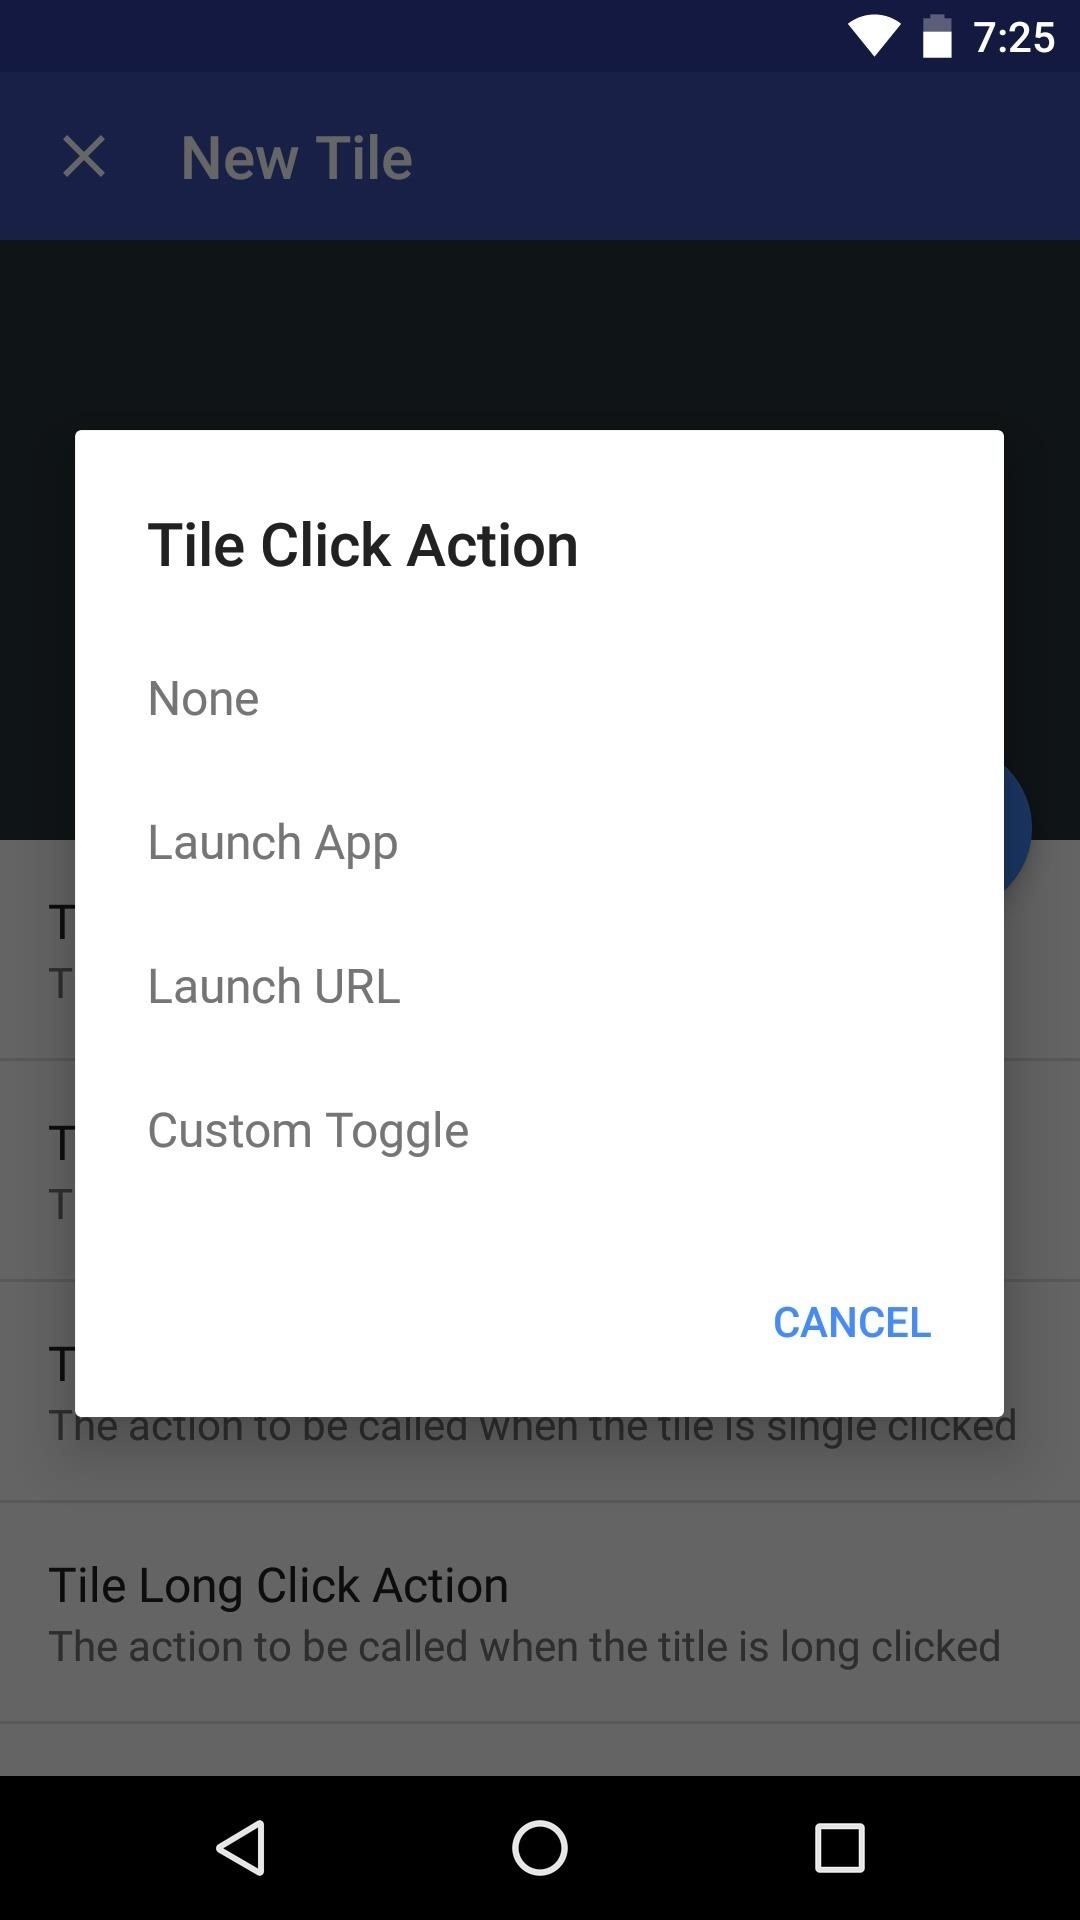
You'll now see a screen with several customization options for your new tile. From here, you can give the tile a title and assign an icon to it with the first two options, respectively. But the good stuff starts when you tap the "Tile Click Action" option, which lets you choose any action—such as launching an app or URL—to perform when tapping your new tile. The same options exist under the "Tile Long Click Action" entry, which assigns an action to perform when long-pressing the tile.

Once you've got everything set up to your liking, your new custom Quick Settings tile can be accessed at any time by swiping down from the top of your screen with two fingers. If you'd like to add more custom tiles, simply repeat the process in this tutorial and you'll be off and running.
What actions did you assign to your custom Quick Settings tile? Let us know in the comment section below, or drop us a line on Android Hacks' Facebook or Twitter, or Gadget Hacks' Facebook, Google+, or Twitter.
Who needs a wand? Unlock your magical powers and transform yourself from a Muggle into a Wizard or Witch just by using your Android phone. See how:


Be the First to Comment
Share Your Thoughts