If you're experiencing issues with an app or custom ROM and would like to report your problem to the developer, there's no better way to do it than by capturing a logcat. Android keeps track of all the commands that have been executed by various apps and services, which means that when something goes wrong, the error is clearly shown in this so-called logcat.
Most of the time, developers will ask for a logcat when you submit a bug report, because otherwise, there simply wouldn't be enough information to get to the root of your problem. So to help you get this issue solved once and for all, I'll go over two methods below for capturing a logcat with a rooted device, as well as a non-rooted device.
Method 1: ADB (Non-Rooted Users)
This first method does not require root access, but there is a bit of manual setup involved. For starters, you'll need to have a computer and a USB data cable handy, because capturing a logcat without root requires the use of ADB commands.
Step 1: Configure ADB
To make sure everything goes off without a hitch, you'll need to have the Android SDK installed on a computer so that you can use the full suite of ADB commands. For instructions on getting the Android SDK and ADB up and running on Windows, Mac, or Linux, see Method 1 in Andrew's full tutorial at the following link:
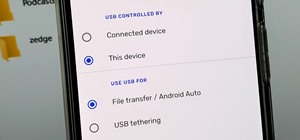
On top of that, you'll need to have "USB debugging" enabled on your Android phone or tablet, and you'll also need to make sure that you've allowed USB debugging access from your computer. For help on getting those two things set up, see my full tutorial at the following link:
Step 2: Change Folder Properties (Windows Only)
From here, Windows users will need to adjust the security properties of their ADB installation folder. To start, navigate to C:\Program Files (x86)\Android\android-sdk\, then right-click the platform-tools folder and choose "Properties."
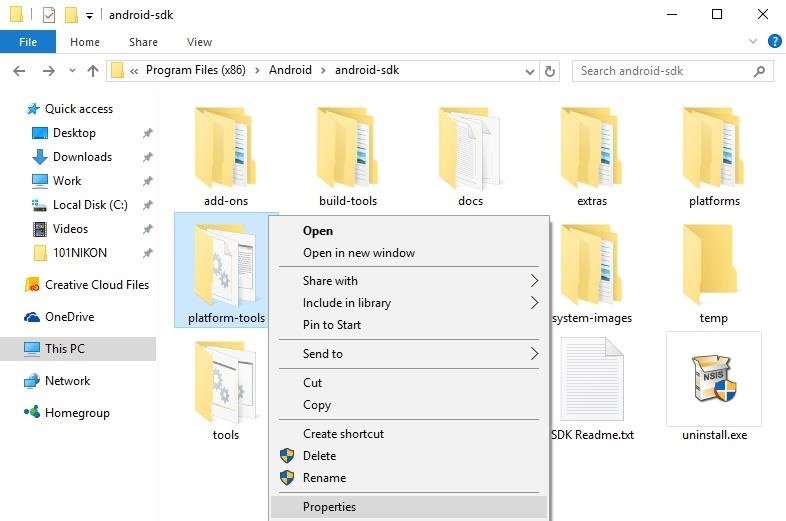
Next, click the "Security" tab in the following pop-up window, then select the "Users (Computer\Users)" entry in the first list and click the "Edit" button directly beneath this menu.

From the window that pops up next, select "Users (Computer\Users)" again, then in the menu towards the bottom of this window, tick the "Allow" box next to the "Full control" entry. From here, click "OK" on both pop-up windows, then you'll be ready to capture a logcat.

Step 3: Capture a Logcat
Once you've taken care of that, open a command window in the platform-tools folder inside of your Android SDK installation directory. For Windows users, this can be done by navigating to the platform-tools folder, then holding the Shift key, right-clicking any empty space, and choosing "Open command window here."

Mac users will need to make sure "New Terminal at Folder" is enabled in their keyboard settings (System Preferences -> Keyboard -> Shortcuts -> Services). Then, just right-click on the platform-tools folder, hover over "Services," then select "New Terminal at Folder."
Next, it's finally time to actually capture your logcat. This is best done after you've experienced a bug that you want to tell the developer about, in a situation where you haven't rebooted since. So when you're ready, type the following command and press Enter.
- adb logcat > logcat.txt

After a few moments, your logcat will be generated and saved as a text file. You'll find the file in the platform-tools folder inside of your Android SDK installation directory, and it will be named "logcat.txt."
When you're sending your bug report to the developer, simply attach this file in your email, and the developer will be able to get a clear picture of what went wrong.

Method 2: aLogcat App (Rooted Users Only)
If you're a rooted user, you have the luxury of being able to avoid ADB altogether, since a nice, simple root app can capture a logcat for you at the press of a button.
Step 1: Install aLogcat
There are several apps on the Play Store that claim to be able to capture a logcat without root, but these are only compatible with Android 3.0 or lower. Since 96.8% of Android phones and tablets are running 4.0 or higher, this means you'll likely need a logcat app that utilizes root. The best such app we've found is called [ROOT] aLogcat, and it's completely free, so head to the following link to get it installed:

Step 2: Capture a Logcat
Once you've installed the app, simply open it up and tap "Grant" on the superuser access request. From here, make sure the logcat-capturing service is running by tapping the play/pause button at the top of the screen. Then, once you've reproduced the bug that you'd like to report, tap the three-dot menu button and choose "Save" to generate a copy of your logcat.


The logcat will be saved as a text file in the aLogcat folder on your SD card or internal storage, so when you're ready to submit your bug report, simply attach this file in the email.
What issues were you experiencing that necessitated capturing a logcat? Let us know in the comment section below, or drop us a line on Android Hacks' Facebook or Twitter, or on Gadget Hacks' Facebook, Google+, or Twitter.
Who needs a wand? Unlock your magical powers and transform yourself from a Muggle into a Wizard or Witch just by using your Android phone. See how:










2 Comments
Nice job the Root aLogcat was all I needed thanks!
In Windows 10 os you might be lazy like me and use powershell. I did a little research after I could not get the cmnd line to work. Open powershell with shift + right click in the platform-tools folder.
Powershell will already have the path in the console. Just add (without quotes) .\adb logcat > logcat.txt
I did get it wrong a few times as I was researching and testing what I was reading. However, I finally got the logs running the . (period) first then \(backslash) second,(nospace)adb(space)logcat(space) >(space)logcat.txt
"See below"
PS C:\Program Files (x86)\Android\android-sdk\platform-tools> .\adb logcat > logcat.txt
Oh, and Thank you Dallas. I also found that I had a previous Android SDK installed and had to remove that..and last last, the installation of the current SDK got installed in the programdata folder. I had to move that to Programs (x86) under my user to get everything as you lined it out so I could use the step by step. Probably not too hard for most to do..but I'm an SC on the disc test and had to do everything exactly as shown. Great job with the steps and extra links.
Randroid
Share Your Thoughts