
Android 7.0 Nougat has finally arrived—well, technically, it's in the process of arriving on Nexus devices across the globe. Google uses a staged rollout system to prevent excessive server load when issuing Android updates, which means even though Nougat has made its official debut already, you might not get that "Update available" notification for another few weeks.
But if you have a few minutes to spare, you don't have to wait to get awesome functionality like split-screen mode and quick reply—instead, you can simply sideload the OTA (short for "over-the-air update") to get Nougat right now. This OTA .zip file is the same exact update you'd get if you waited on the staged rollout, and you don't even need to be rooted to install it.
Of course, this only applies to Nexus devices and the Pixel C, as other smartphones and tablets won't get the Nougat update for another few months. But it's a quick and painless process, and all you need is a computer with a USB data cable to get started.
What You'll Need
- Nexus 6, Nexus 9, Nexus Player, Nexus 5X, Nexus 6P, or Pixel C
- latest version of Marshmallow installed (6.0.1 with July 2016 security patches)
- non-rooted device (rooted users see this guide)
- Windows PC (recommended)
- USB data cable
Step 1: Set Up ADB
First, you'll need to install ADB and all of the relevant drivers on your computer. We recommend a Windows PC for this part, as the easiest method is to use a Windows-exclusive program called Minimal ADB and Fastboot. To start with that, simply download the Minimal ADB and Fastboot executable, then launch the file and follow the prompts for installation. When you're done there, install the ADB drivers, then restart your computer.
Note that this would still be possible with a Mac or a Linux machine, but you'd have to install the entire Android SDK, and the installation directories would be different than those shown below.
Step 2: Download the OTA Update ZIP & Rename
Next, grab the OTA .zip file that will update your device from Marshmallow to Nougat. Just in case you missed it in the "What You'll Need" section up top, these OTA .zips will only work if you're running Marshmallow 6.0.1 with the July 2016 security patches. These files are device-specific, so make sure to download the right one, and save it to your computer.
- Nexus 6 OTA ZIP (not yet available)
- Nexus 9 (Wi-Fi) OTA ZIP
- Nexus 9 (LTE) OTA ZIP (not yet available)
- Nexus Player OTA ZIP
- Nexus 5X OTA ZIP
- Nexus 6P OTA ZIP
- Pixel C OTA ZIP
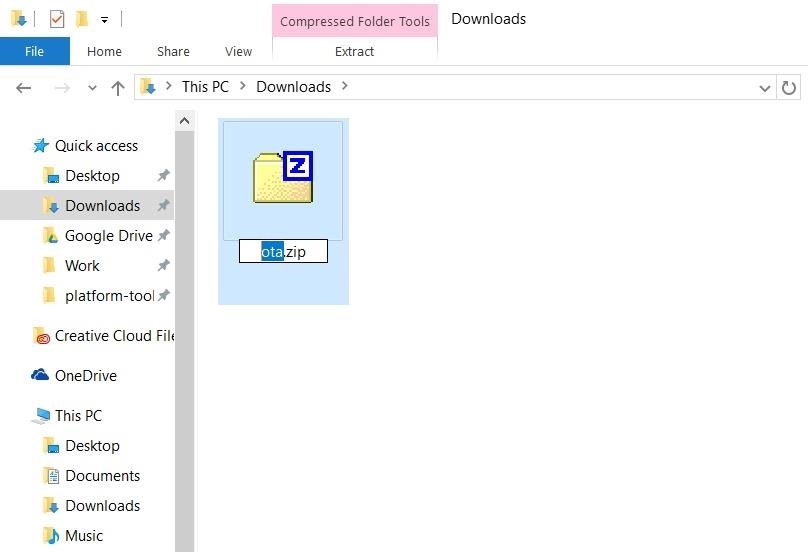
Once you've done that, rename the file to simply ota.zip. Or, if you have file extensions hidden and can't already see the "zip" part in the name, just rename to ota.
Step 3: Move the OTA Update ZIP
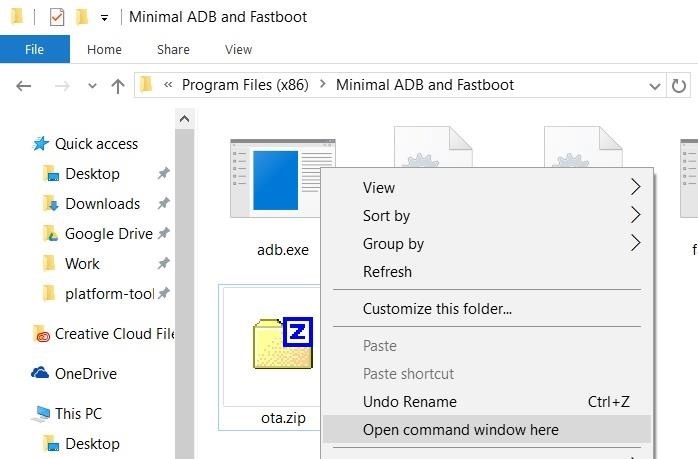
From here, transfer the ota.zip file to your ADB installation directory. With Minimal ADB and Fastboot, that will be the C:\Program Files (x86)\Minimal ADB and Fastboot folder—so just copy the ota.zip file from your Downloads folder, then paste it right in here.

For Mac and Linux users, this depends on where you installed the Android SDK in the first place. However, the easiest way to find the location is to search your computer for a folder named "platform-tools," then move the ota.zip file here.
Step 4: Boot Your Phone into Recovery Mode
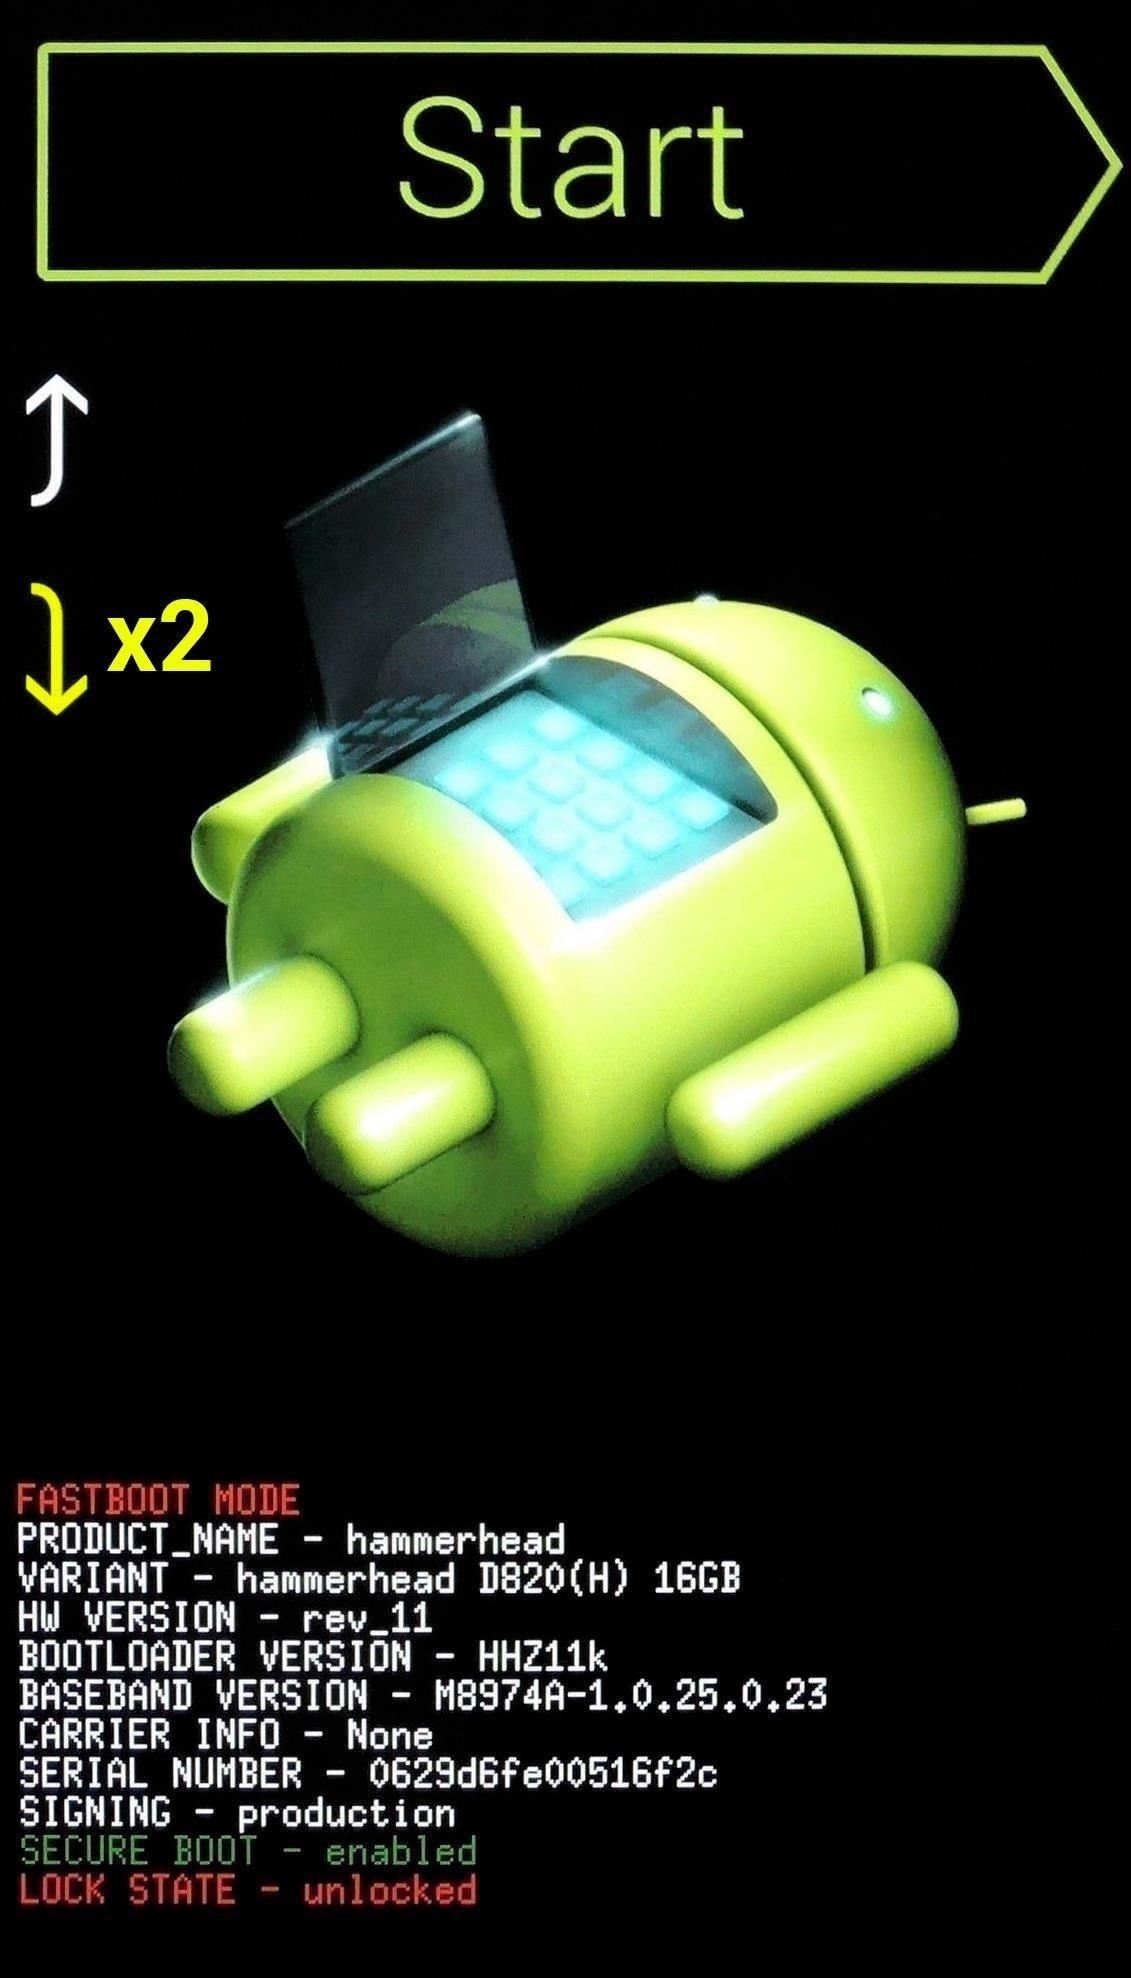
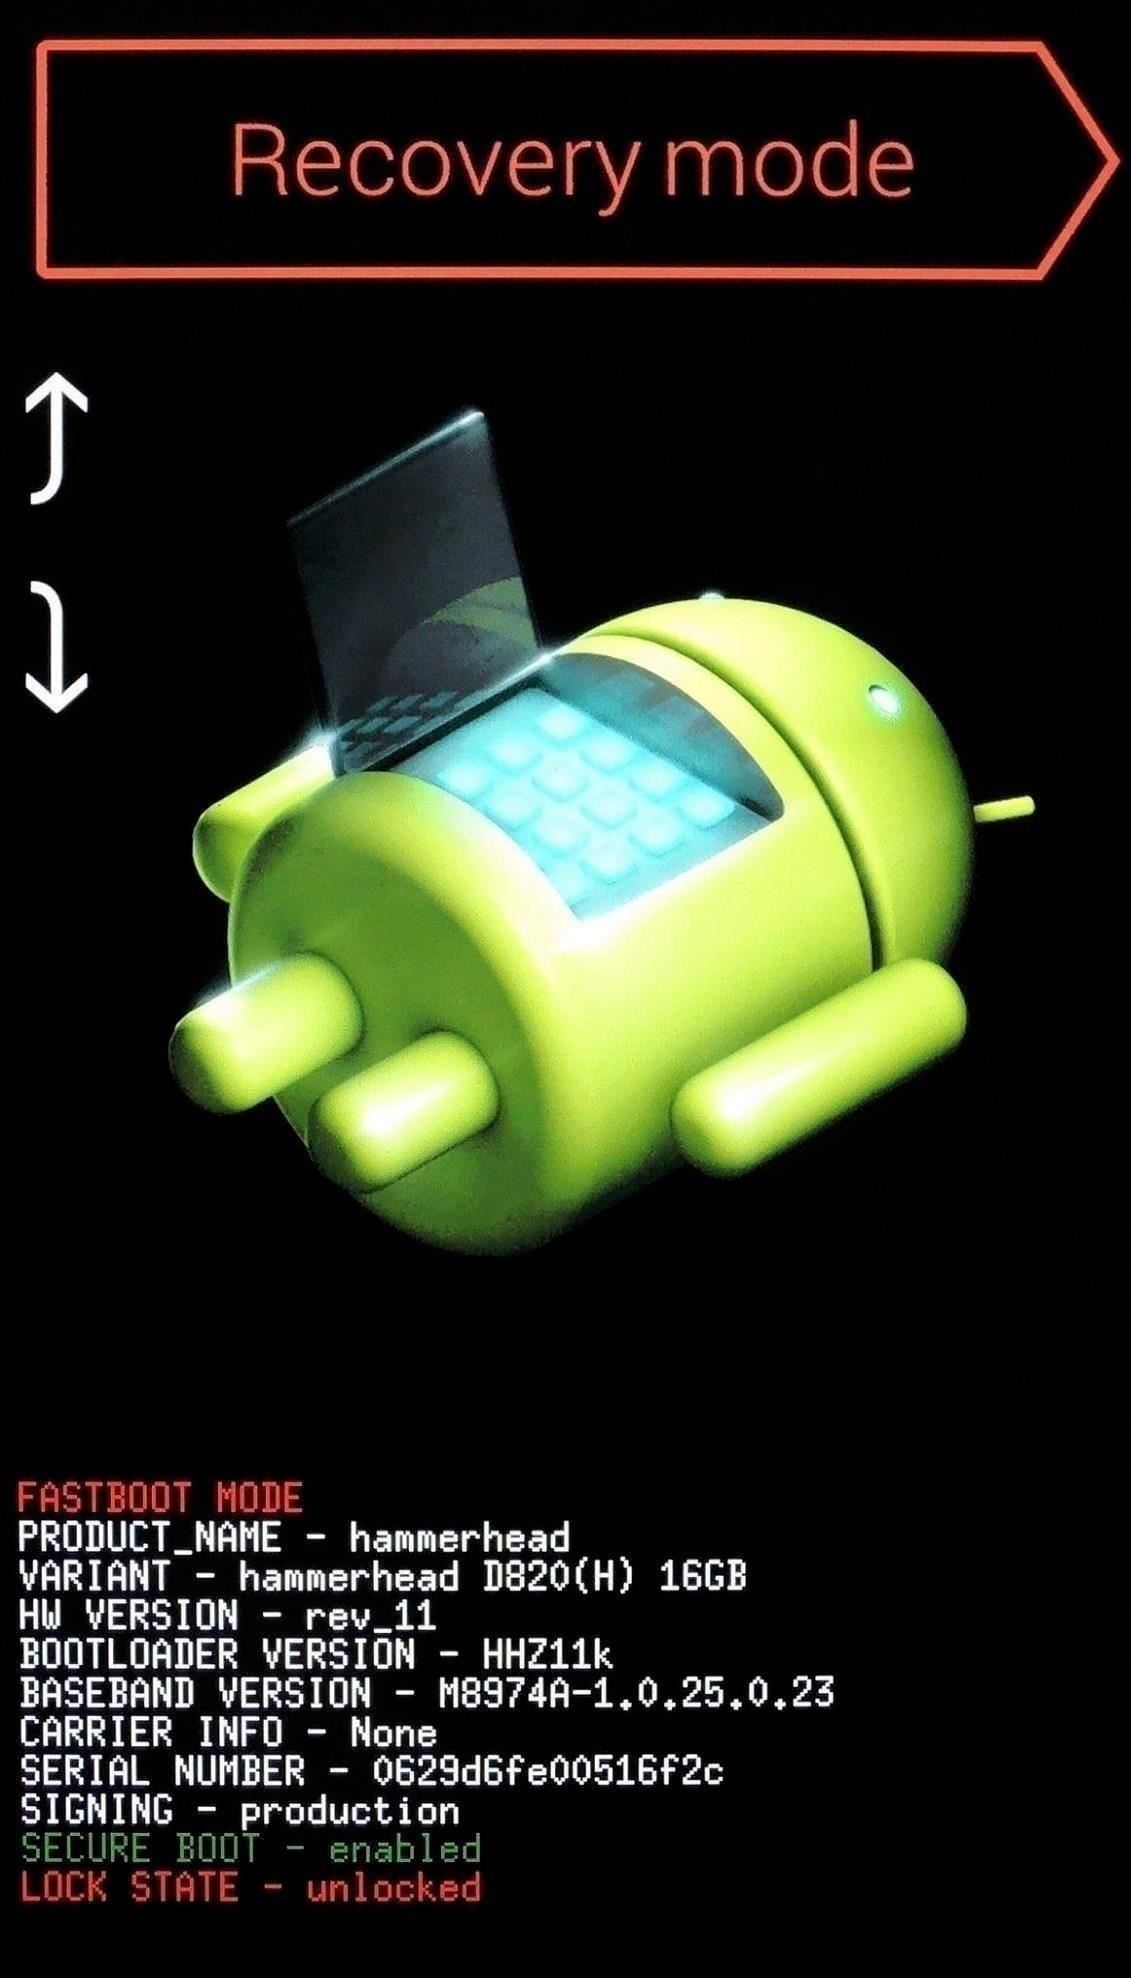
Next up, power your Nexus or Pixel device completely off. When the screen goes black, press and hold the volume down and power buttons simultaneously. This will put your device into bootloader mode—from here, tap the volume down button twice to highlight the "Recovery mode" option, then press the power button to select it.
Step 5: Prepare for Sideloading
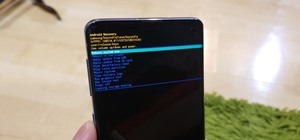
Once you've done that, you'll see a screen with an Android logo and the text "No command." From here, hold down the power button, then press the volume up button. Within a few seconds, you'll be greeted by Android's stock recovery menu—from here, use the volume down button to highlight "Apply update from ADB," then press the power button to select it.
Step 6: Sideload the OTA with ADB
Next, plug your phone into your computer with a USB data cable, then navigate to the ADB installation directory (C:\Program Files (x86)\Minimal ADB and Fastboot for Windows). After that, hold down the shift button on your keyboard, then right-click any empty space in this folder and choose "Open command window here."
Note: Mac and Linux users will have to open a Terminal window first, then manually navigate to the ADB installation directory using change directory commands.
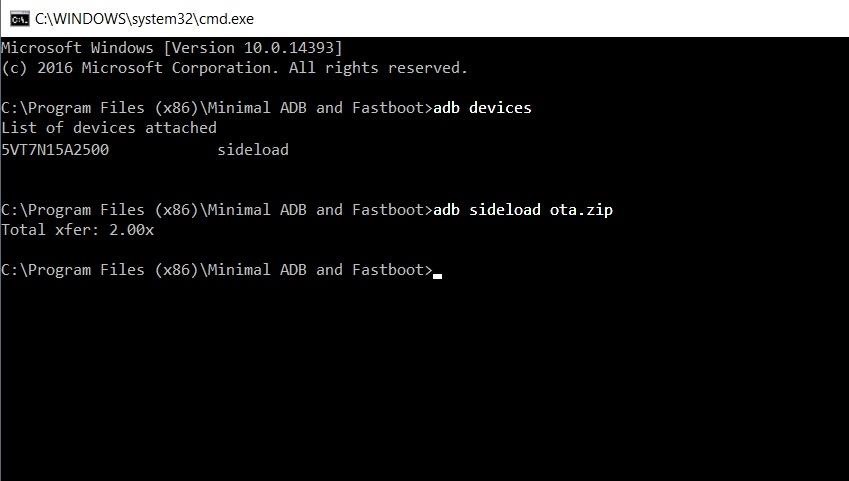
From here, type adb devices into the command prompt, then press enter. If you see a series of letters and numbers, followed by the word "sideload," that means you're good to go. Otherwise, you'll need to check your ADB and driver installation again.
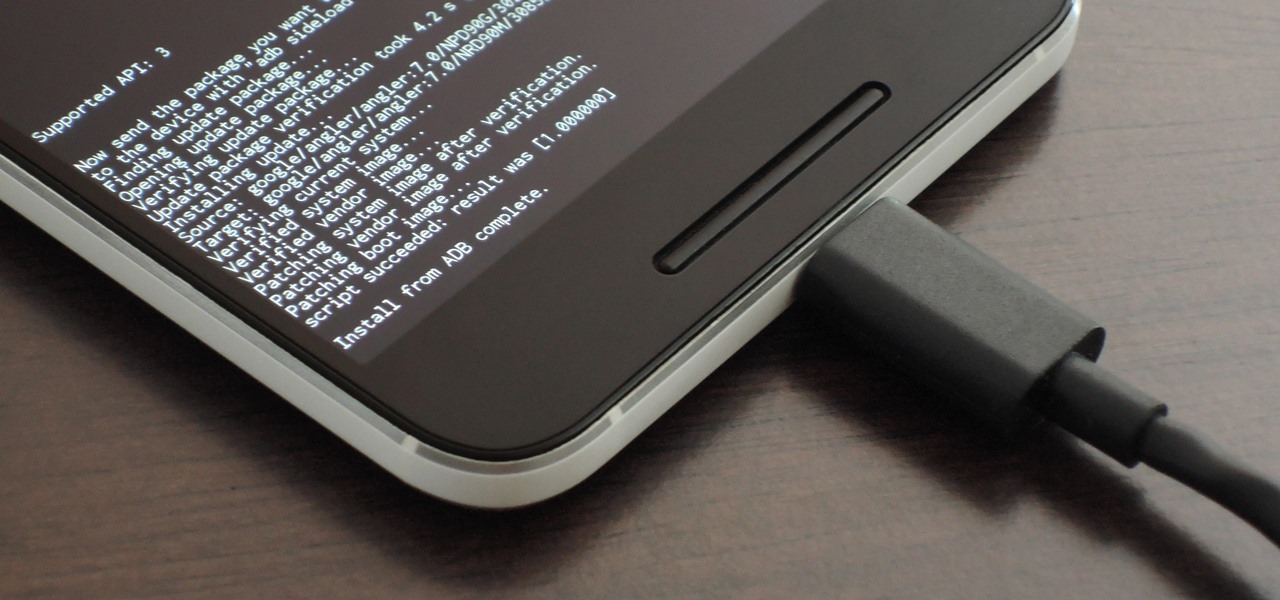
Next, type adb sideload ota.zip into the command prompt, then hit enter. This will start the update process immediately, so make sure that the USB cable doesn't get unplugged. When the process is finished, the command line will say "Total xfer," and your Android device will say "Install from ADB complete."
Step 7: Reboot
Once installation has completed, use your volume buttons to highlight the "Reboot system now" option, then press your power button to select it. Within a few minutes, your device will finish booting, and you'll be running Android Nougat. First boot may take longer than normal, so be patient—but once you're up and running, take a second to check out all of Nougat's new features below.
Who needs a wand? Unlock your magical powers and transform yourself from a Muggle into a Wizard or Witch just by using your Android phone. See how:


Be the First to Comment
Share Your Thoughts