
With certain apps and games, it's all about the settings. In order to get your money's worth with one of these, you simply have to take the time to tweak and adjust various options, which is something a lot of users don't necessarily want to do.
Take GravityBox for example—the popular all-in-one Xposed module lets you change just about anything in your phone's main interface, but the sheer amount of options it offers can be intimidating.
So to help you get a better handle on this awesome tool, I'll go over all of the best settings for GravityBox below. And since a guided tour of the entire app would be way too long of a read, I'll just focus on the highlights and the more interesting options, which should get you well on your way.
Lock Screen Tweaks
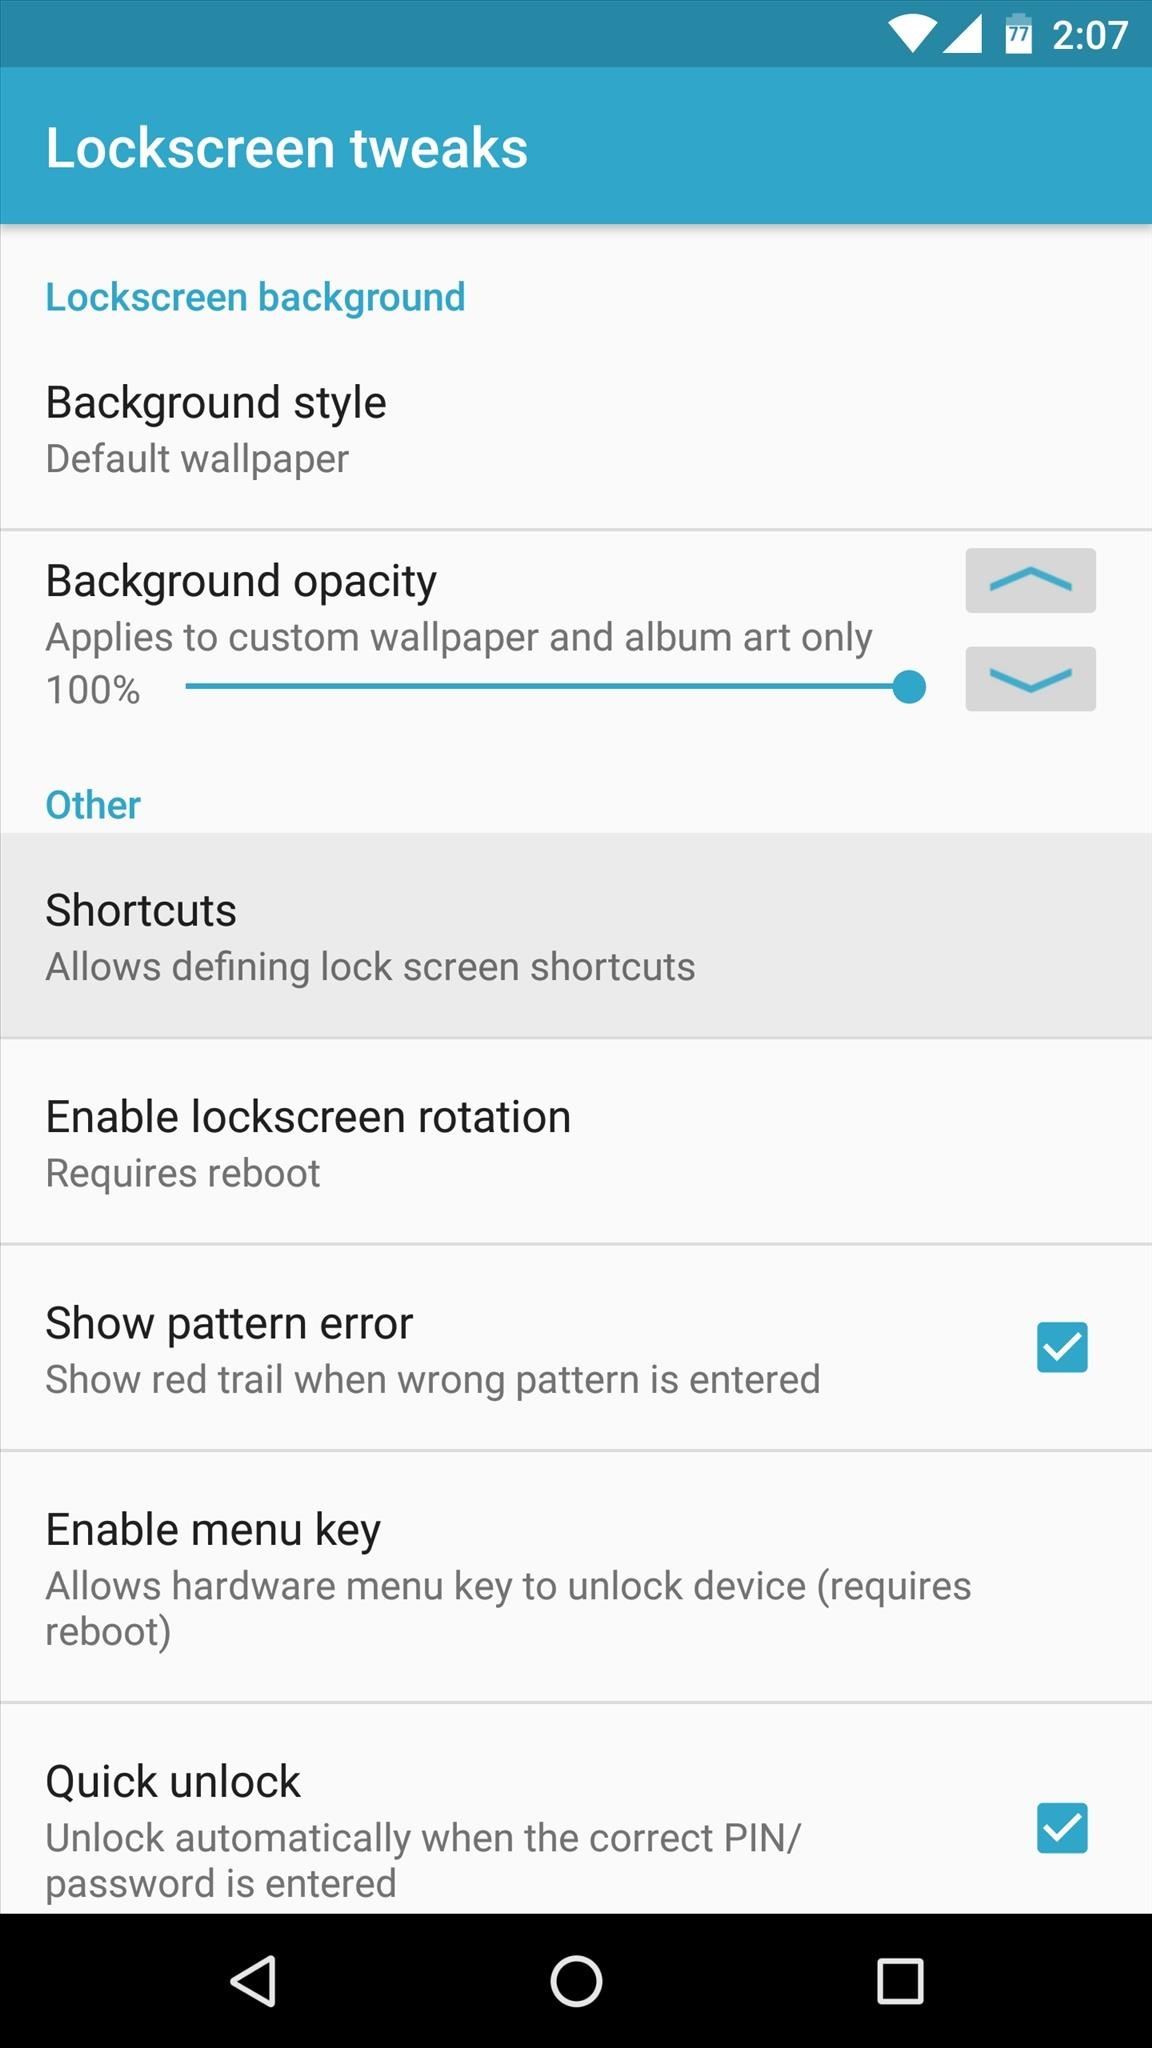
Working through the menus in the order they appear, the first category worth delving into is "Lockscreen tweaks."
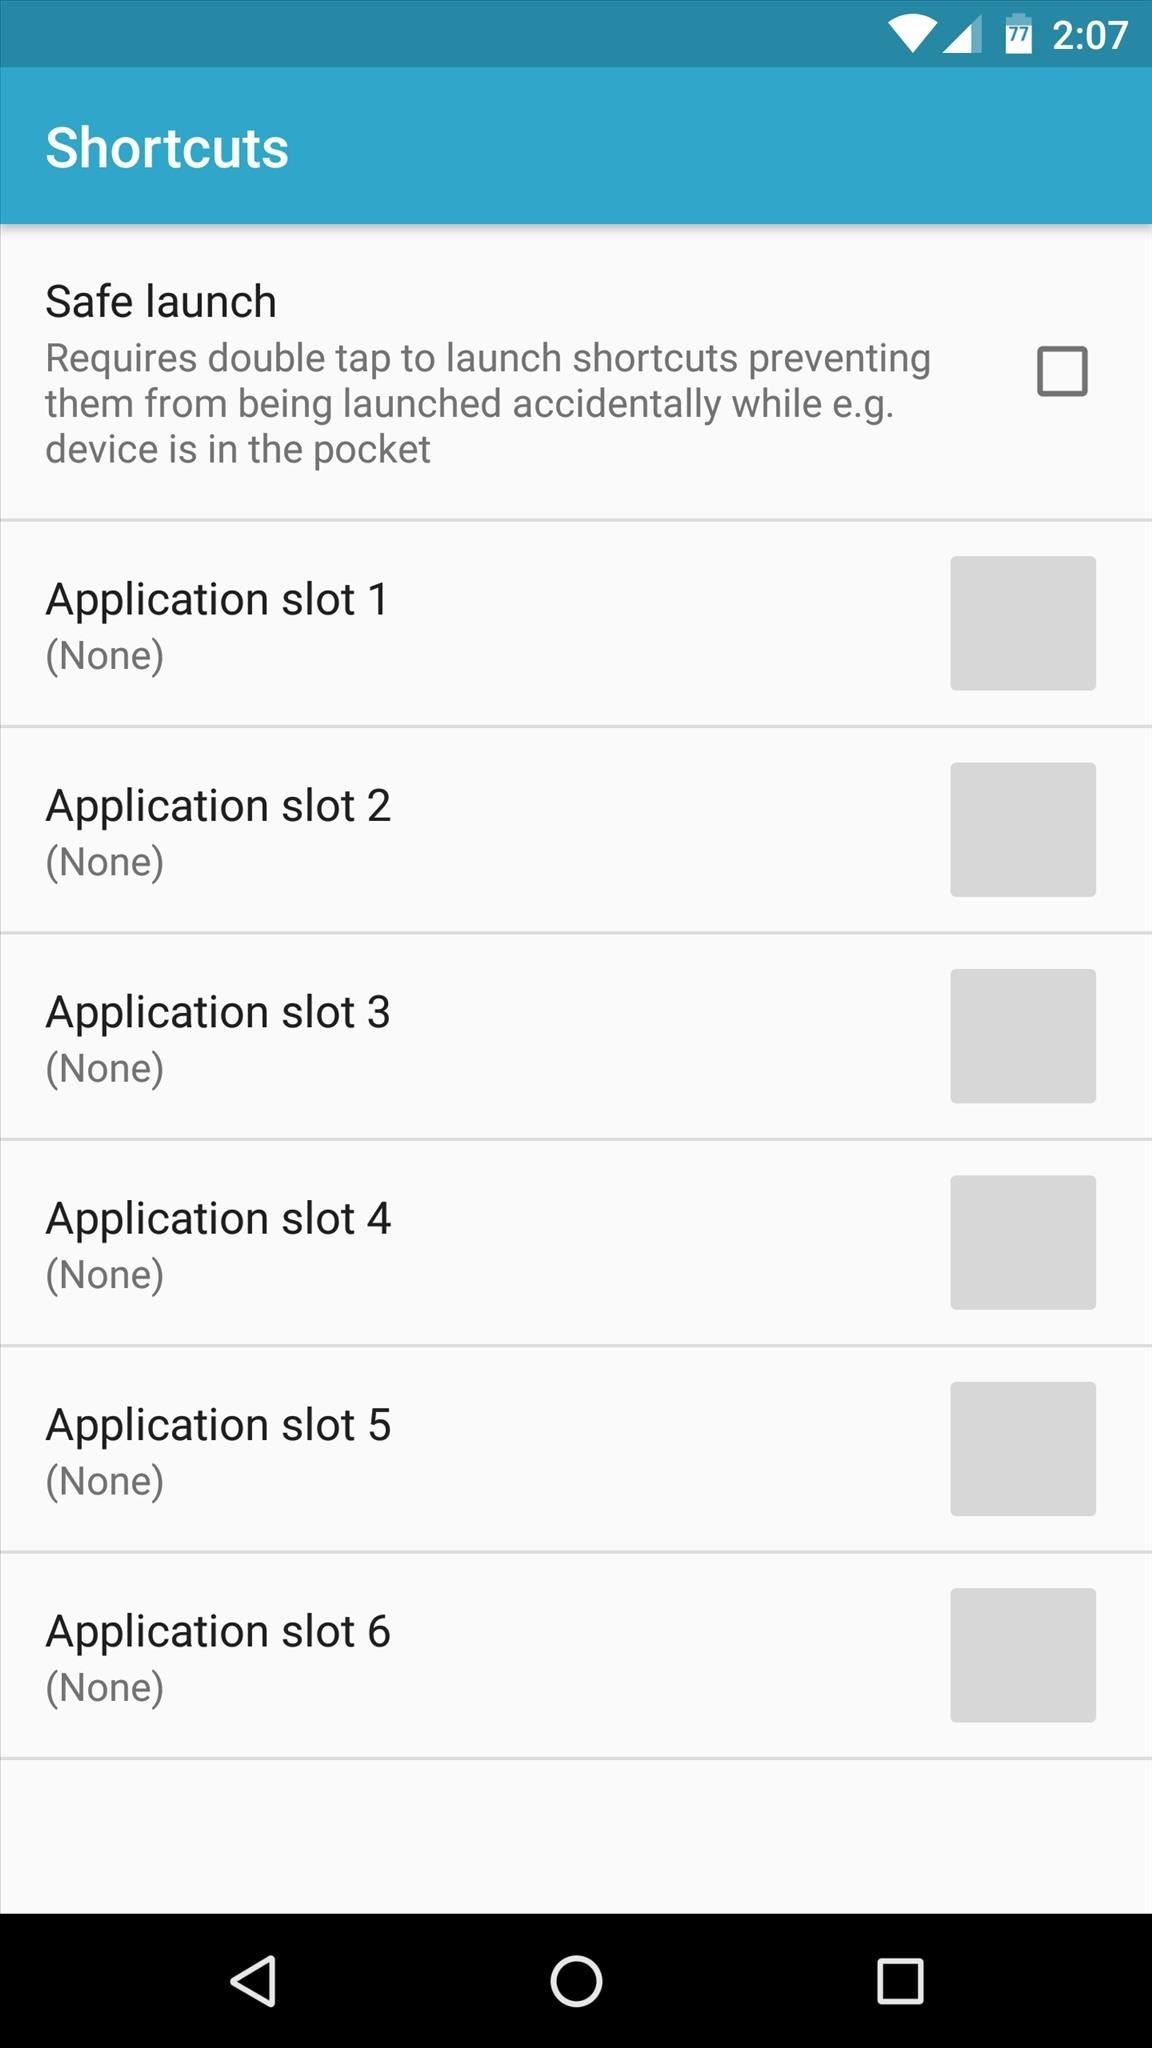
Add Easy-Access Shortcuts
Perhaps the biggest difference maker here is the "Shortcuts" option—select this one, then you'll see a menu with six different application slots. You can select as many of these slots as you'd like, then choose either an app or an activity to populate them. They'll appear as small icons beneath your lock screen clock that can be launched in one tap.
Unlock Your Device Faster
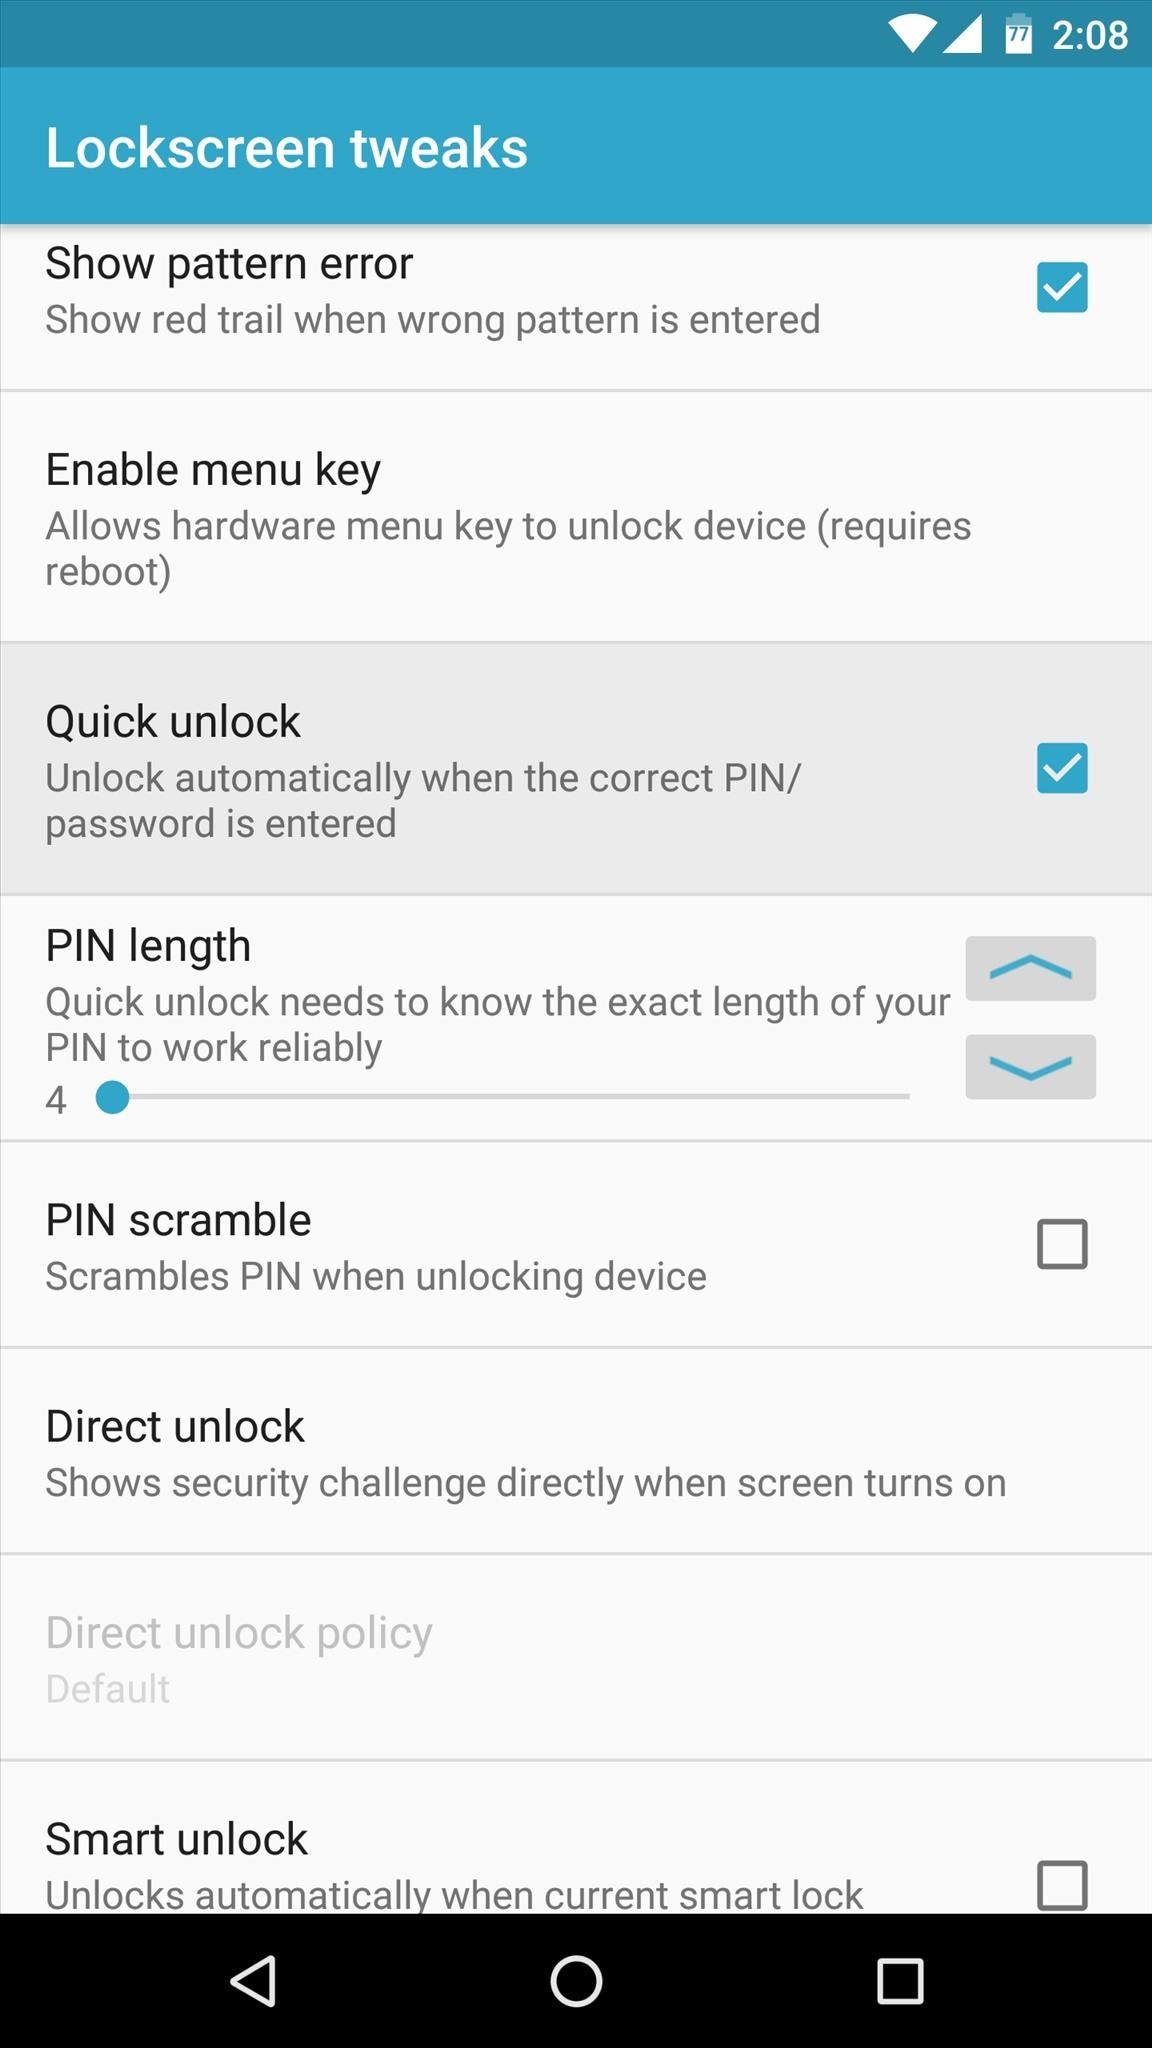
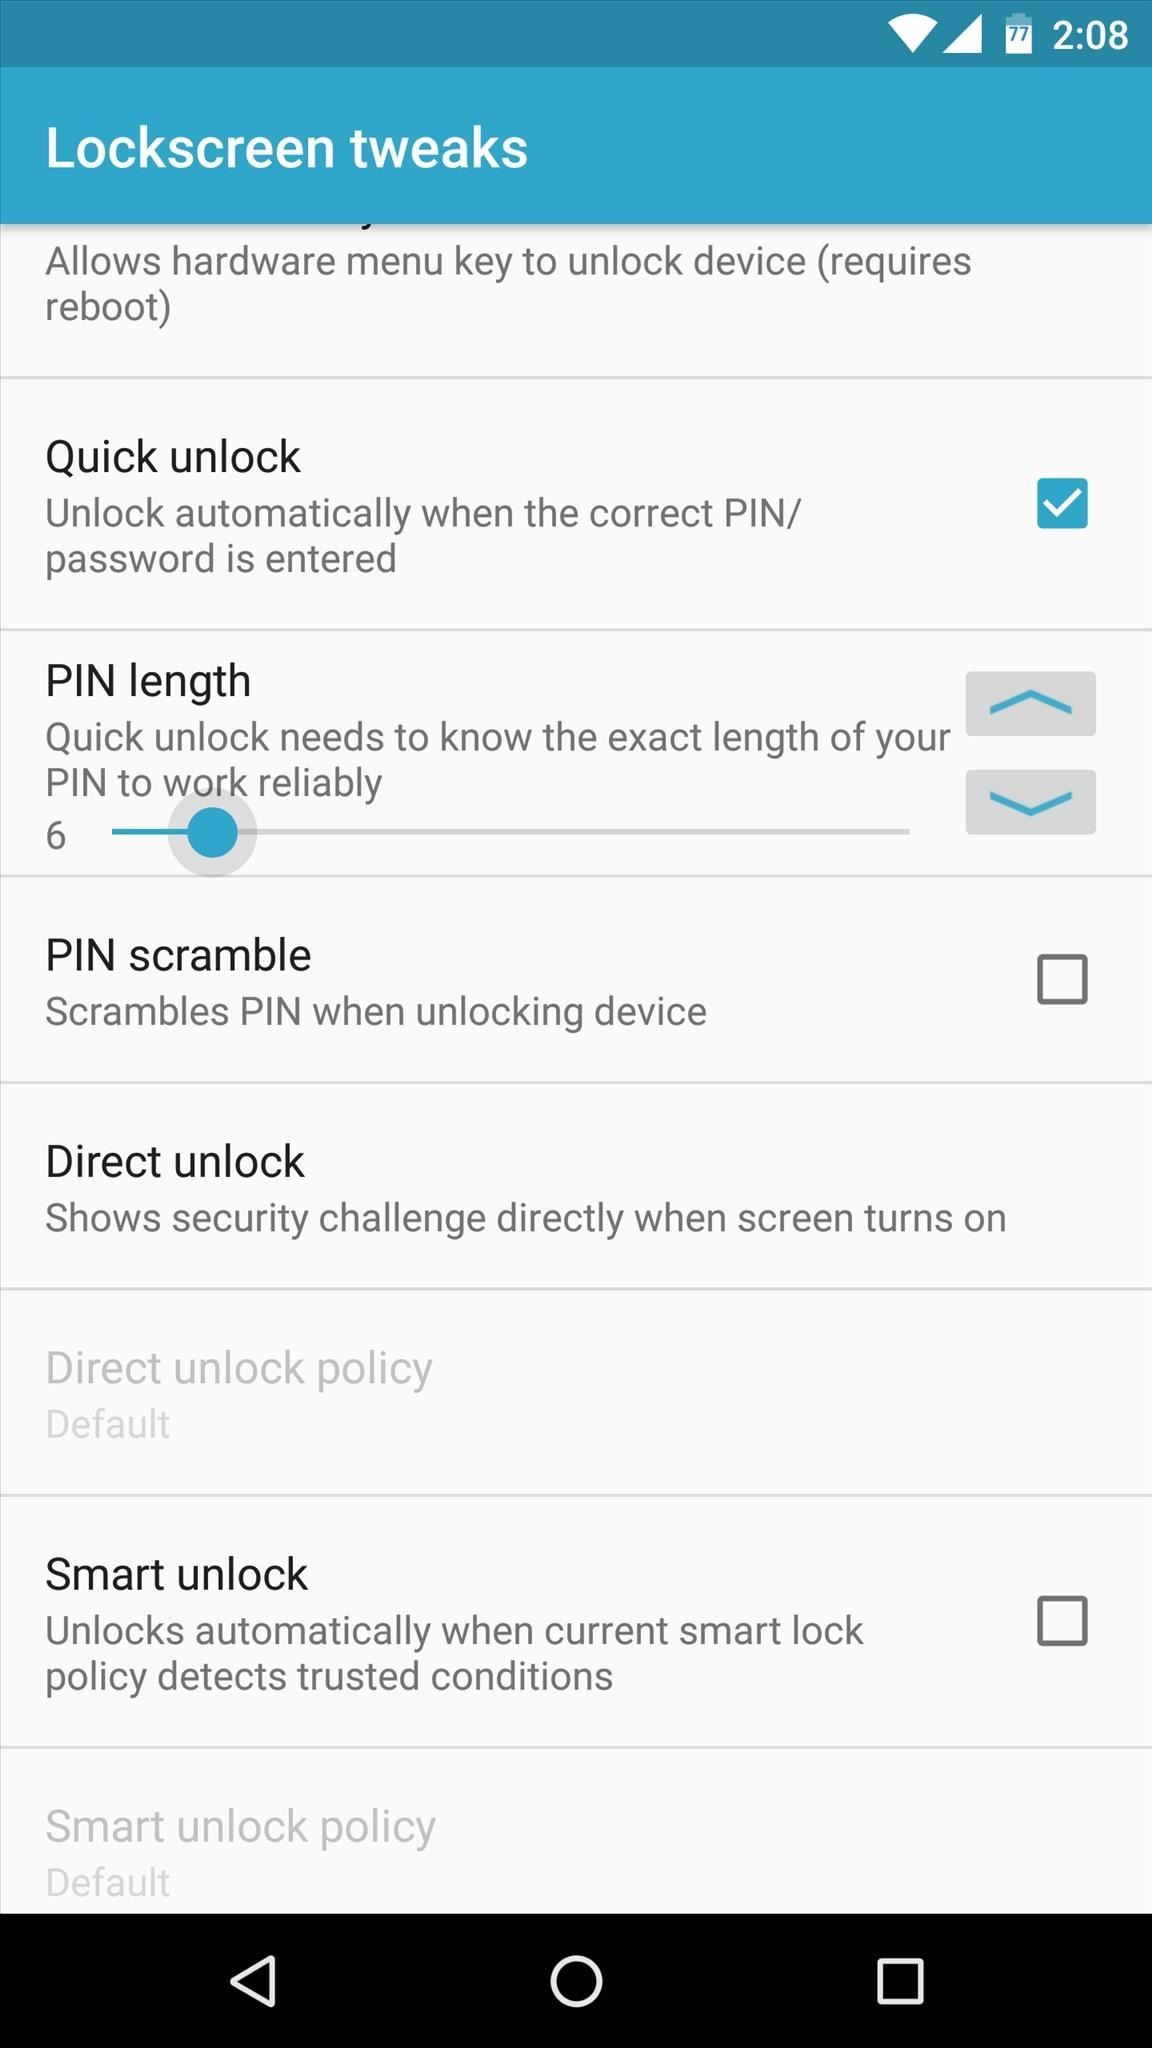
Aside from that, the "Quick unlock" option is another good one in Lockscreen tweaks. Enabling this option will remove the need to tap the check icon after entering your PIN, which is one of the things iOS does better than Android.
But be careful here, because this option basically just presses enter for you after four digits have been typed in, which means that if your PIN is five or more digits, you could end up locked out of your phone. So after ticking the "Quick unlock" box, make sure to use the "PIN length" slider to let GravityBox know exactly how many digits are in your PIN.
Statusbar Tweaks
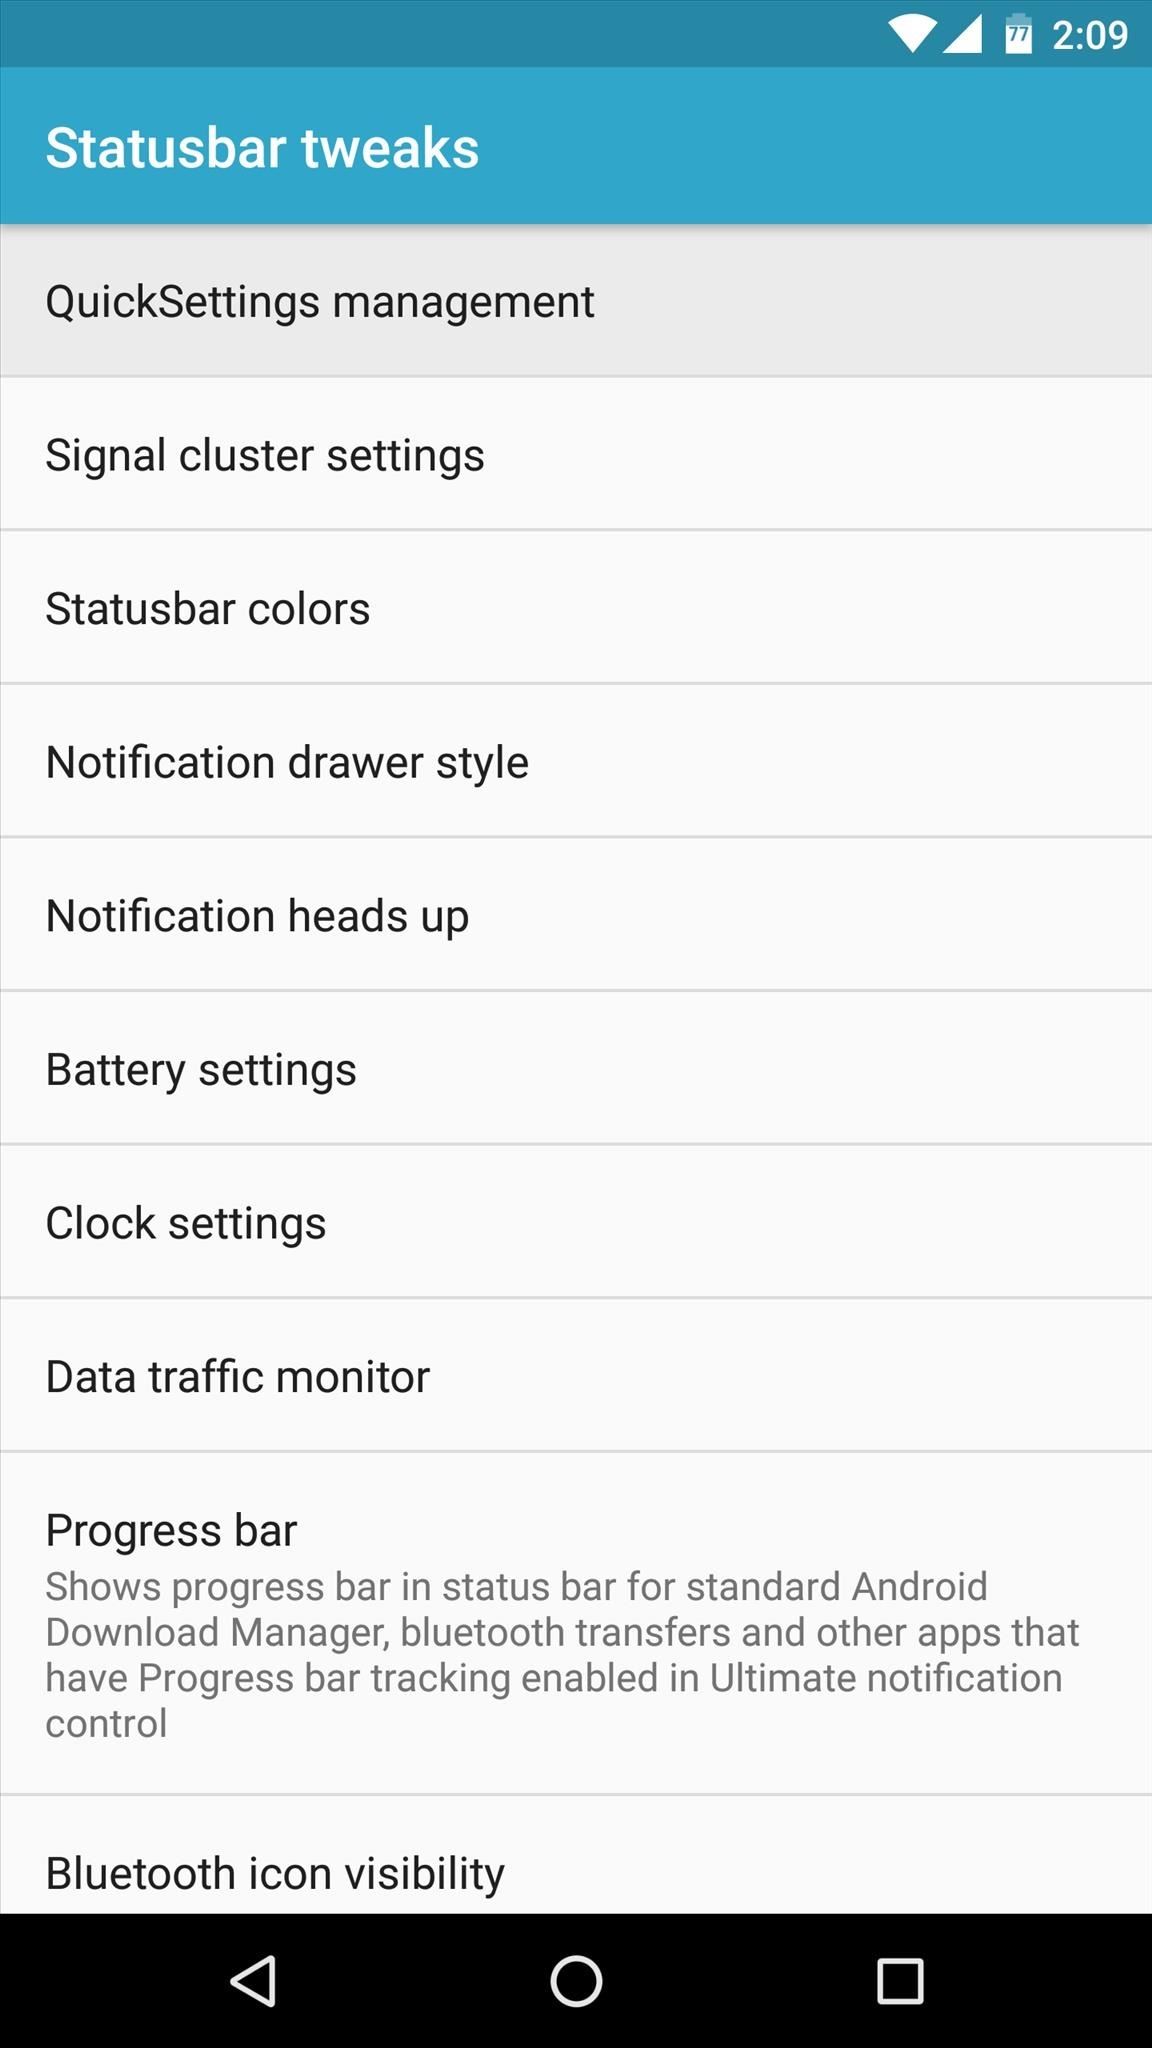
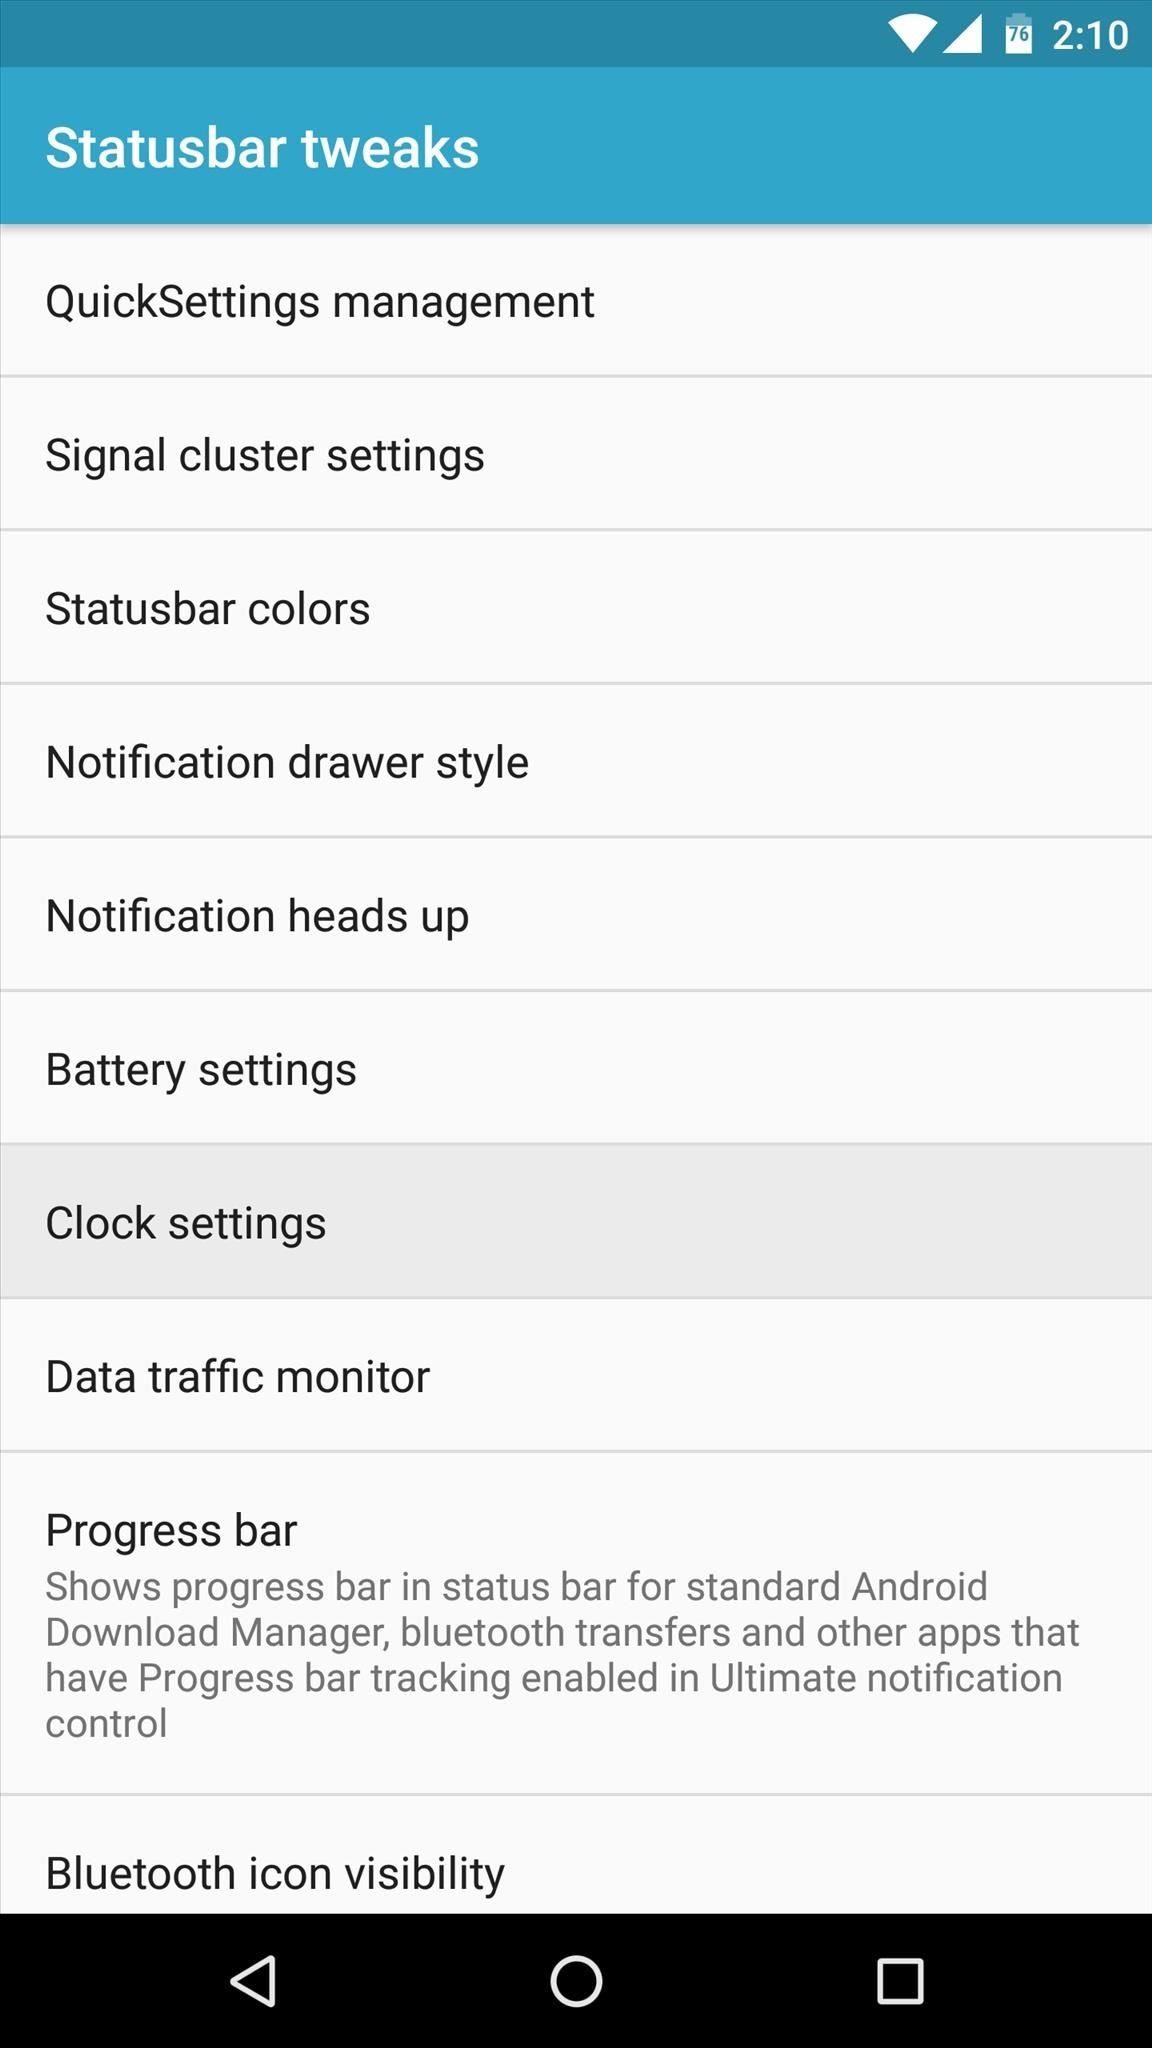
Next up is the "Statusbar tweaks" menu. Within this one, the first setting of note can be found under the "QuickSettings management" section.
Own Your Quick-Settings
From here, select the "Statusbar QuickSettings tiles" option, then you'll see a menu that lets you add, remove, or reorder the toggle switches in your Quick Settings menu. It's a great way to customize one of Android's most centralized menus, but it should be noted that this can cause conflicts if you've used Marshmallow's hidden System UI Tuner option to tweak your Quick Settings already.
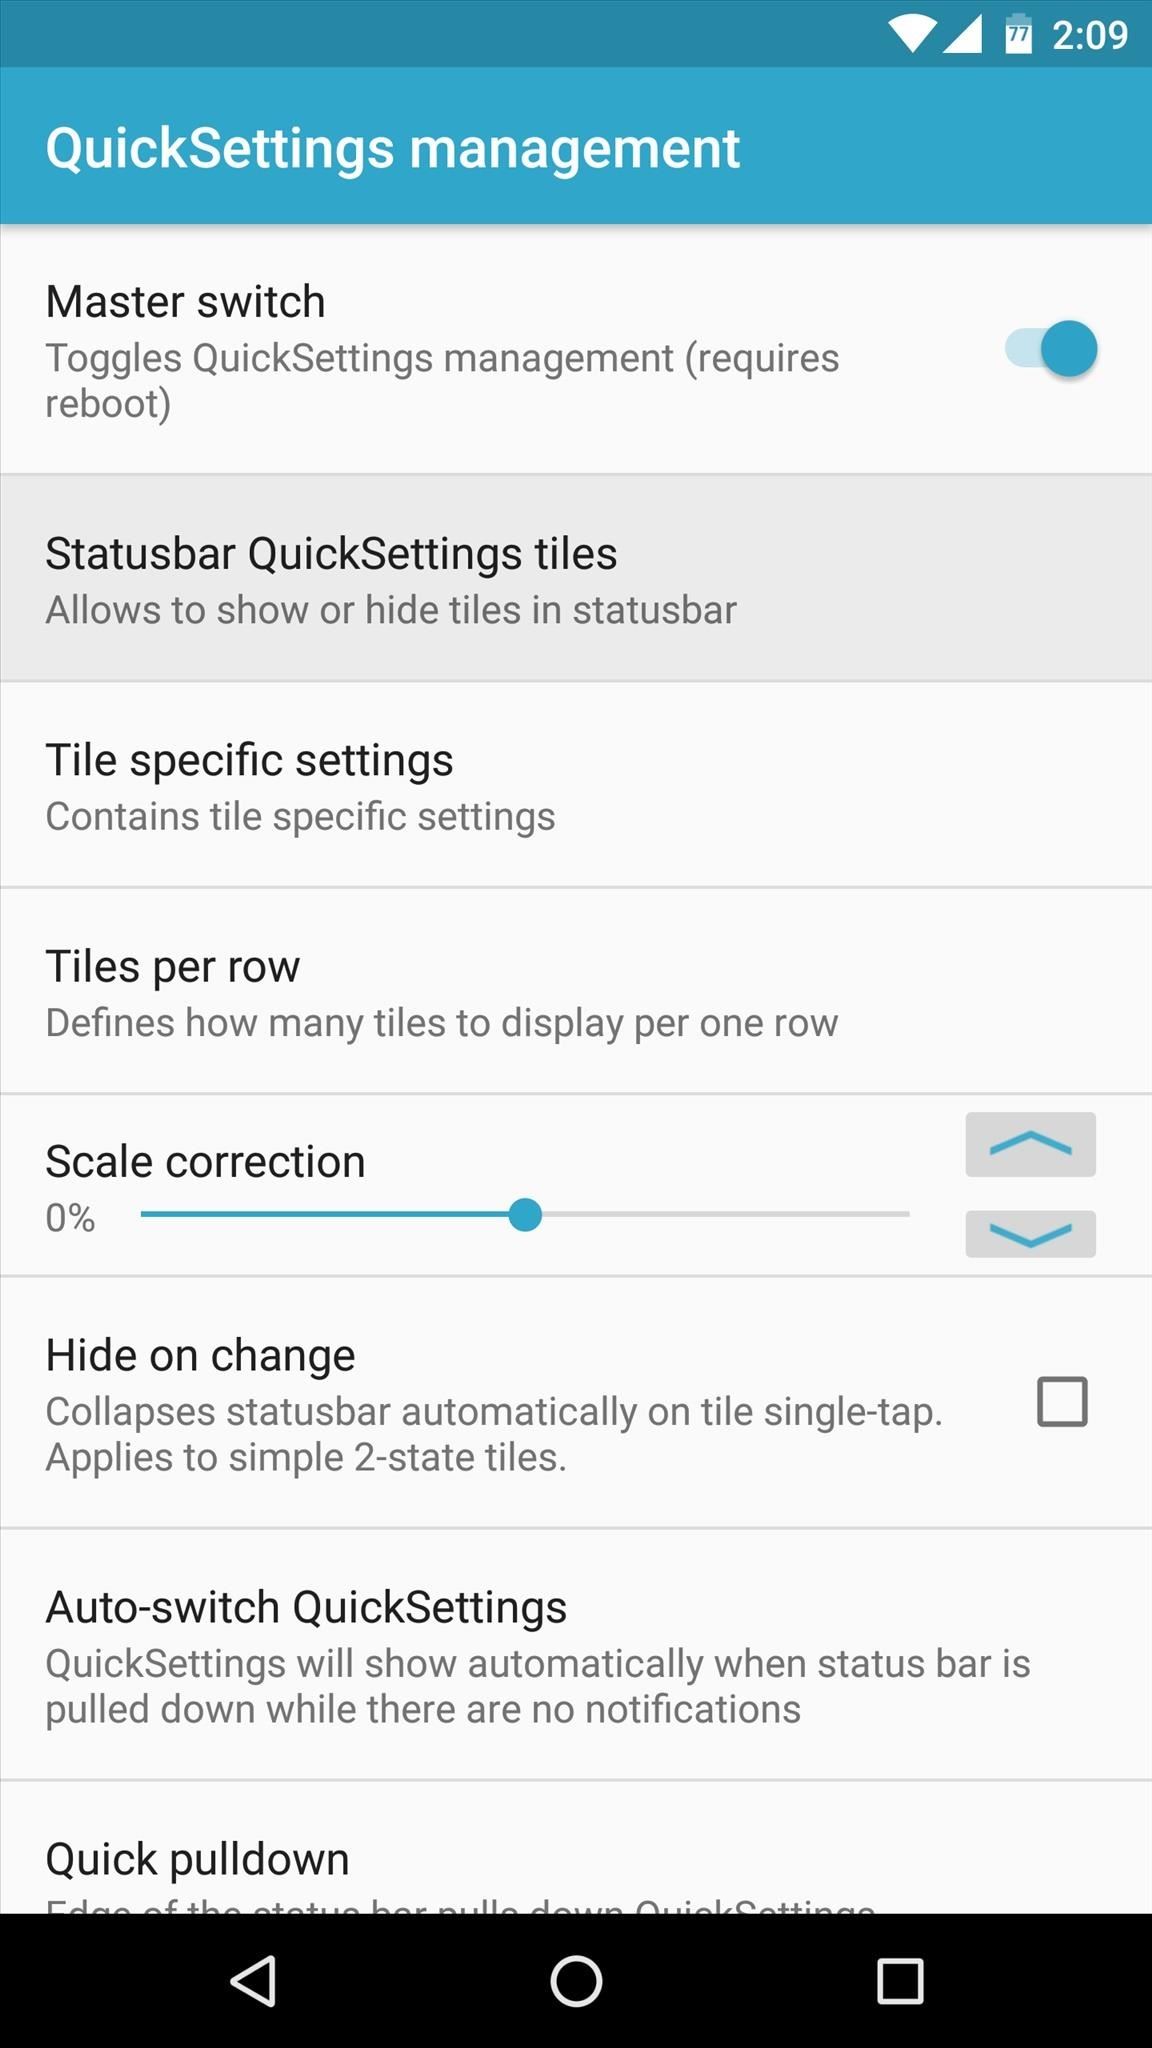
While you're still in the QuickSettings management menu, there's another option worth checking out. By default, you have to either swipe down twice from the top of your screen, or swipe down with two fingers to access Android's Quick Settings, and that's just too much work.
Access Quick-Settings Faster
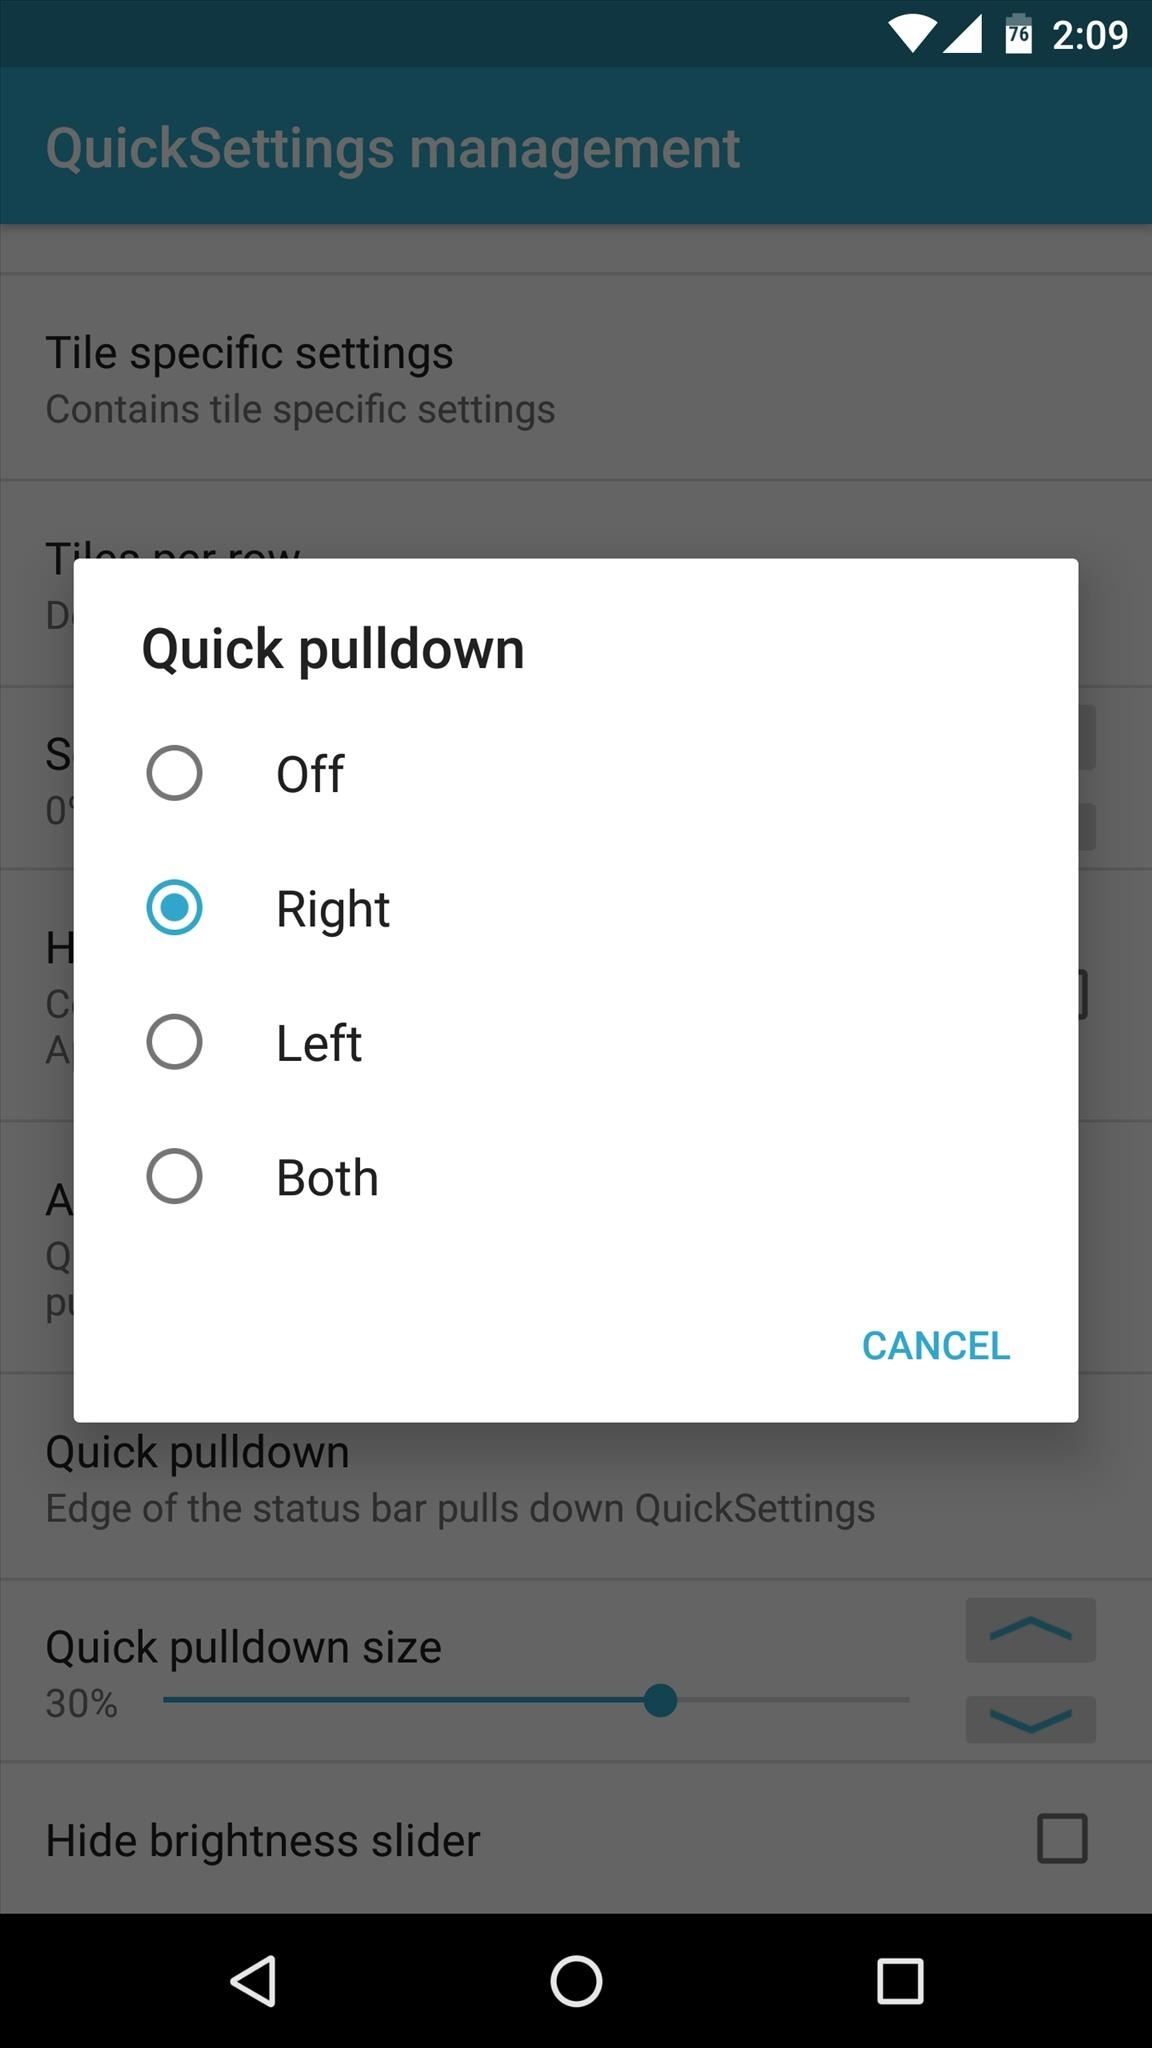
If you'd like to change that, select the "Quick pulldown" option, which lets you access Quick Settings in a single swipe from either the left or right edge of your status bar. From here, I'd recommend choosing "Right" as the Quick pulldown edge, because this is more in line with the way Android tablets work, and the options you adjust in the Quick Settings menu are already represented by icons on the right side of your status bar.

Customize the Clock
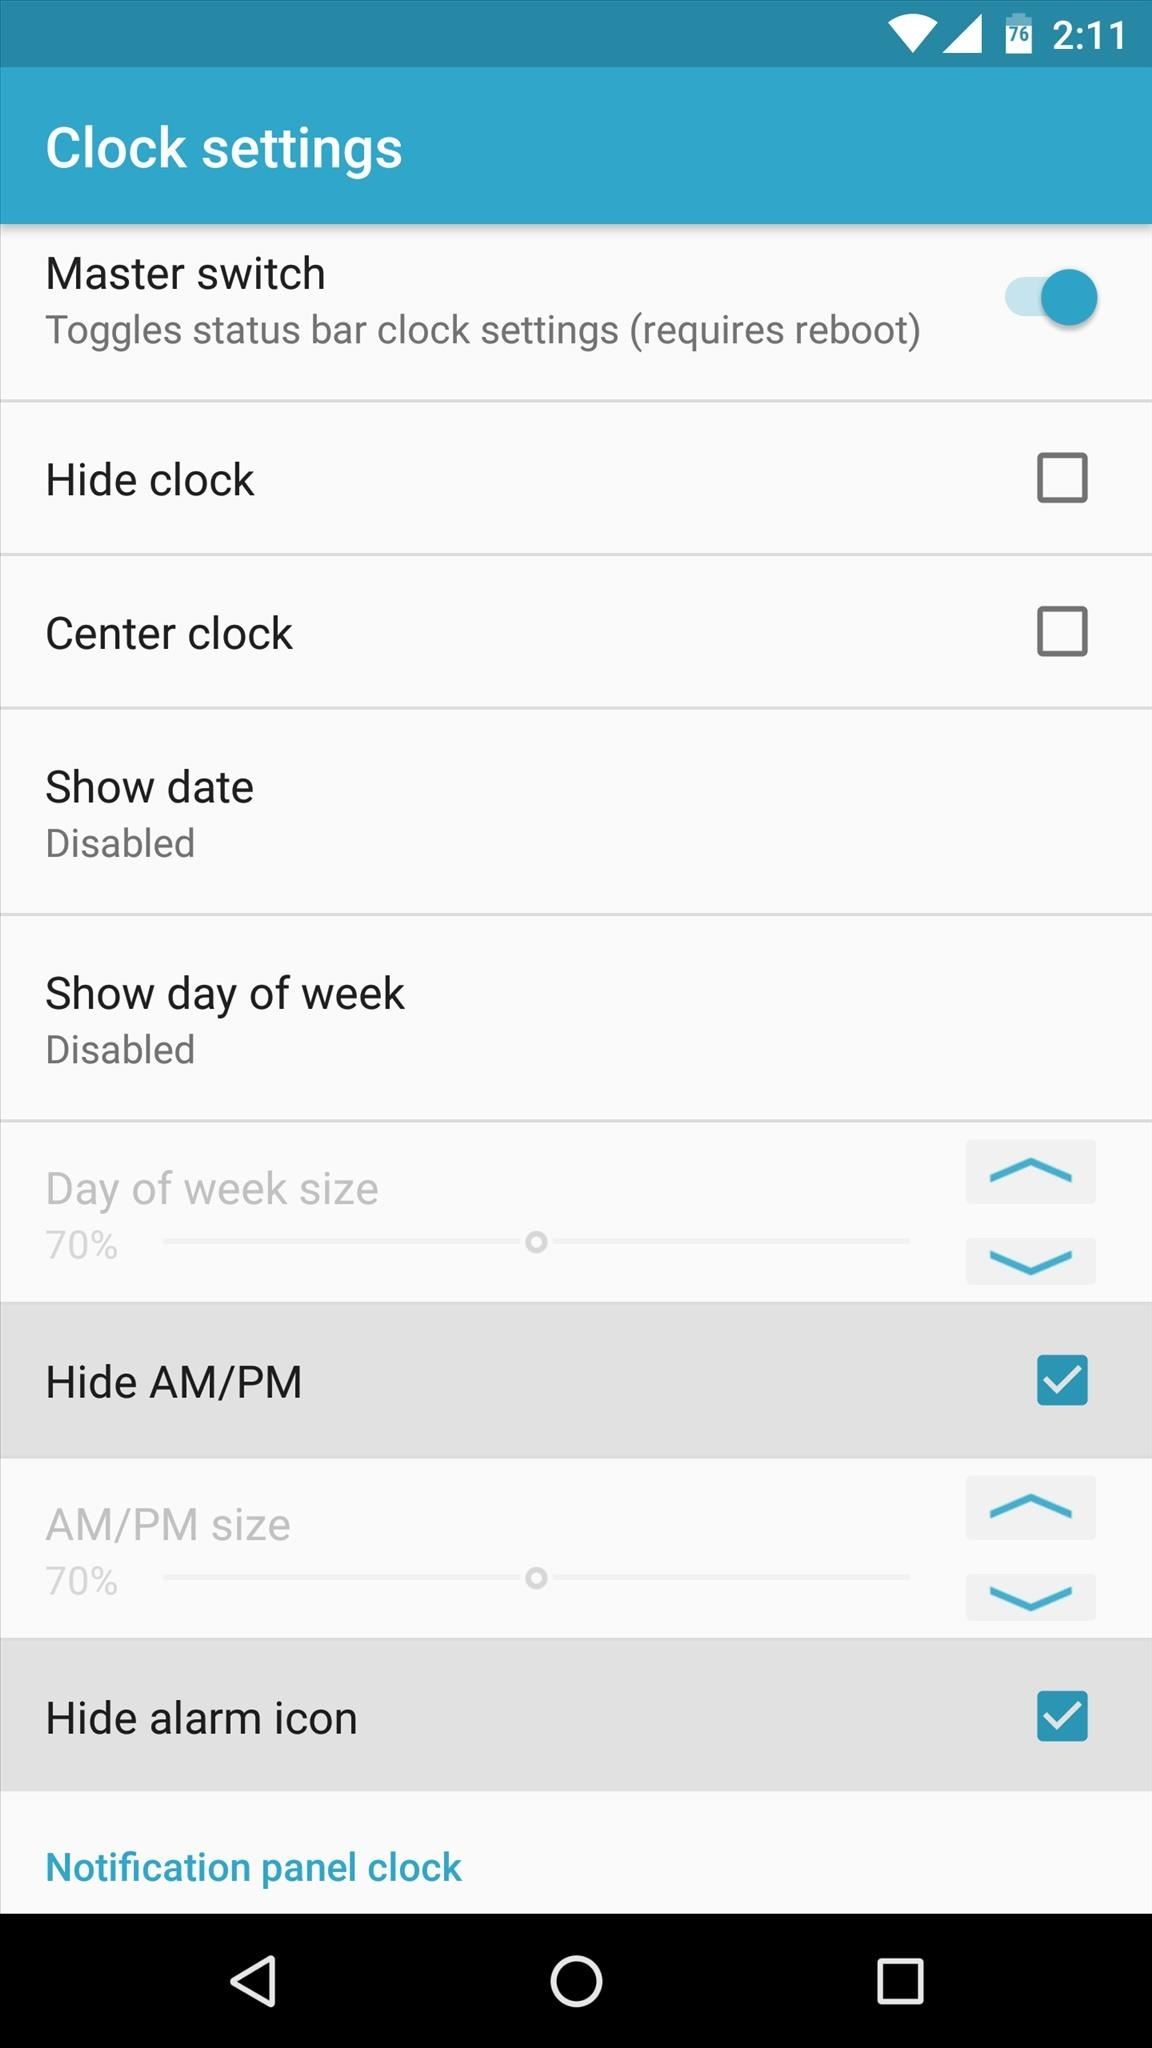
Backing out to the main Statusbar tweaks menu, the next noteworthy options can be found under the "Clock settings" category. First, if you use a 12-hour clock format, tick the box next to "Hide AM/PM" to get rid of the status bar indicator that tells you whether it's dark or light outside—something your eyes already do for you.
Hide Alarm Icon
Then beneath that, the "Hide alarm icon" option gets rid of the indicator that appears in your status bar when you have an alarm set. This is useful for freeing up space in the status bar, especially if you use your phone as your main alarm clock.
Tune Brightness from the Status Bar
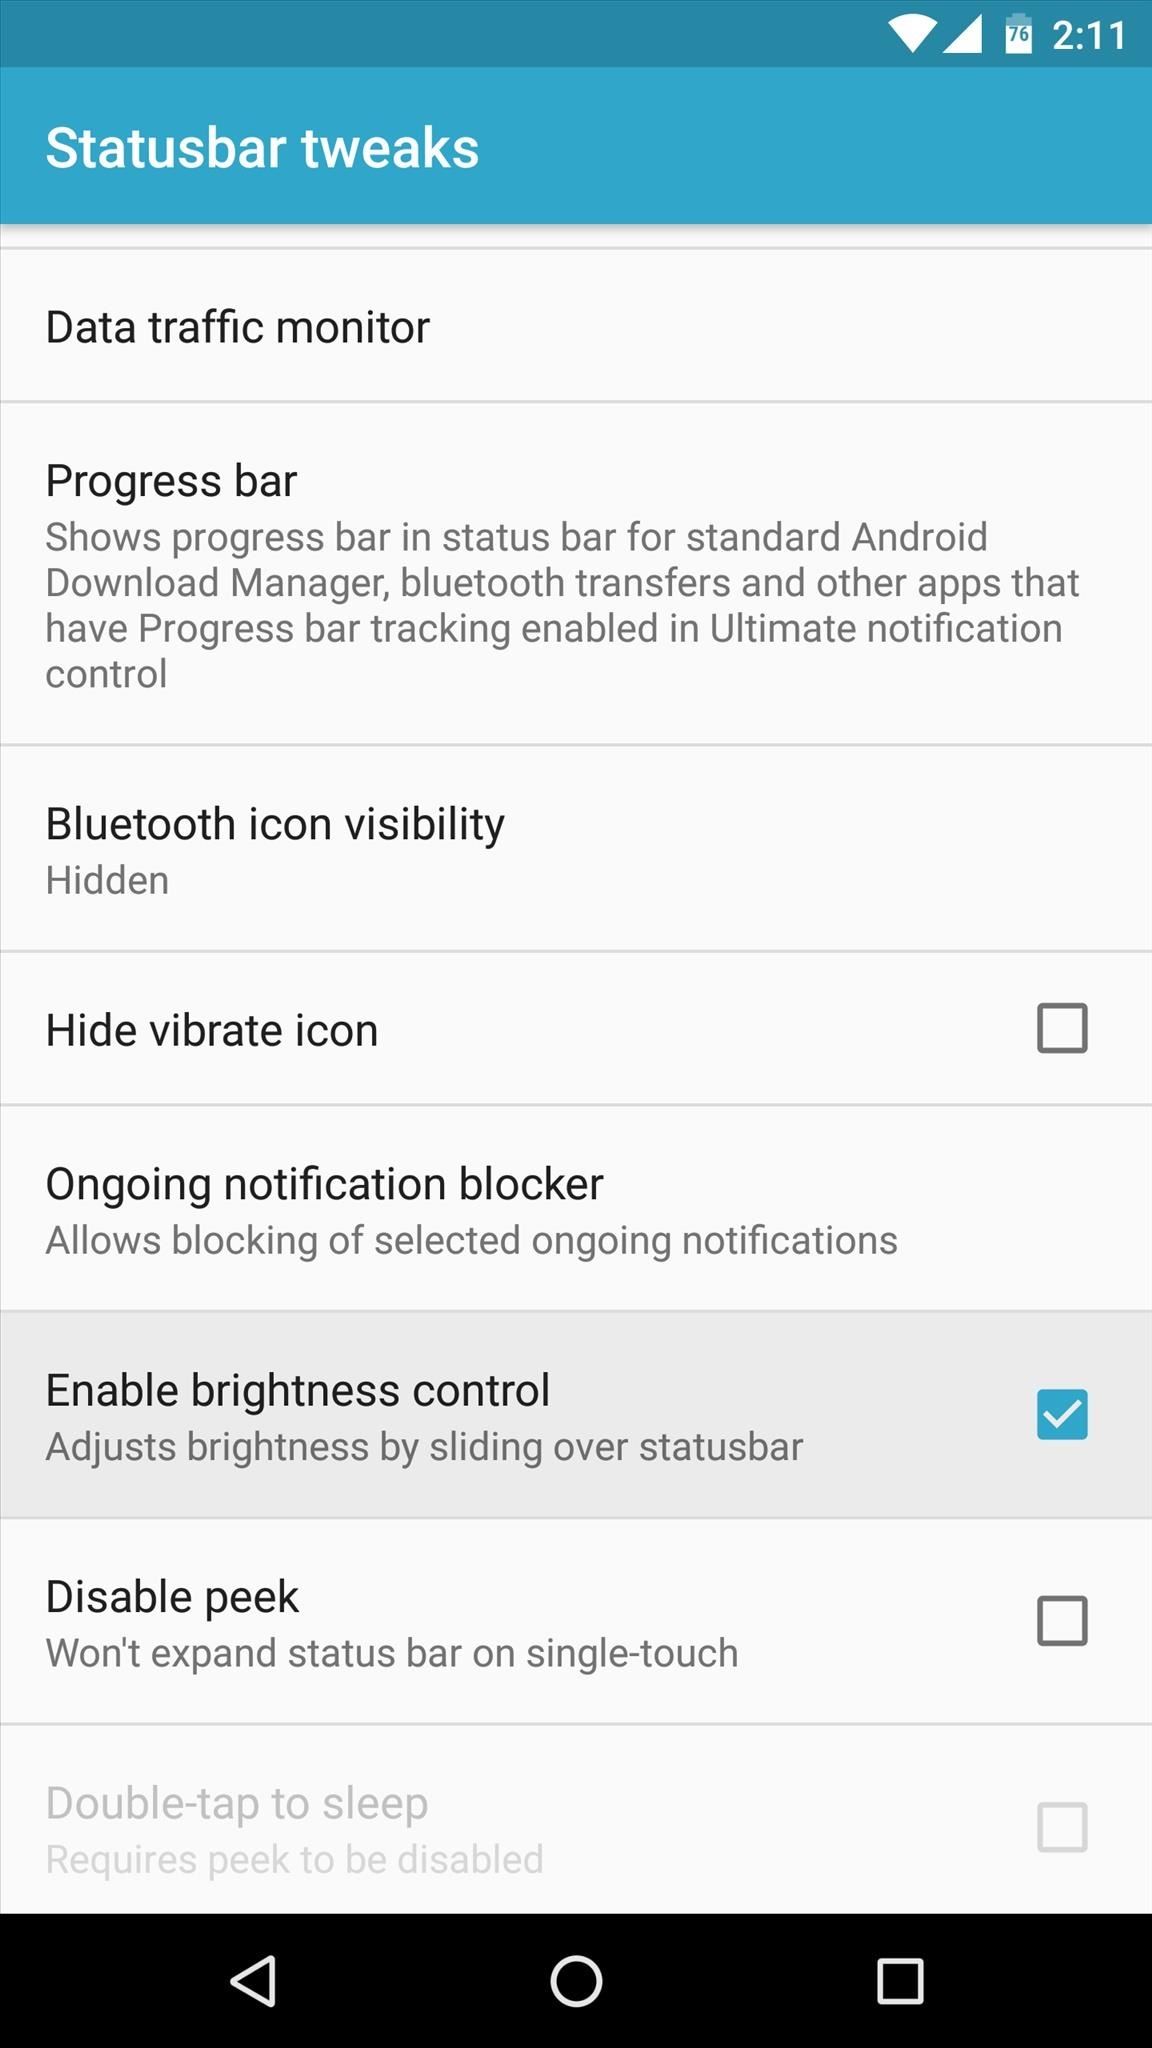
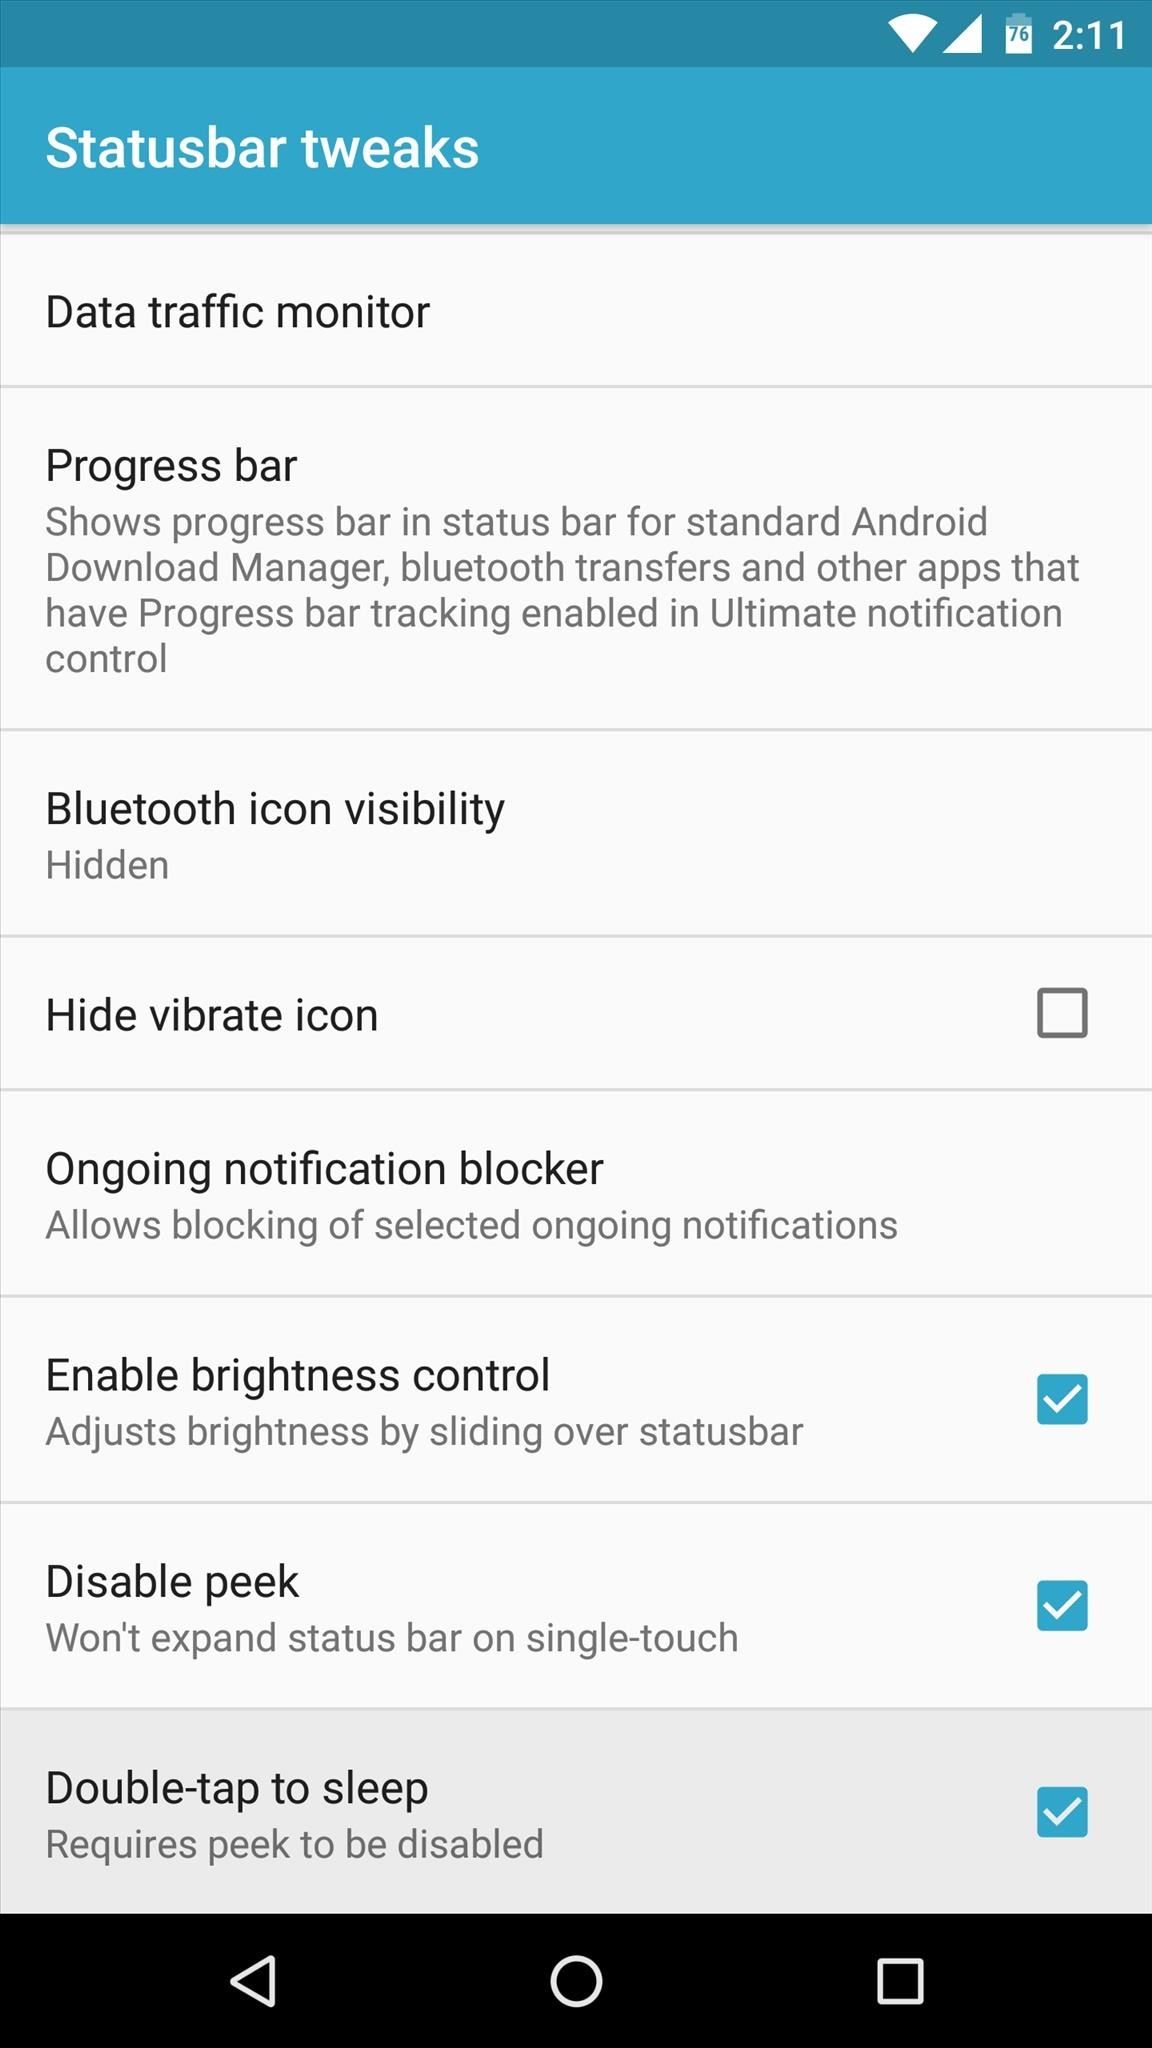
Finally, towards the bottom of the main Statusbar tweaks menu, the "Enable brightness control" option is an interesting one. If enabled, this will allow you to simply slide your finger across the status bar to adjust your display brightness from any screen.
Double-Tap to Lock
From there, if you tick the box next to "Disable peek," you can then enable the "Double-tap to sleep" option, which will let you lock your device from any screen by tapping the status bar twice.
Navigation Bar Tweaks
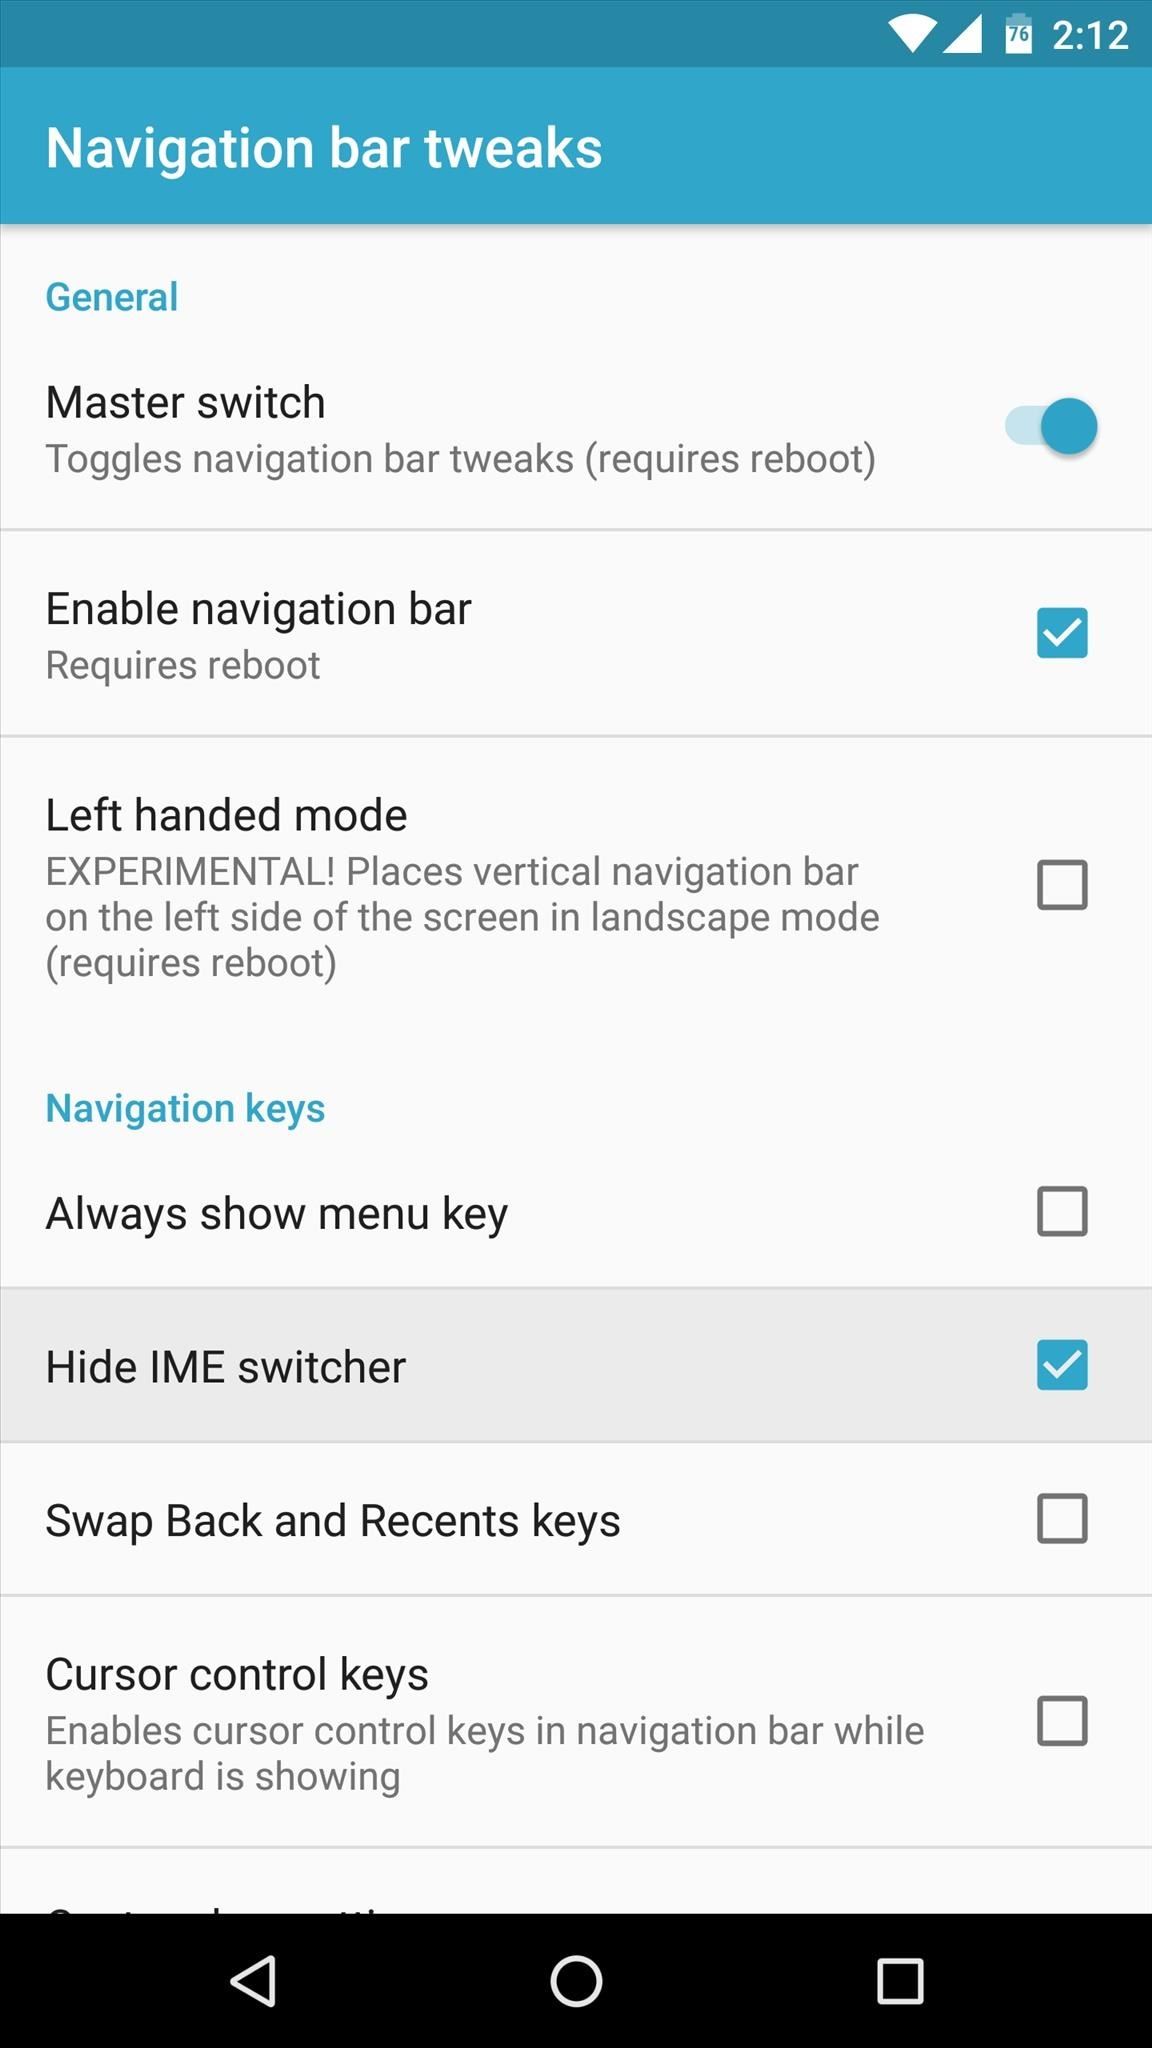
The next main category worth visiting is the "Navigation bar tweaks" menu—one you'll definitely want to check out if you have on-screen navigation buttons. Before you can make any changes here, you'll need to enable the "Master switch" option at the top the screen.
Hide the Keyboard Switcher
From there, you'll probably want to tick the box next to "Hide IME switcher," which gets rid of the icon that appears in your navigation bar when you're using a third-party keyboard.
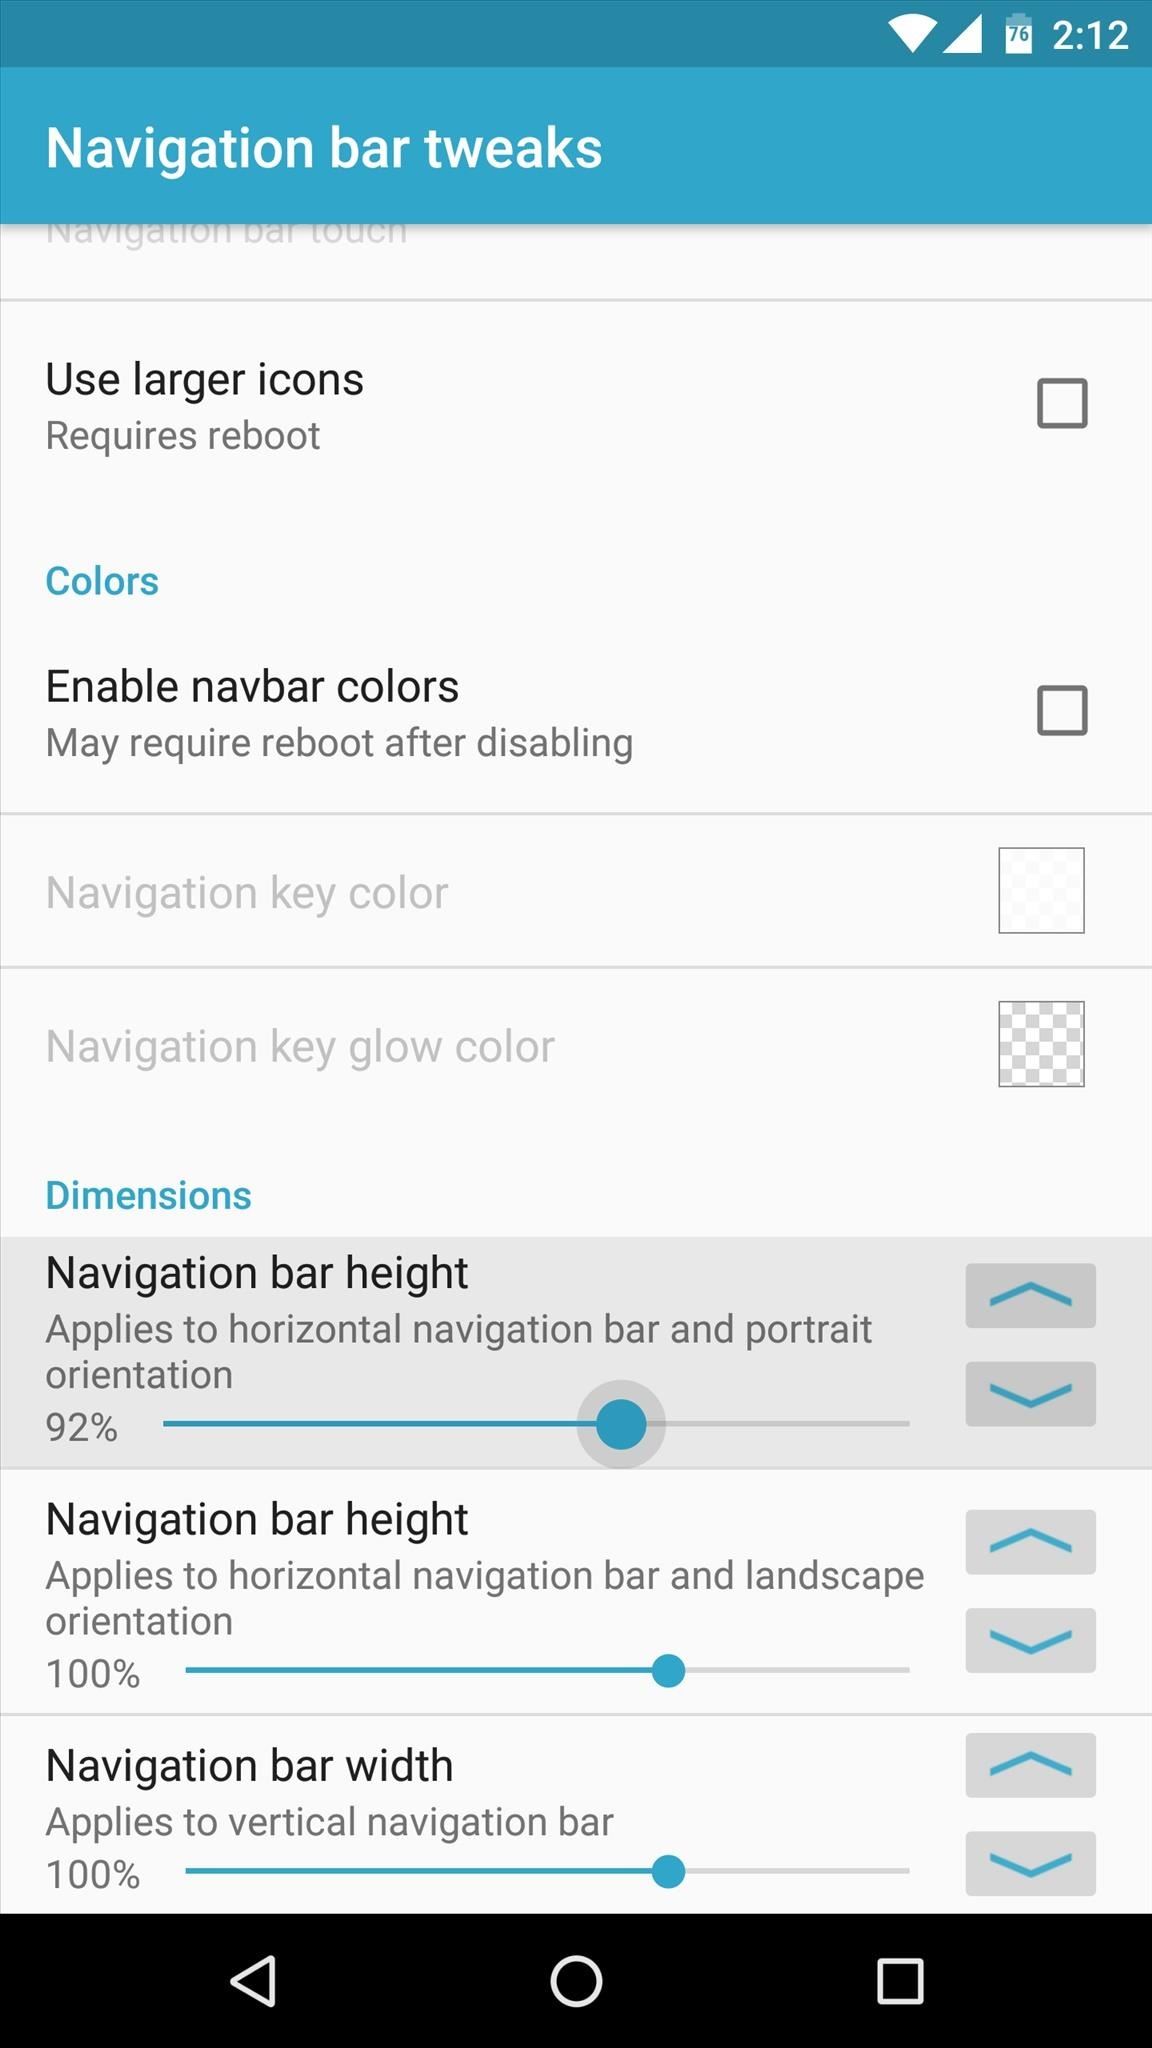
Change Navigation Bar Size
Then finally, three sliders towards the bottom of this menu allow you to adjust the size of the navigation bar itself. Here, you can shrink the height of both portrait and landscape navigation bars, plus you can adjust the width and spacing of the buttons themselves.
Power Tweaks
Next up, the "Power tweaks" menu in GravityBox has a pair of noteworthy options.
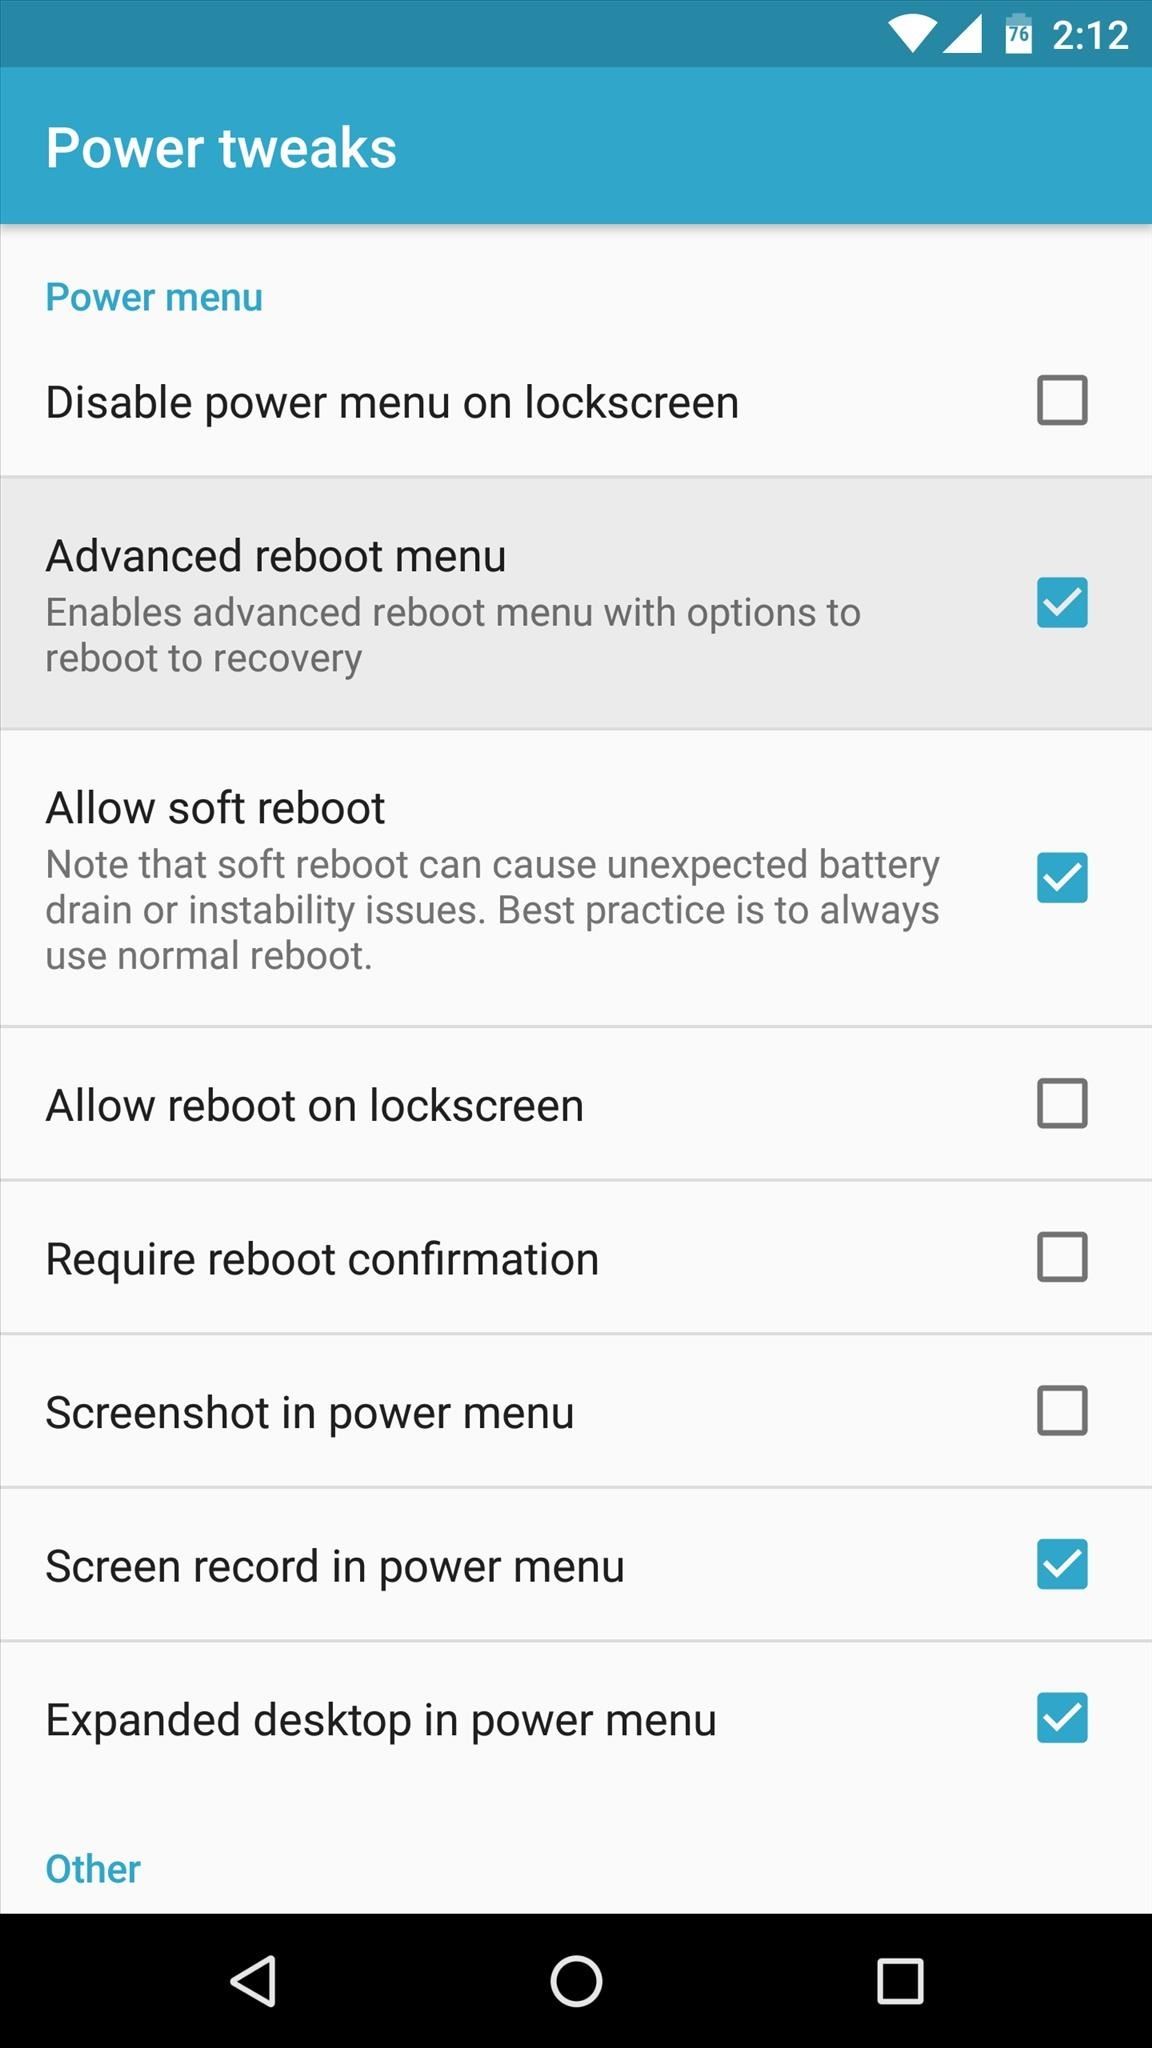
Add Options to Power Menu
First, tick the box next to "Advanced reboot menu," then the standard popup that appears when you long-press your power button will now have options for rebooting your device directly into recovery mode or the bootloader menu.
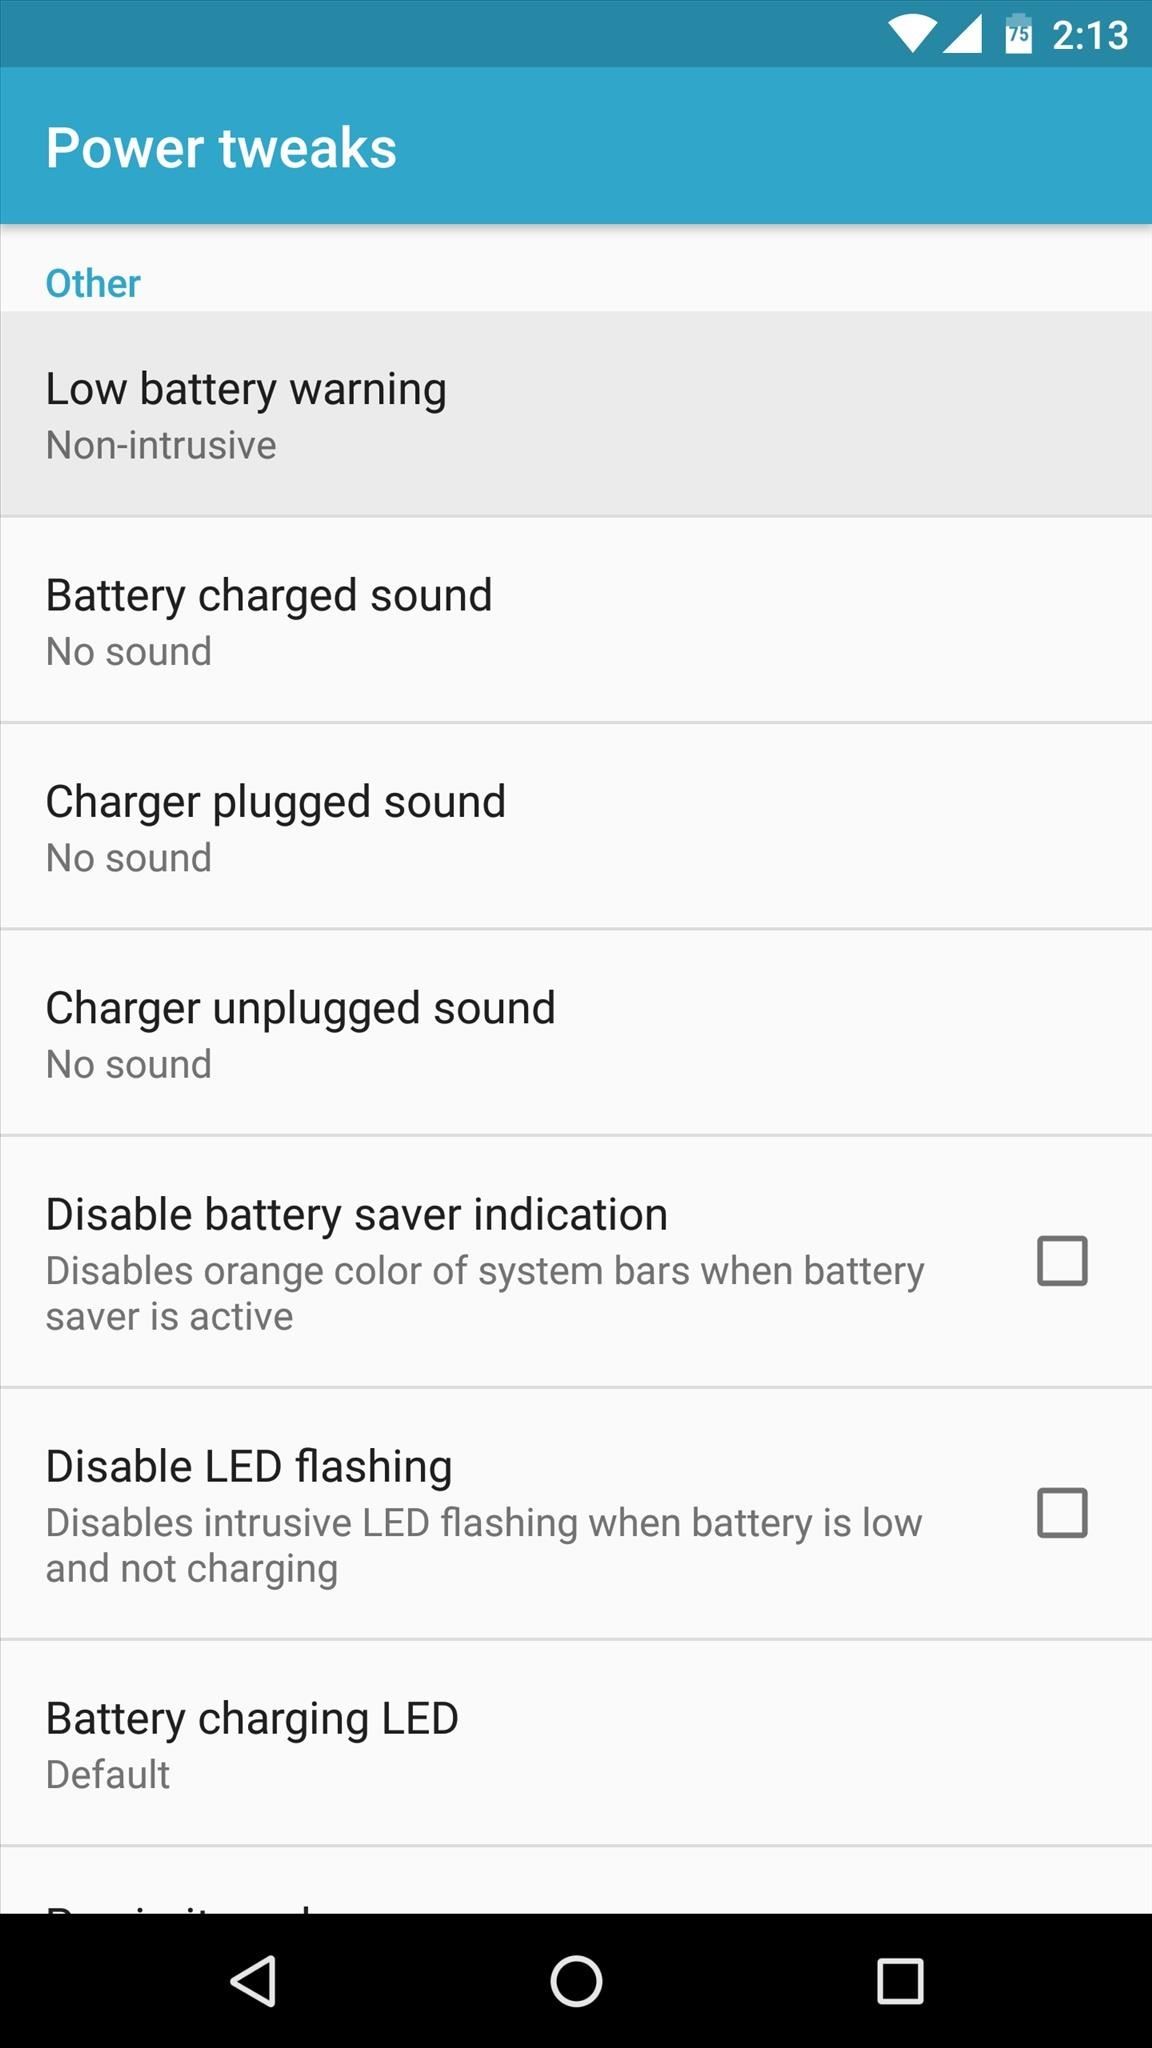
Get Rid of 'Low Battery' Warning
Then, if you're like me and you keep a close eye on your device's battery life already, the popup that appears when you hit 15% is probably just a nuisance to you. To remedy that, I'd recommend setting the "Low battery warning" option to "Non-intrusive," which will cause this warning message to appear as a simple notification in your status bar instead.
Media Tweaks
Here, you can adjust several options for media playback on your device.
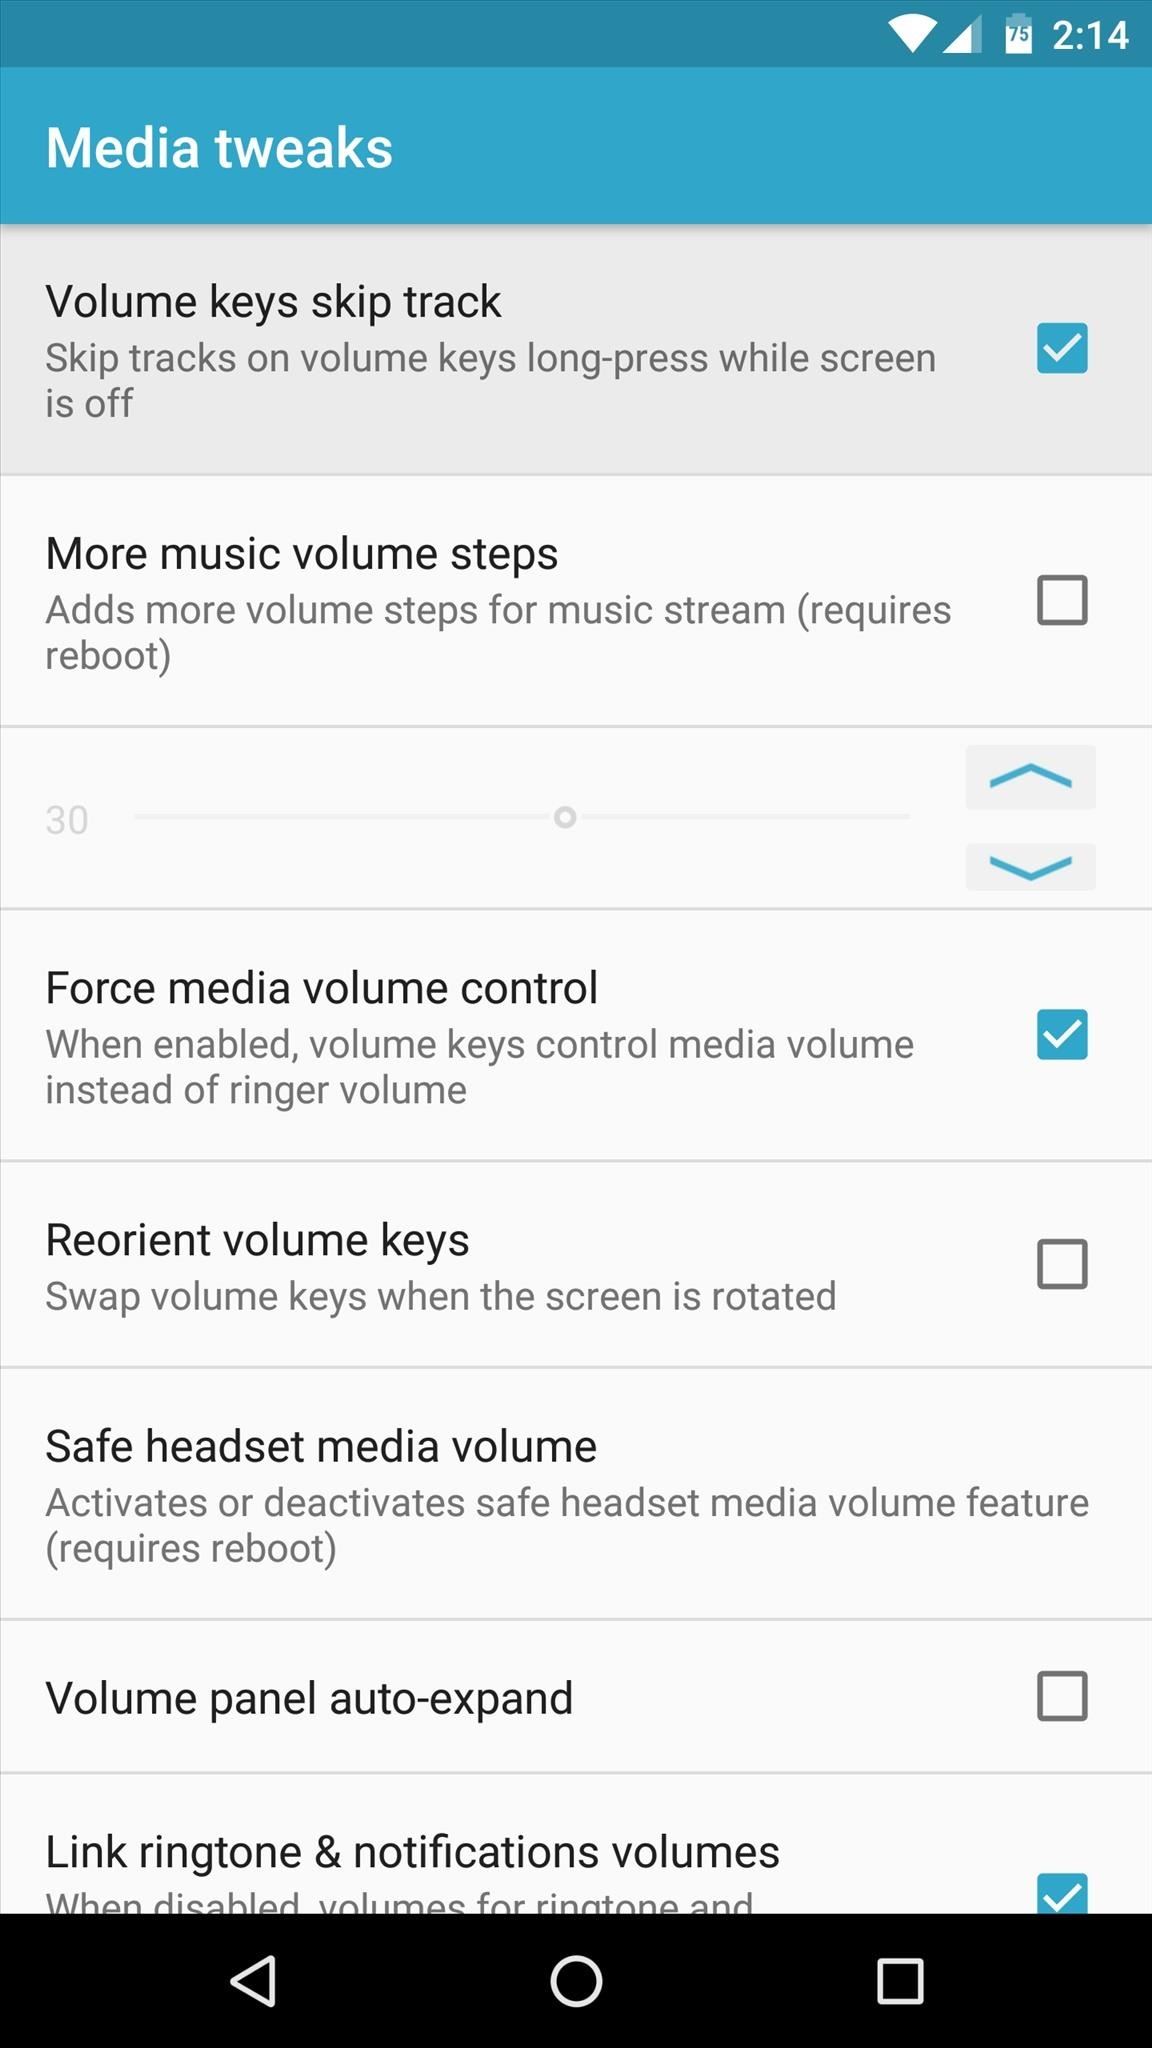
Skip Tracks with the Volume Buttons
Under the "Media tweaks" menu, the "Volume keys skip track" option is a fun one. With this enabled, you can skip to the next track in your playlist without ever turning your screen on—just long-press the volume up button to skip ahead, or do the same for the volume down button to flip back to the last track.
Set Media Volume as Default
Then perhaps one of my biggest gripes with Android is how the volume buttons control notification volume by default, despite the fact that media playback volume needs to be adjusted far more frequently. To remedy this, simply tick the box next to "Force media volume control," and from now on, your volume buttons will always adjust media volume by default.

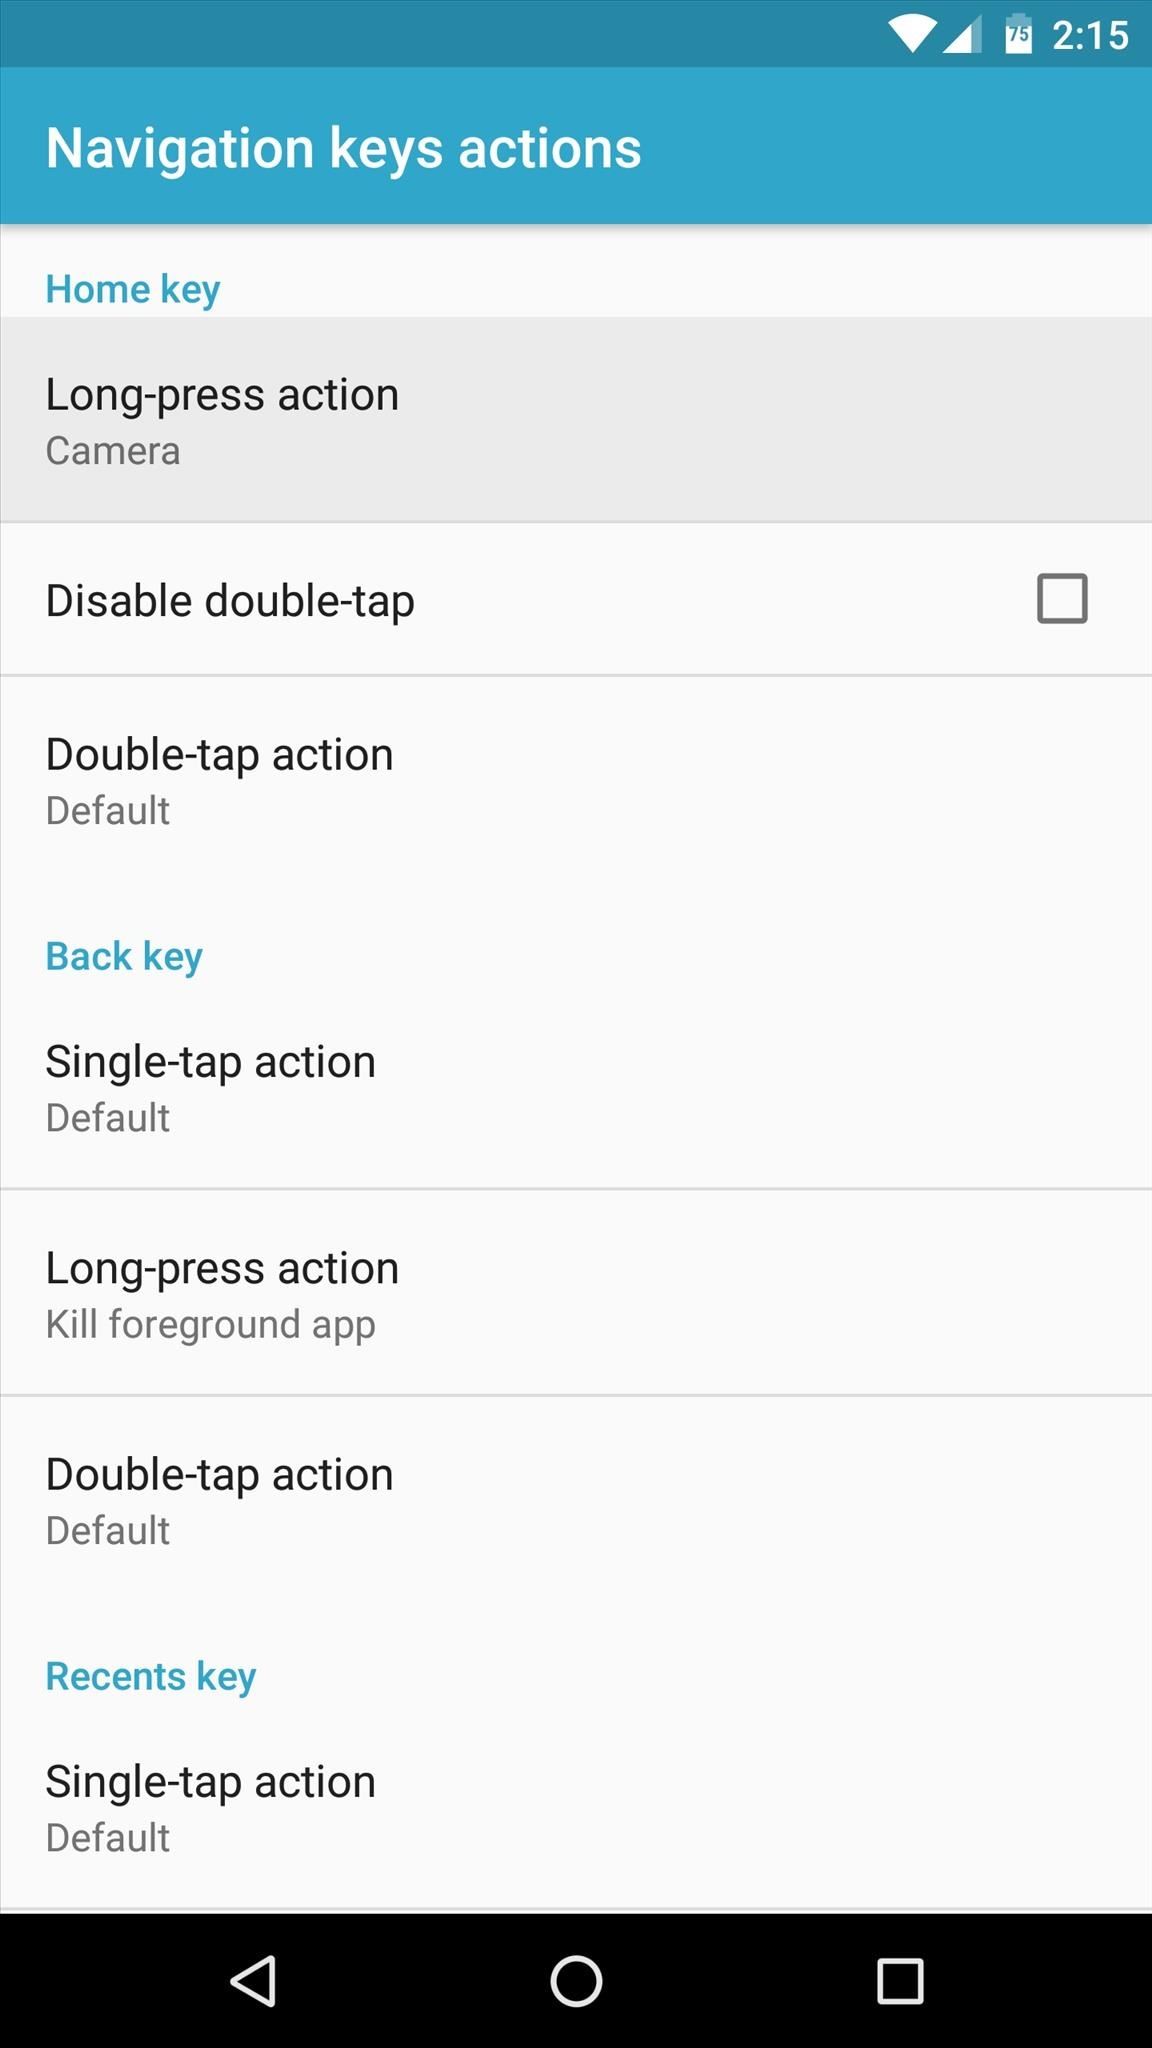
Navigation Keys Actions
From there, the "Navigation keys action" menu has some useful tweaks, but most require that you've enabled the "Master switch" option under "Navigation bar tweaks."
Add Actions to the Navigation Bar
Mainly, you can assign custom long-press and double-tap actions for each of your navigation buttons, and the setup process is extremely straightforward.
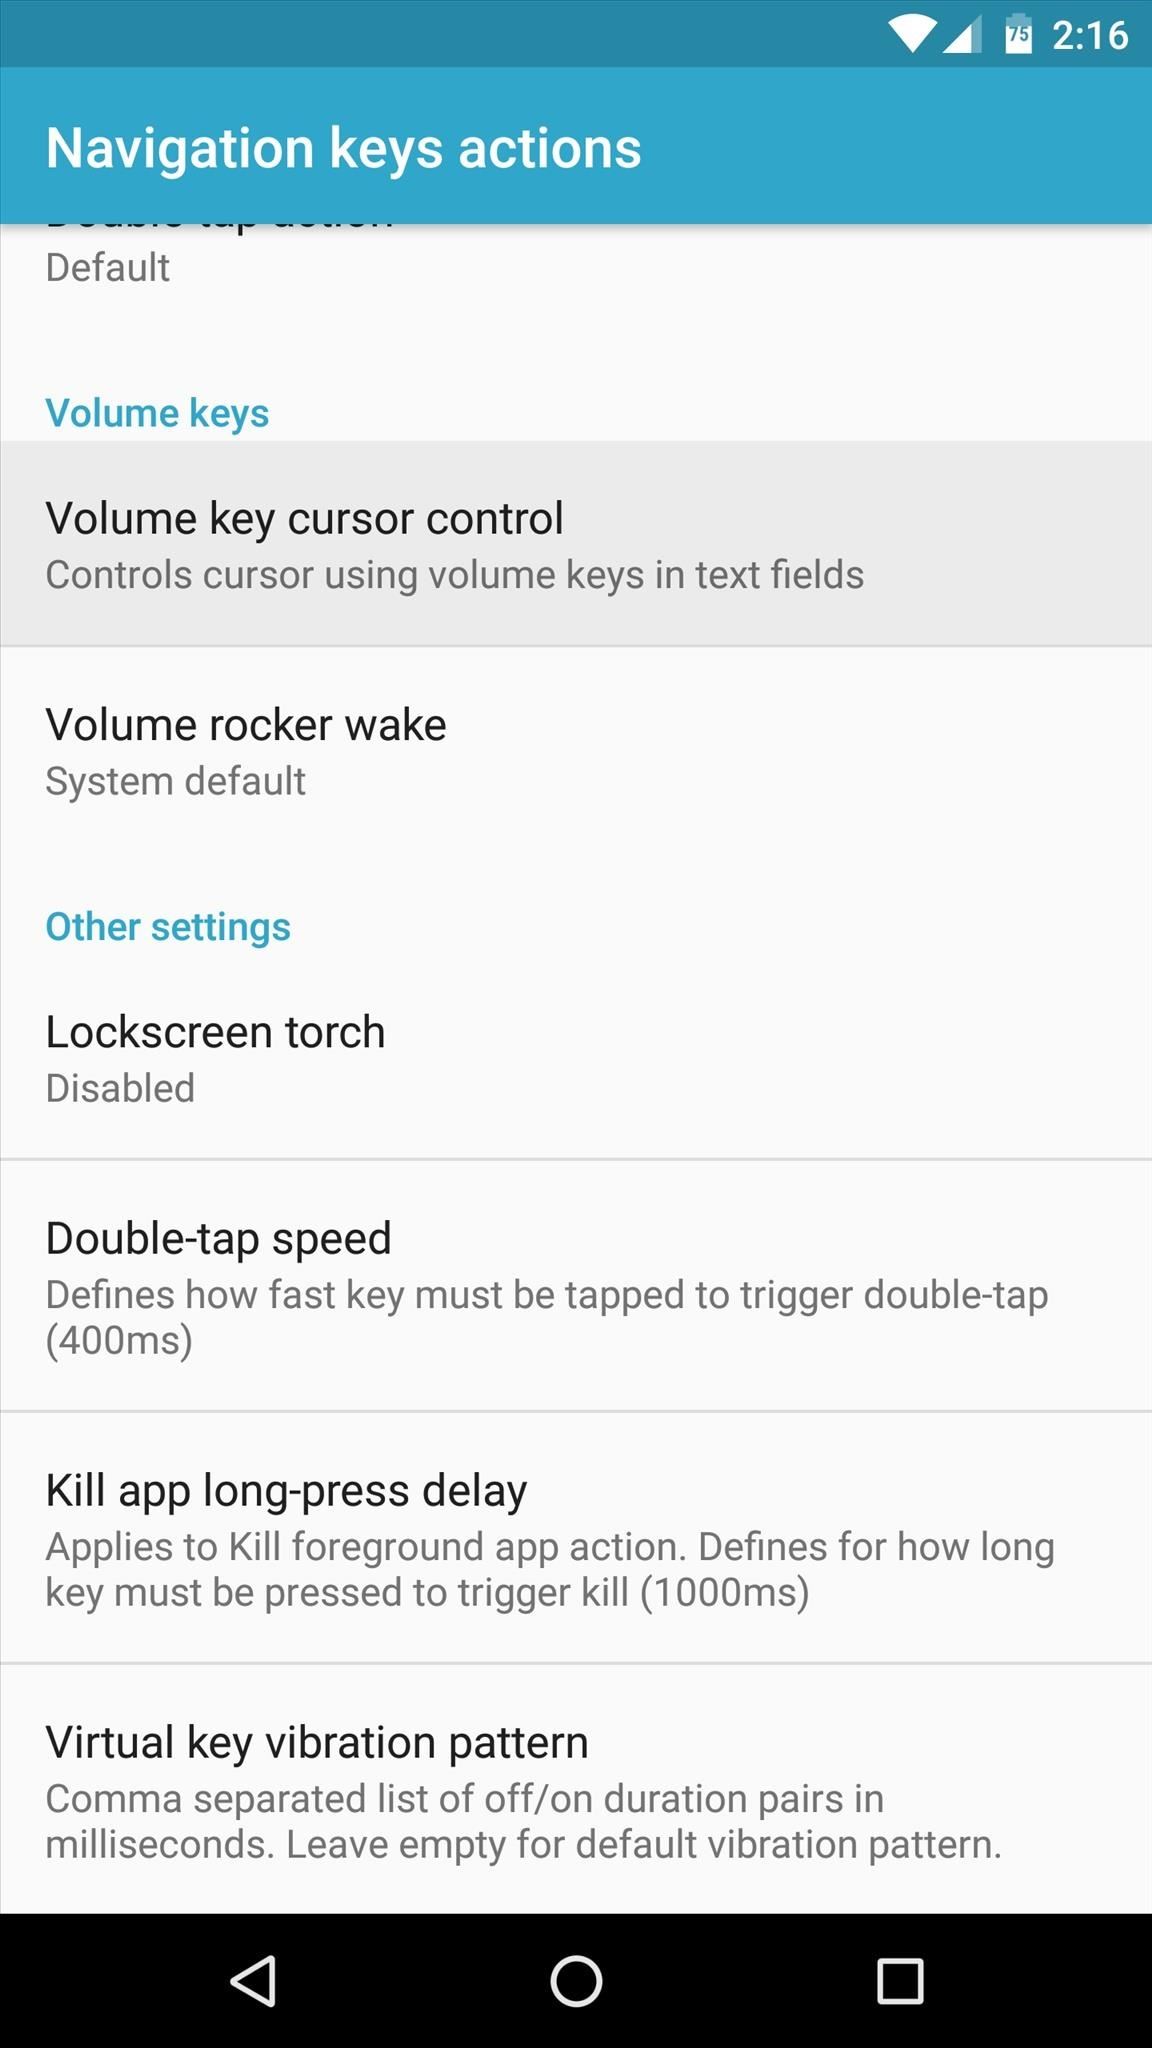
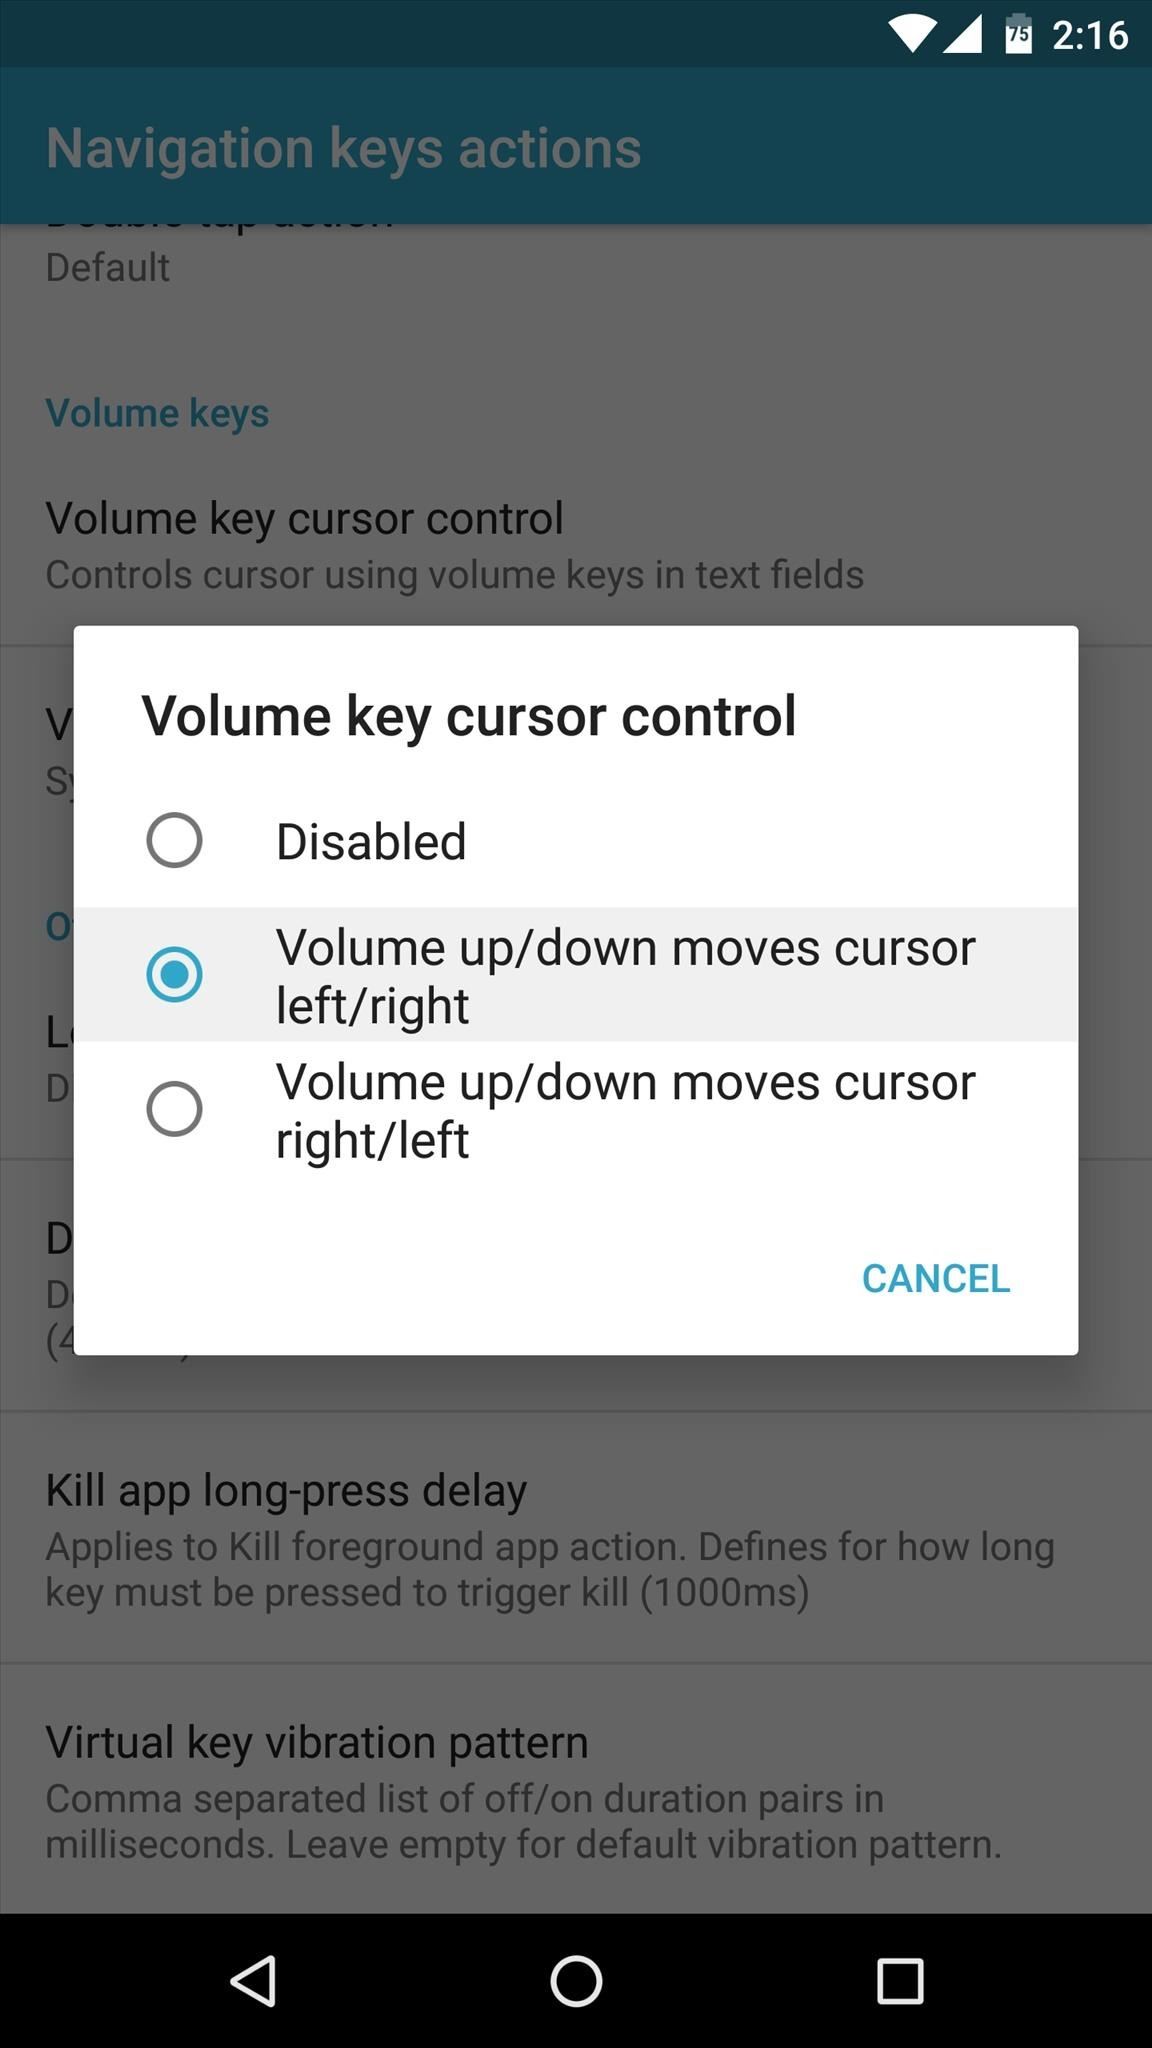
Control Cursor with Volume Keys
But the most interesting option in this menu is "Volume key cursor control." Tap this one, then select "Volume up/down moves cursor left/right," and from now on, when you're typing in any text field, you can use your device's volume buttons to precisely move the cursor.
Miscellaneous Tweaks
The last GravityBox menu worth delving into is "Miscellaneous tweaks."
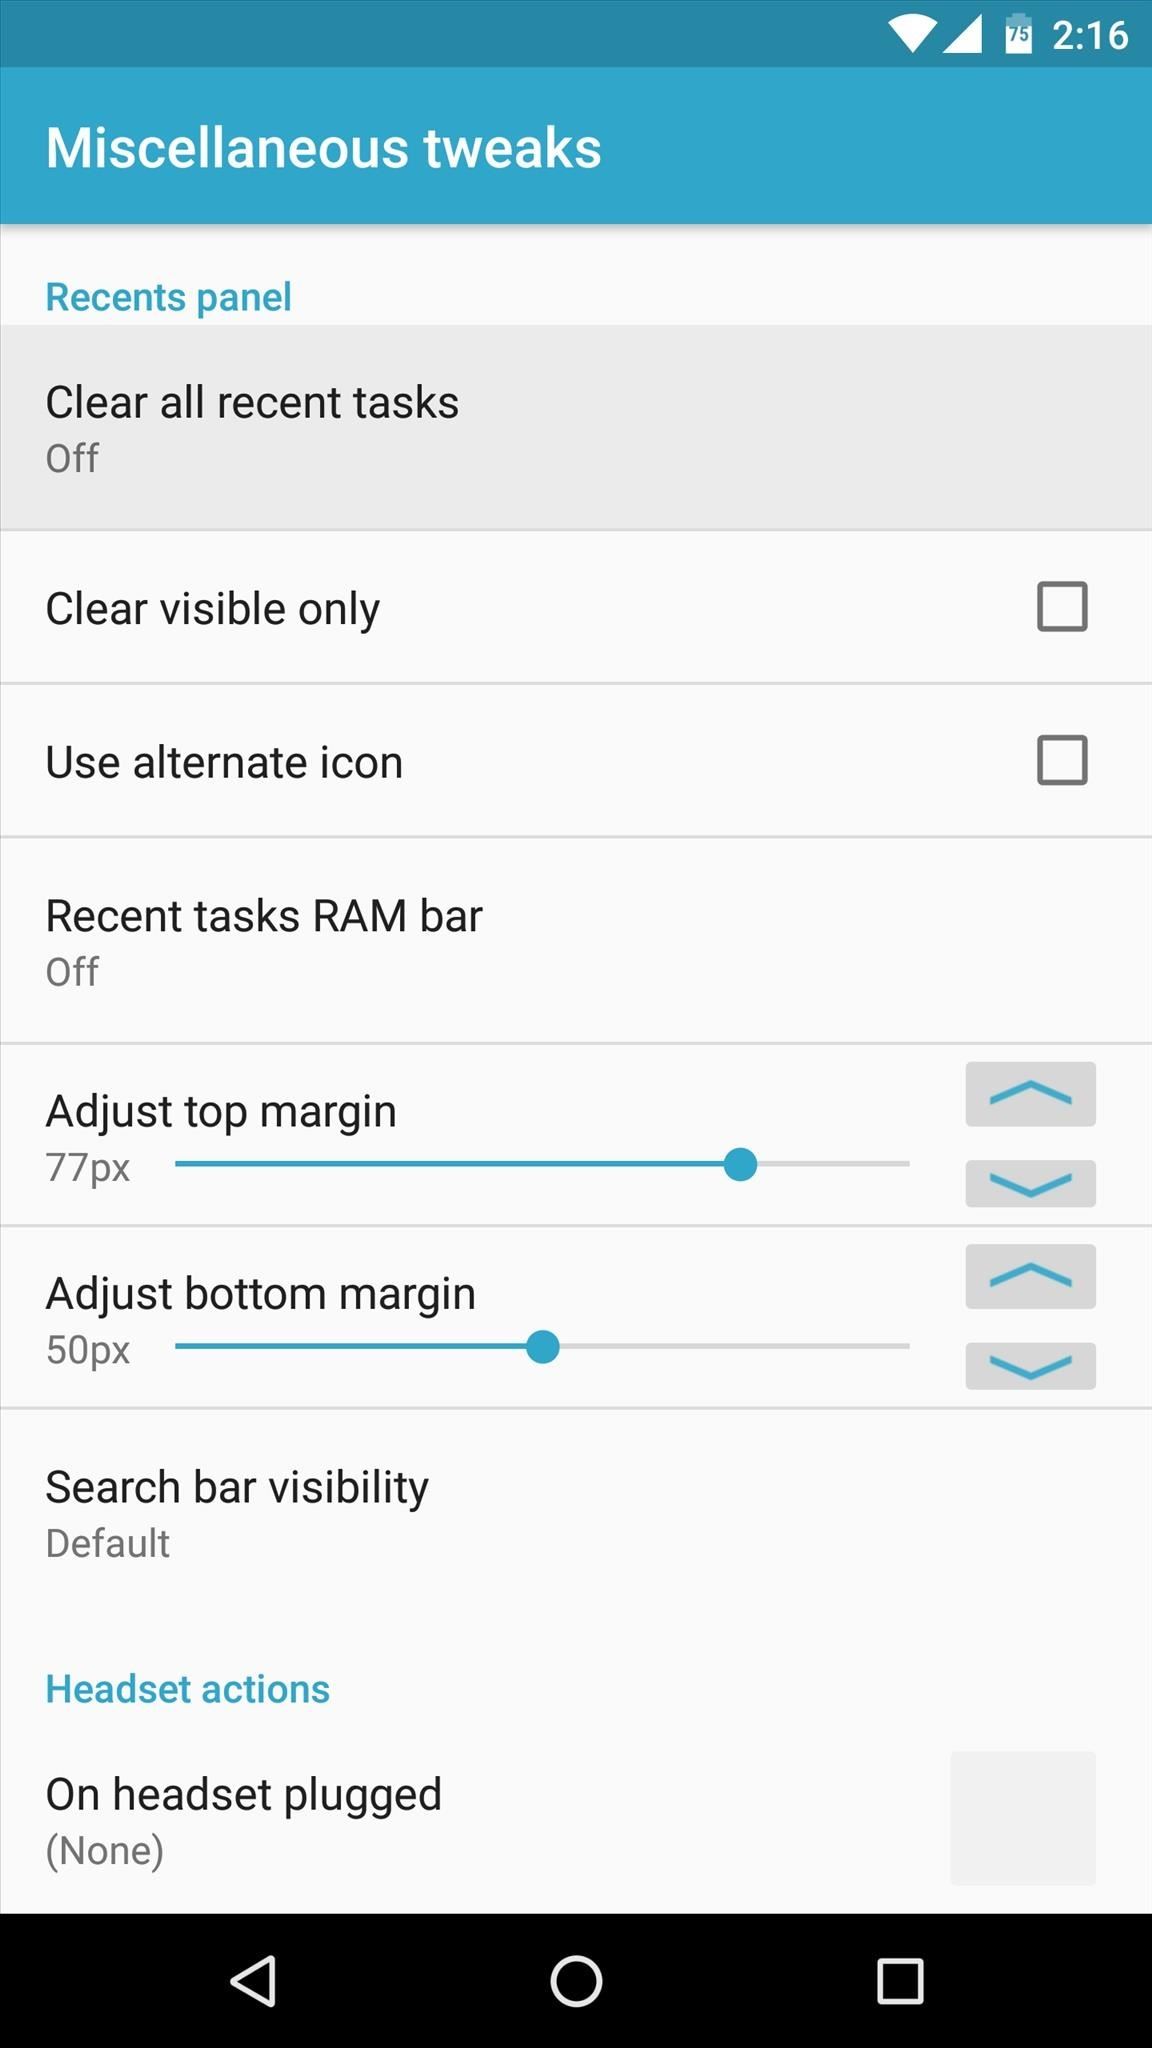
Clear All Recents
The most noteworthy option is "Clear all recent tasks," which places a button in your recent apps/overview menu that clears away all of the entries in one tap.
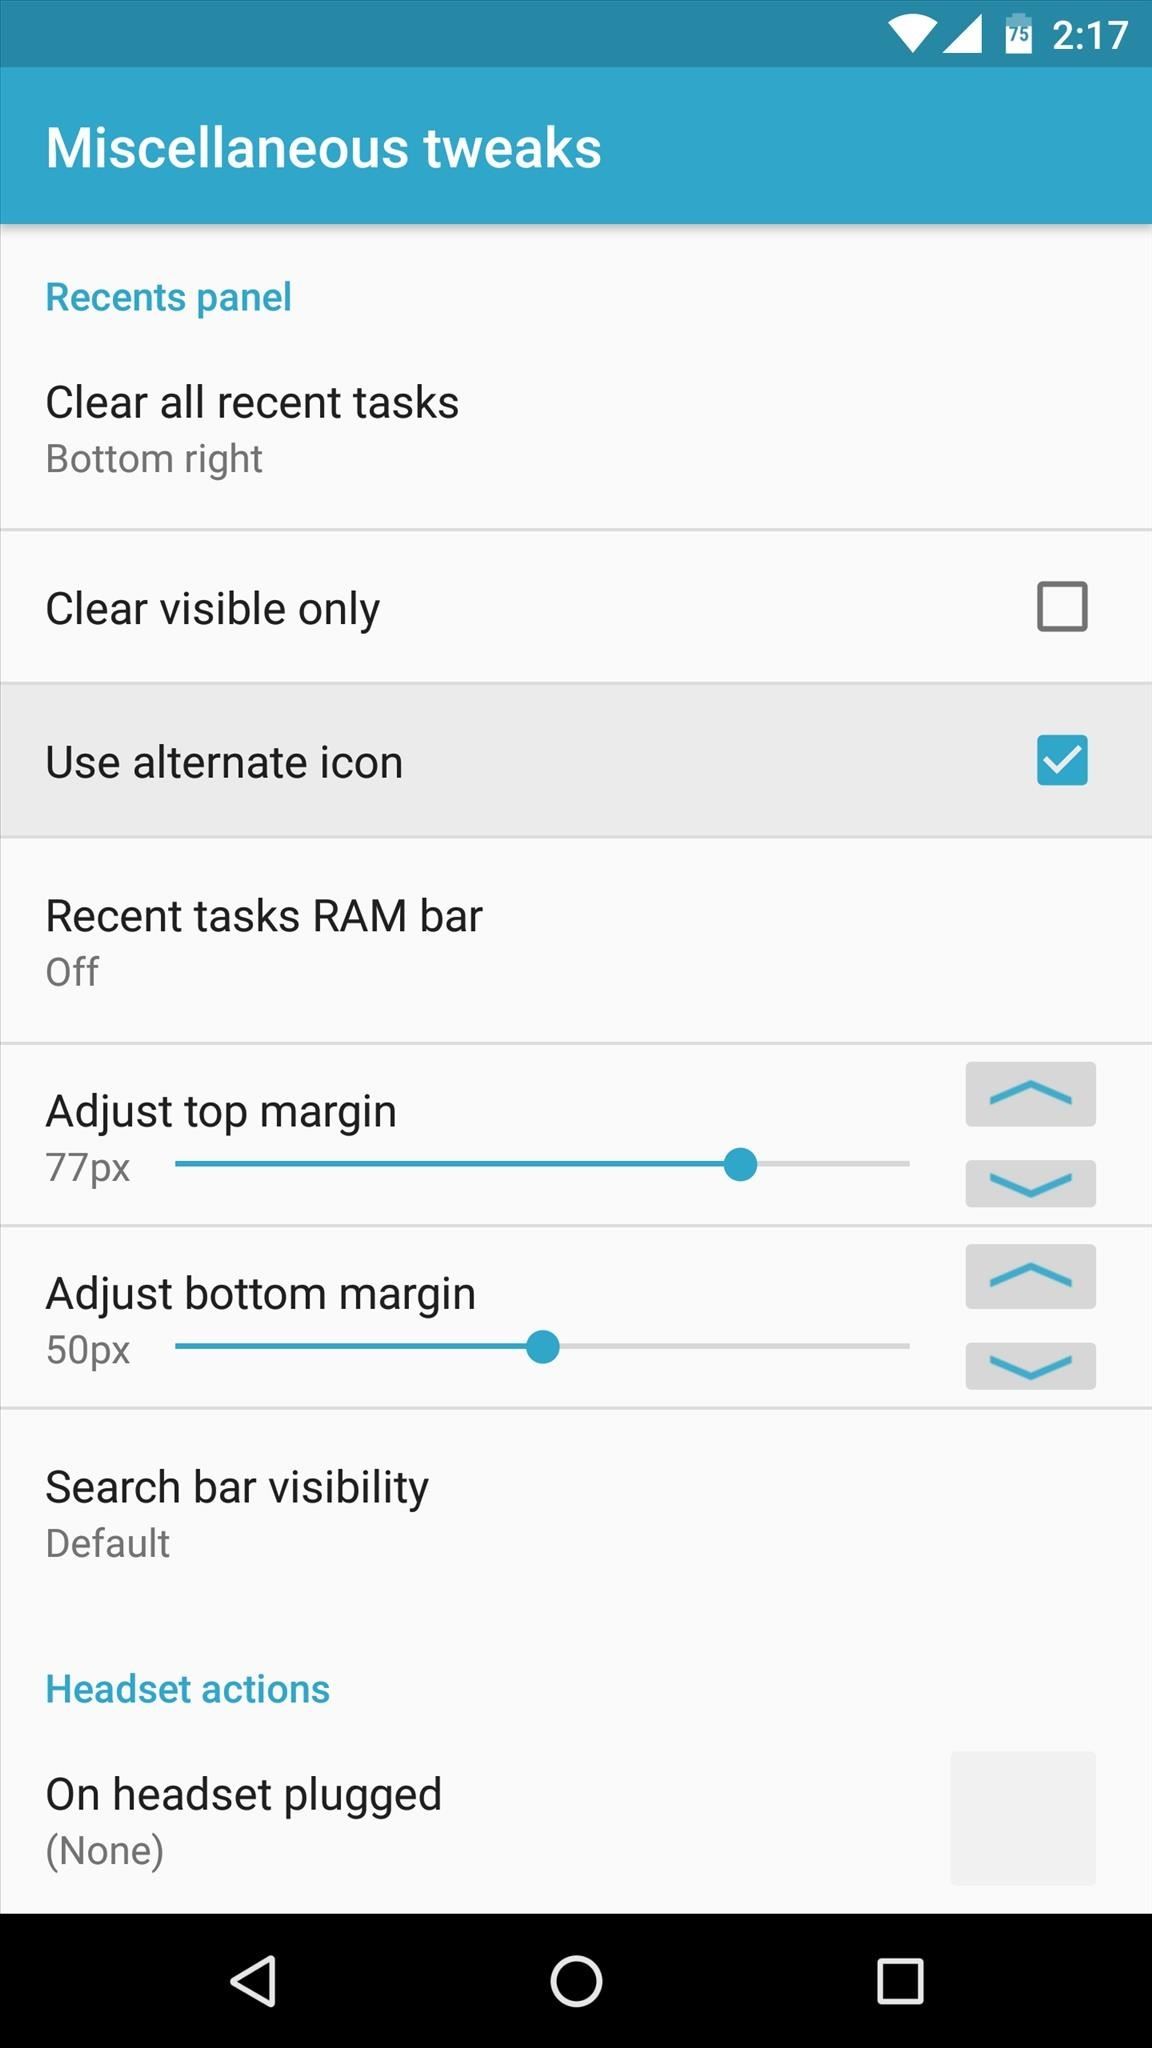
However, this button is white by default, which makes it hard to see in some cases. So to remedy that, I'd suggest ticking the box next to the "Use alternate icon" option, which gives the "Clear all" button a bit of Material Design instead.
Who needs a wand? Unlock your magical powers and transform yourself from a Muggle into a Wizard or Witch just by using your Android phone. See how:


Be the First to Comment
Share Your Thoughts